The idling sensor is a car node that stabilizes the motor turnover in idling mode. Note that the idling regulator and the idling sensor is the same. At the same time, it is more correct to say the idling regulator (abbreviated RCX), since all car sensors are measuring equipment. If in the work of the RHX there are problems, you may have difficulty controlled by car. About this further in the article.
Content
- Idling sensor - design and purpose
- Place of installation and principle of opening sensor
- Signs of idle sensor malfunction
- Diagnosis of idling sensor, how to make diagnostics with your own hands?
- Tools, fixtures, consumables
- How to replace idle sensor with your own hands (step by step)
- How can I restore the performance of the idling sensor (in detail)
- Tips Prof.
Idling sensor - design and purpose
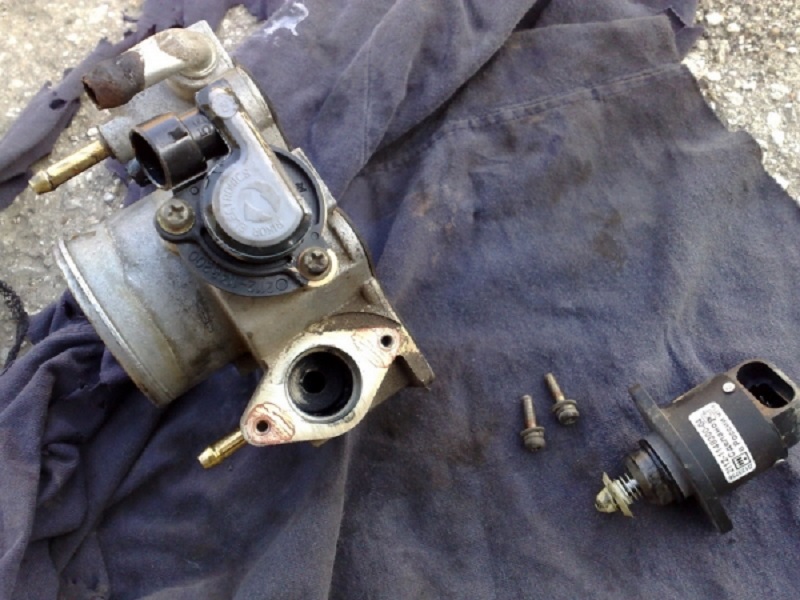
 As already mentioned, the idling sensor is a device that monitors the idle rotation of the motor. Thanks to him, the engine maintains optimal modes of operation, which increases the life of its components. In addition, in the cold time, idle turns warm the power unit to the operating temperature. Thus, RCH is playing a fairly important role in the engine of the car. By the way, it consists of only three components:
- Stepper electric motor.
- Spring.
- Rod, at the end of which there is a conical needle.
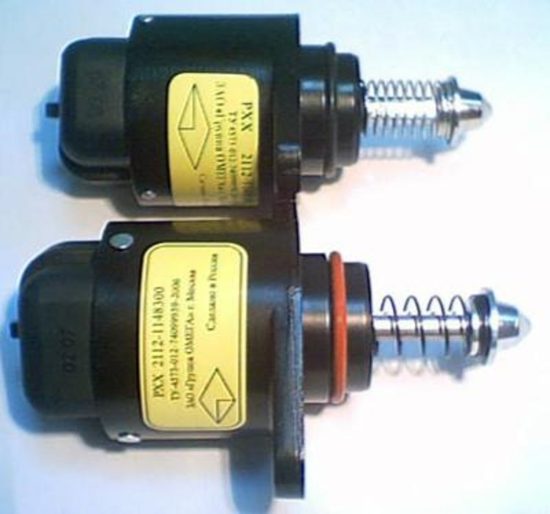
With a more detailed structure of this item, you can read the picture below:
Place of installation and principle of opening sensor
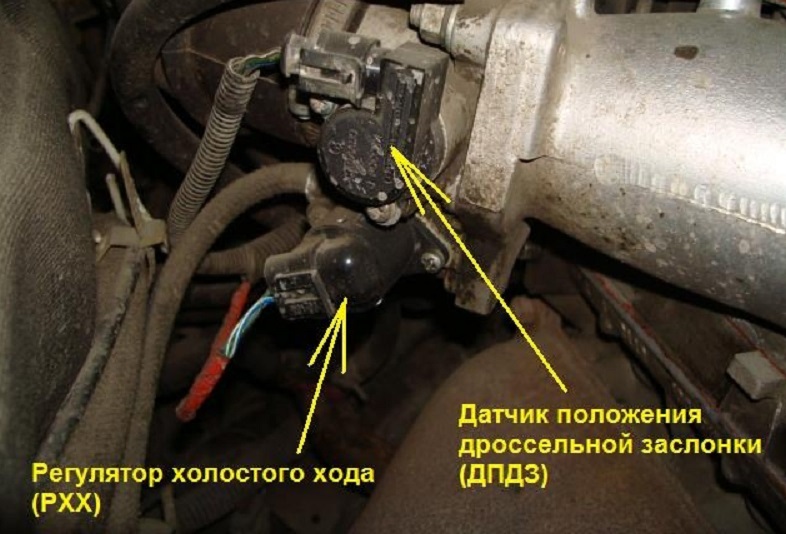
On the machines of the VAZ RXX family is located on the throttle node, or rather, on its body, near the mechanism of the position of the throttle. It is fastened with two screws. The essence of the work of the PCH is to open / closing the channel passing into the throttle bypass. When the motor works, the crankshaft rotation speed sensor reports the speed of the element rotation (often information is transmitted using special labels).
The controller, in turn, decides: Open or close the valve. It is guided by this one by different algorithms and calculations. Next, the XX sensor comes to the command that needs to be executed. So, by nulling a rod with a needle, a fuel supply to the motor is reduced or increased.
Signs of idle sensor malfunction
These symptoms can say about the faults of the RCX:
- "Swim" motor turns on XX.
- When warming the car, the engine turnover does not increase.
- Bad start of the power unit even when pressing a gas pedal.
- Sudden stopping of the engine on neutral gear.
- Falling the engine turns after powering on energy consumers: Magnitols, stoves, air conditioning or headlights.

Note that such signs can provoke other devices that are associated with fuel supply (for example, a fuel filter or candles). Therefore, before replacing the XX sensor, make diagnostics of the serviceability of a number of other important details. Only after making sure the RHX breakage can be processed to the sensor replacement.
Diagnosis of idling sensor, how to make diagnostics with your own hands?
To test the LCH, the mechanism itself find the mechanism itself and pull out a block with wires from it. If a 1.6-liter vazovsky motor is installed on your car, you first unscrew the two throttle components and shift it by 10 mm from the end of the receiver.
Then swipe the sensor circuit and see if the voltage is suitable for it. For this, an ordinary voltmeter is applied. To determine the voltage, connect the minus terminal to the mass and connect the conclusions "A" and "D" to the wire block (most often they are designated on the shoe). Next, turn on the ignition and see the voltmeter reading. If there are no signs of current supply at all, it means that the entire chain or the computer is faulty. If the voltage on the scale is less than 12 V, most likely, you have discharged AKB.
If a voltmeter shows a voltage of 12 V and more, we continue the experiment. Turn off the ignition and check the LCM itself. Tester terminals Connect to the conclusions A, B, C, D. General resistance should fluctuate in the range of 50-55 ohms. Then measure resistance in pairs. If the RHX is functioning normally, the device will show infinite resistance. If the sensor displays other readings, it is faulty and needs to be replaced. If the values \u200b\u200bcorrespond to the norm, most likely, the problem lies in the candles or other components of the car.
Tools, fixtures, consumables
When conducting work on the replacement of the RHX, you will need only two crusades, as well as a little musculoskeletal oil to lubricate the sealing ring.
How to replace idle sensor with your own hands (step by step)
Order of work:
- First of all deraid the onboard system of the car, for which we remove the minus terminal from the battery.
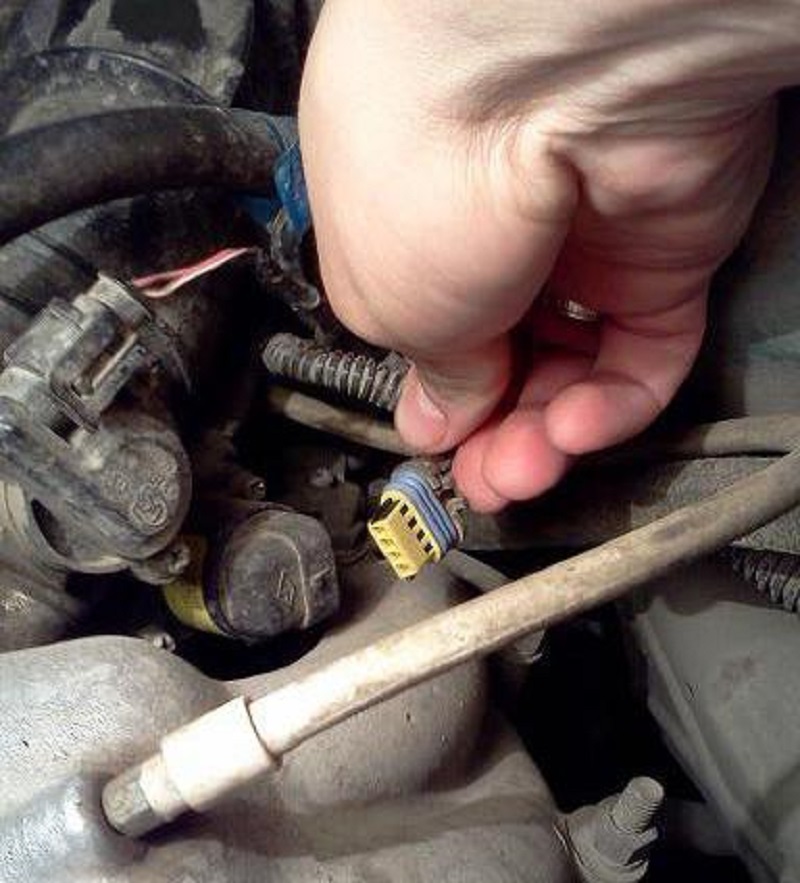
- Then disconnect the shock with the wires that go to the sensor from the throttle. To do this, press your finger to the plastic latch-retainer.
- Now unscrew the two fastening bolts and remove the sensor from the nozzle. Sometimes there may be problems - a screw located near the receiver may fall out during the twisting. To avoid this, it is advisable to extract the left mounting mechanism first, and then unscrew the right.

- Now you should pull the sensor slightly and unscrew the right screw. Such a sequence will allow you not to confuse fastening elements and significantly speed up the removal process.
- When the old sensor is dismantled, set the new one. In general, the PCH installation is performed similarly to dismantling, only in the reverse order. Experts recommend that several droplets of the motor oil are recommended for the sealing ring.
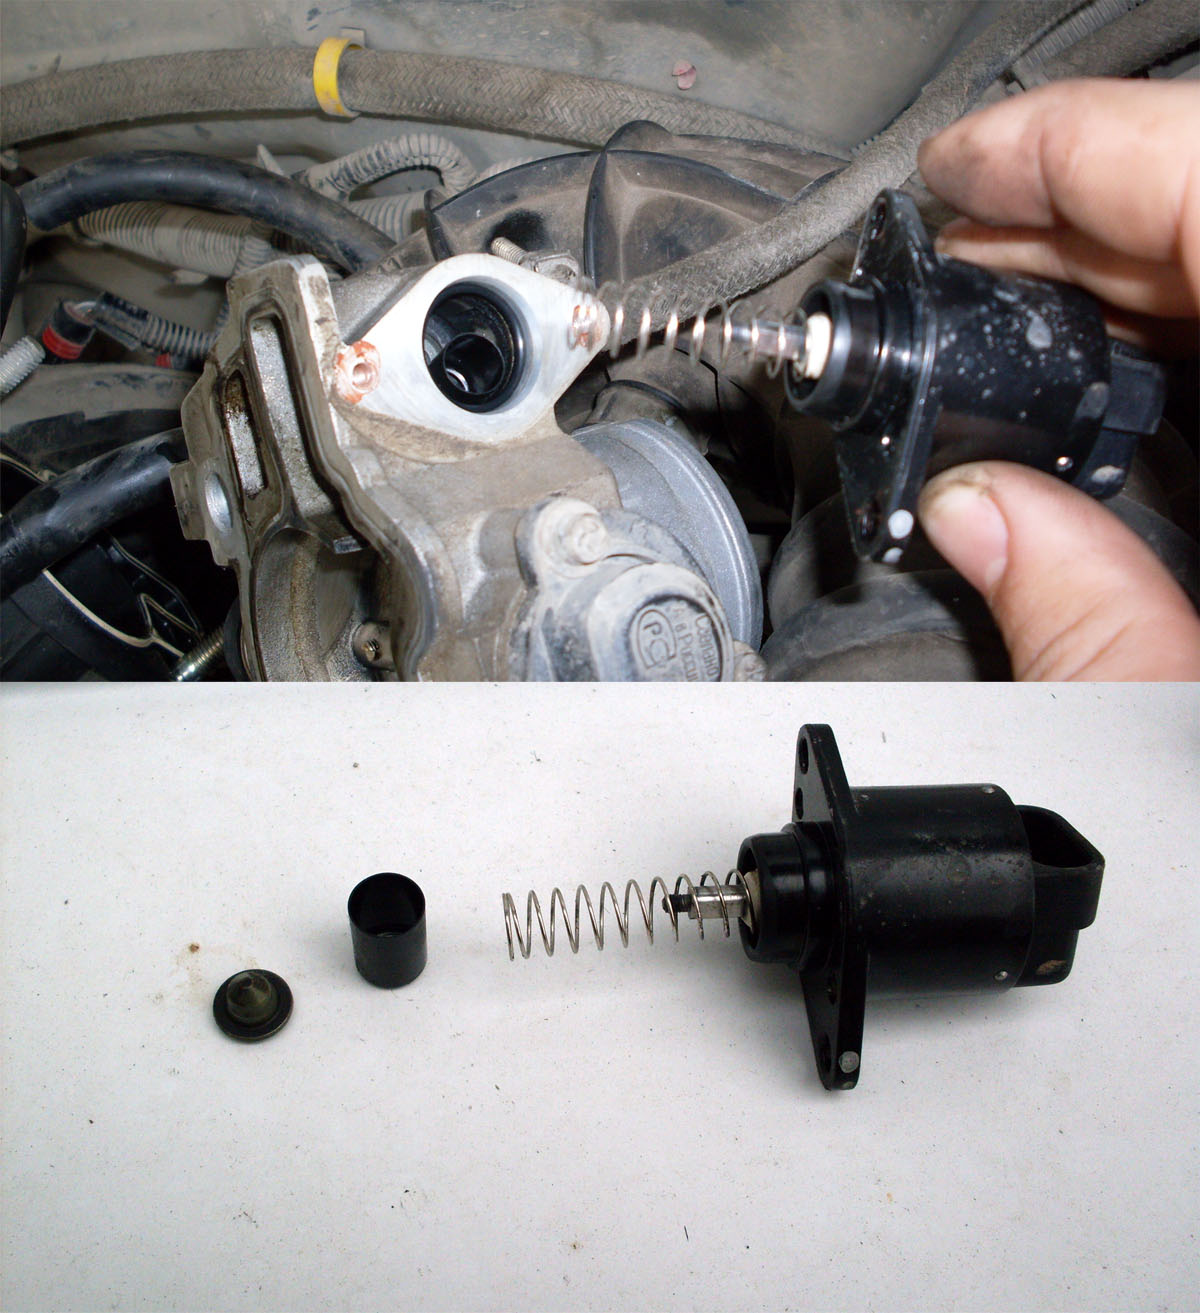
- The last stage is the Calibration of RXX. On domestic auto, this procedure is automated, so you only need to wear a minus terminal and turn on the ignition for a few seconds, then turn it off again. At this, the Calibration of the RXX is successfully completed. Vehicle is fully prepared for operation.
How can I restore the performance of the idling sensor (in detail)
Order of work:
- Remove the two throttle node fasteners and assign it to a side by 10 mm.
- Then disconnect the wire block from the LCH.
- We apply on a cotton wand WD-40 and carefully clean all the channels.
- Further, we unscrew the two bolts that fastening RXX. If there are no fasteners here, you have to remove the throttle knot.
- Now pull the mechanism itself. If there are oils and black mud on it, in addition to cleaning the RCH, you will need to clean the entire throttle.
- Then apply WD-40 on the cone needle with the spring.

- After cleaning, the device is dried and mounted in place.
- Before installing, check the distance from the device body to the needle - it should be 23 mm.
Tips Prof.
We recommend to see the following video:
Related Materials
- Stove 2110, bad warm stove 2110, VAZ 2110 heating system, repairing the heating system VAZ 2110 with their own hands
- VAZ 2114 stove blows with cold air, stove 2114, bad warm stove VAZ 2114, device and repair of heating VAZ 2114 do-it-yourself, removing the stove VAZ 2114
- How to subdominize the car. How to put a jack. Types of jacks for cars.
- VAZ 2109 Fuse Block, VAZ 2109 Fuse Block Carburetor, VAZ 2109 Fuse Block Injector, Old VAZ 2109 Fuse Block, VAZ 2109 Fuse Block, VAZ Fuse Block 2109
- Car exhaust gas catalyst, faulty catalyst, pluses and cons of the catalyst, how to change the catalyst on the planeencitel
- Stove blowing cold air VAZ 2114, badly blowing the stove VAZ 2114, why badly blowing the stove VAZ 2114
- How to find out the owner of the car by the number of his car, check the car by the number of the traffic police machine, check the car by the state number of the car for free
- How to choose Used tires, Useful Tips
- Winter car road, pressure in passenger car tires in winter, good battery for the car in winter, whether to warm the car in winter
- In winter, the car is poorly started. How to make a car in winter, do you need to warm up the car in winter, useful tips
- Economy fuel consumption machines, the most economical car consumption
- Tires brands for passenger cars, labeling of car tire labeling, residual passenger car tire protector, how to pick a tire on a car brand, car tire tread pattern
- Working transmission operation, mechanical gearbox clutch work, driving with manual gearbox, useful tips
- Rear beam Peugeot 206 sedan, rear beam device Peugeot 206. Rear beam Peugeot 206 Malfunction, repair of the rear beam Peugeot 206
- Diesel fuel in winter, additive for diesel fuel in winter, how to choose the best diesel fuel
- Diesel winter does not start. How to start diesel in winter, heating diesel in winter.
- Japanese bridgestone tires, winter studded bridgestone tires, bridgestone tires brand
- Tire marking decoding for passenger cars, labeling wheels, how to choose the right tires on the disks
- Diesel engine in winter, launch of the diesel engine in winter, what oil to fill in a diesel engine in winter, useful tips
- LED backlight of the car, the backlight of the bottom of the car, the backlight of the legs in the car, the backlight in the door of the car, the backlight of the car is fine
- Recovered tires, bus tire, restored tire protector, can I use them
- Choose winter tires, which is a winter tires, which pressure in winter tires should be marked with winter tires, how to choose the right winter tires, the best winter tires 2019
- Steering rail rail, knock of steering rack, reasons for the knock and repair of the steering rack do it yourself
- Cameless car tires, a set for repair of tubeless tires, repair of the cannon-free tire do it yourself
- Russian tires, Russian tires Winter, Russian All-season tires, Voronezh AMTEL tires, Tires "Matador Omsk Tire", Kama-tires are world-class bus
- How to open a car without a key. Lost the key from the car what to do, the key from the car inside the car
- Silent tires, quiet winter tires, quiet studded bus, which tires to choose, overview tires
- Tires and safety, safety of the bus, why it is necessary to constantly monitor car tires
- Rules of safe driving of the car in the rain and slush, safe driving of the car for beginners
- Rust converter which is better for cars, rust converters to choose how to use rust transducer, professionals
- Polishing the body of the car do it yourself, how to choose a polishing paste, useful tips
- Engine durability, engine life, how to extend engine life
- Knock in the car. Knock when moving the car. What can knock in the car. How to determine the cause of the knock.
- ABS car, what is ABS car, ABS system malfunction, ABS diagnostics
- Overtaking a car when you can start overtaking a car, rules of traffic rules
- Fuel pump VAZ 2110, VAZ 2110 gas station scheme, VAZ 2110 fuel pump device, VAZ 2110 gas station repair,
- Automotive antennas for radio, automotive antenna device, car antenna do it yourself
- Front suspension Kalina, device front suspension Kalina, knock in front suspension Kalina, repair of front suspension Kalina
- Shock absorber Oil, best oil shock absorbers, pumping oil shock absorbers, how to properly pump oil shock absorber
- Clutch malfunctions, touches clutch, causes a clutch malfunction, how to eliminate







Comments