Undoubtedly, all the motorists themselves, who does not suspect it, are constantly engaged in tuning their car. The ordinary tinting sticker or replacing the elementary lamps of the heating LED is also tuning.
Content
Tuning auto backlit
Each driver wants to make his car unique and individual, highlight it from a gray mass and make it not like everyone else. To achieve such a result, you need to change the appearance of your car.
For example, no one pays attention to alloy wheels, spoilers and tinting, it looks like a modern one, but still trite. But the backlight of many makes admire and can give the car a unique view.
Tuning auto backlight is available both external and internal. It can not only change the appearance of the car for the better, but also significantly improve the lighting of the road surface.
Most motorists believe that they are taken for LED tuning on their own, while not having experience, a little dangerous. However, in fact, it is very simple, albeit a rather time-consuming procedure.
Undoubtedly, when you have unnecessary tools or you are absolutely not confident in your abilities, it is worthwhile to commemorate. But if you still decided to make this process yourself, then our article in the form of a step-by-step instruction will help you.
Backlight car interior with your own hands
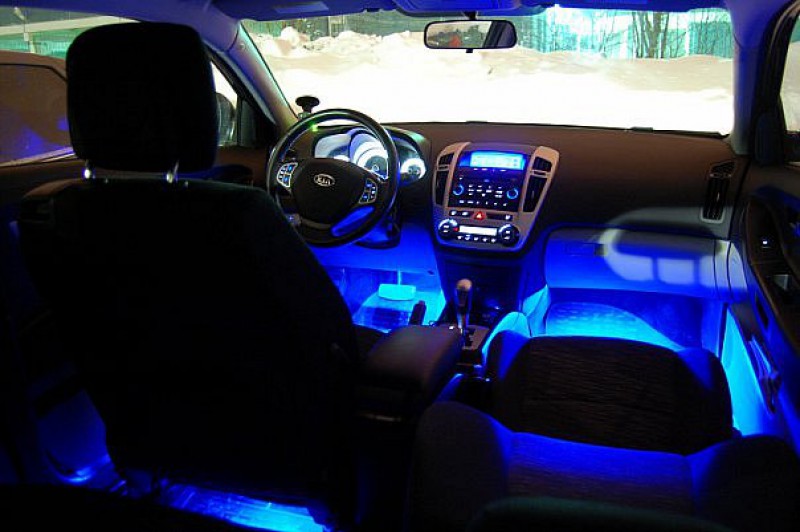
- To begin with, we are determined with what exactly we want to highlight and what specific places, we are going to glue the LED tape.
- The next step is to define the option of connecting the backlight. This means that we need to choose one option from the most relevant, for example, the light can be turned on from the button, when opening the door or when the ignition is turned on. Of course, the best option will turn on the highlighting from the button, because the LEDs will be needed only at night at night, and so that the light is not burned in vain, you can enable the desired function when you need it.
- The choice of color solving the tape is an equally important step, it must be successfully combined with the flowers that will surround it, for example, with the color of your car or the seats in the cabin.
- Next, we need to purchase materials and tools for work:
- Directly LEDs can be bought on the radio launch, they will cost less than specialized tapes, created specifically for cars, but, at the same time, you will have to work on them with a soldering iron.
- Switch (meaning, button itself).
- Special tube, to isolate an electric cable.
- Screwdriwer set.
- Fuse.
- Keys with asterisks and heads (need, when tying panels).
- Also, to the backlight you purchased, should apply the instruction in which the list of necessary tools is located.
5. Go directly to the installation. To do this, we connect the switch to the battery and put the fuse for the entire backlight. We carry out the wire through the hole in the plate, which is located between the cabin and the engine. You can drill your hole, but provided that you can not get anything important, also, you need to take care of what metal, along the edges of the hole, did not cut the wire. To do this, you can apply the rubber rings you need diameter.
6. The last step will be the connection of the second wire to the required terminal on the battery. You can use, as in the first case, the hole in the plate or connects to the car housing.

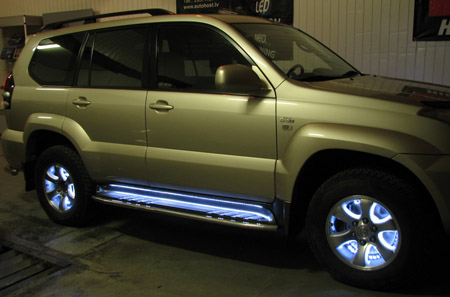
Backlight the bottom of the car do it yourself
To create a LED backlight system on the bottom of the car, we will need the following tools:
- LEDs;
- Plexiglas;
- Two-housing copper wire;
- Plastic tube;
- Resistor.
So, proceed.
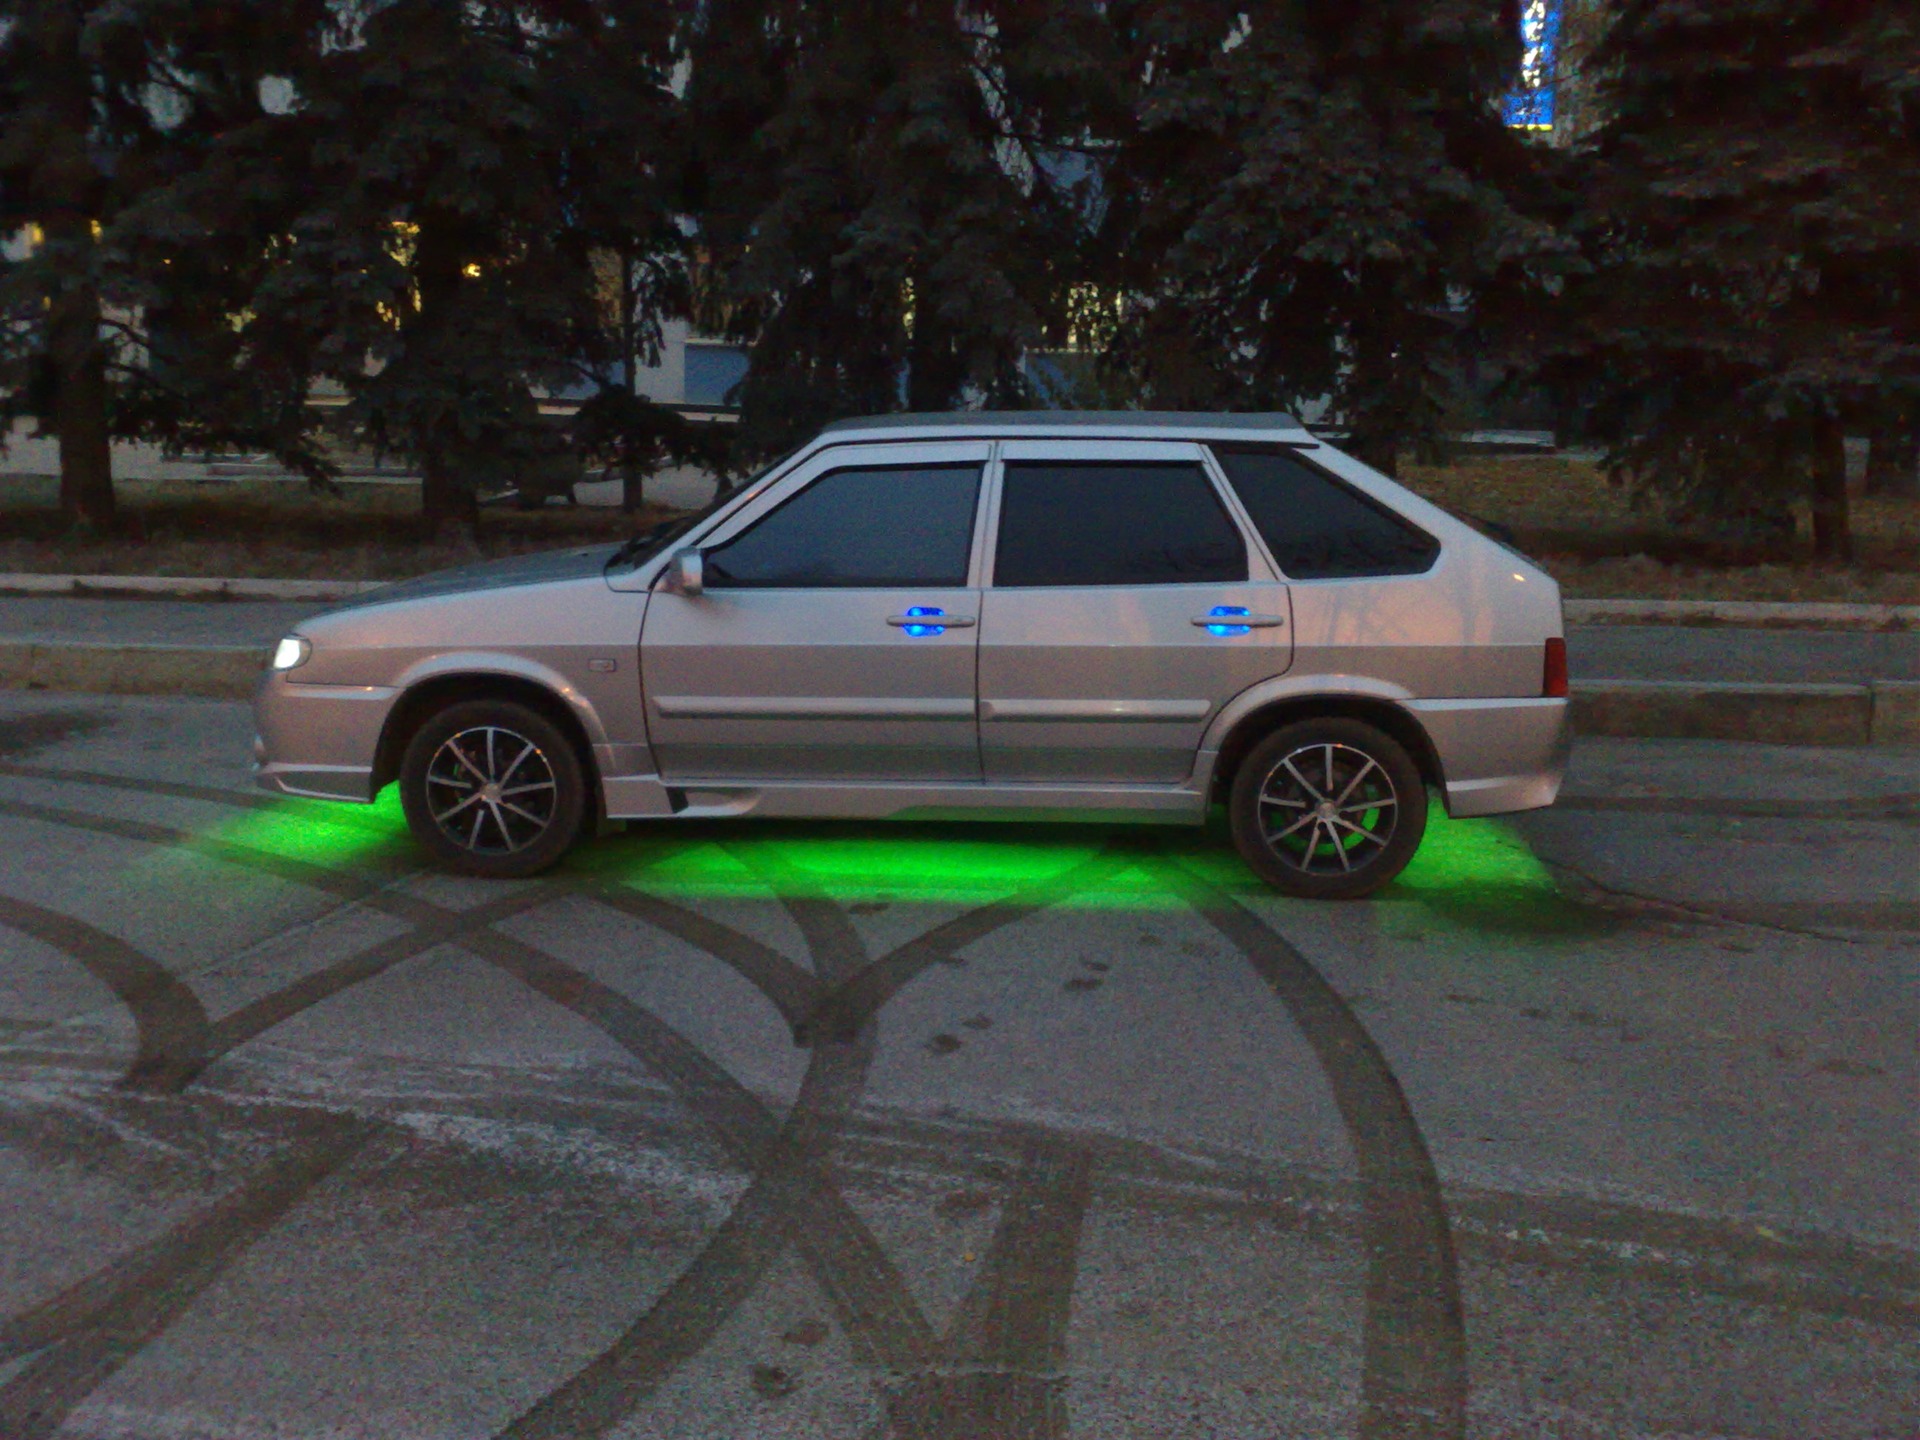
Such a procedure should always be started by the manufacture of the body, for this, the plastic tube must be cutting and make a semi-cylinder from it. Further, the inner side of the semi-cylinder must be fully attached to the foil, in order to improve the quality of brightness. Then we make a hole in it using a drill.
After preparing the diodes, we attach them, together with the resistor, to a plastic basis, pre-checking their performance. The obtained semi-cylinder must be supplemented with a protective glass as well as the formation of a cylindrical tube. If when working, the slots occurred, then they can be smeared with silicone. Further, we are attached to the plexiglass using galvanized tin, and connect the entire system to the overall chain with the fuse and shutdown toggle in the panel.
I would like to say that when performing such works, you do not need to hurry, since you do it for yourself and only the quality of the work done depends on you.

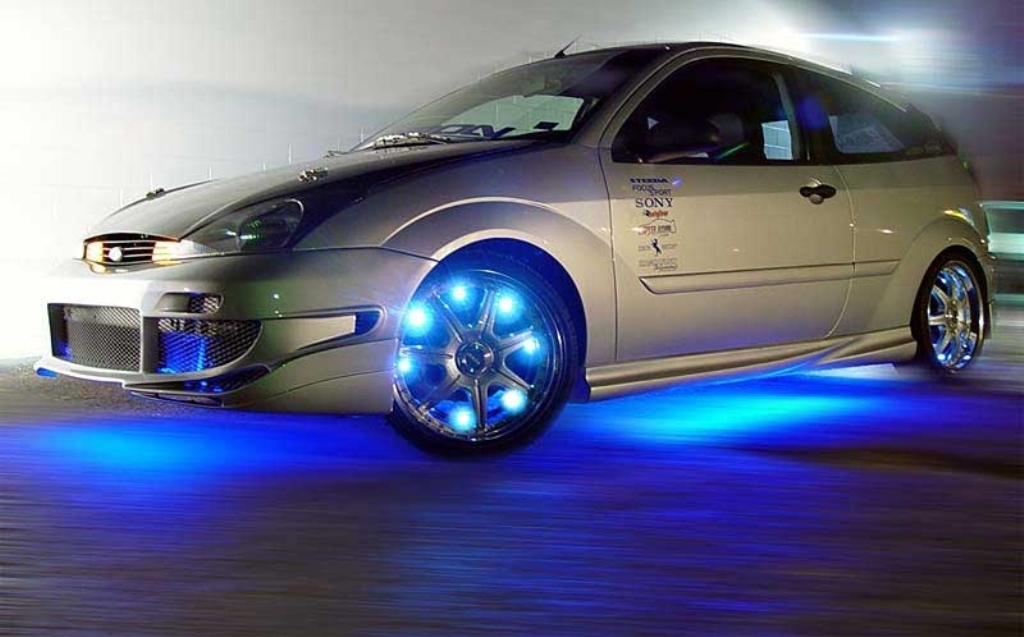
Backlight wheels and disks do it yourself
Necessary materials:
- LED ribbons;
- Jack;
- End heads;
- Corrugated tubes to hide the wires;
- Acetone;
- Super glue;
- Insulating tape;
- Wire;
- Clamps for fastening.
Go to work.
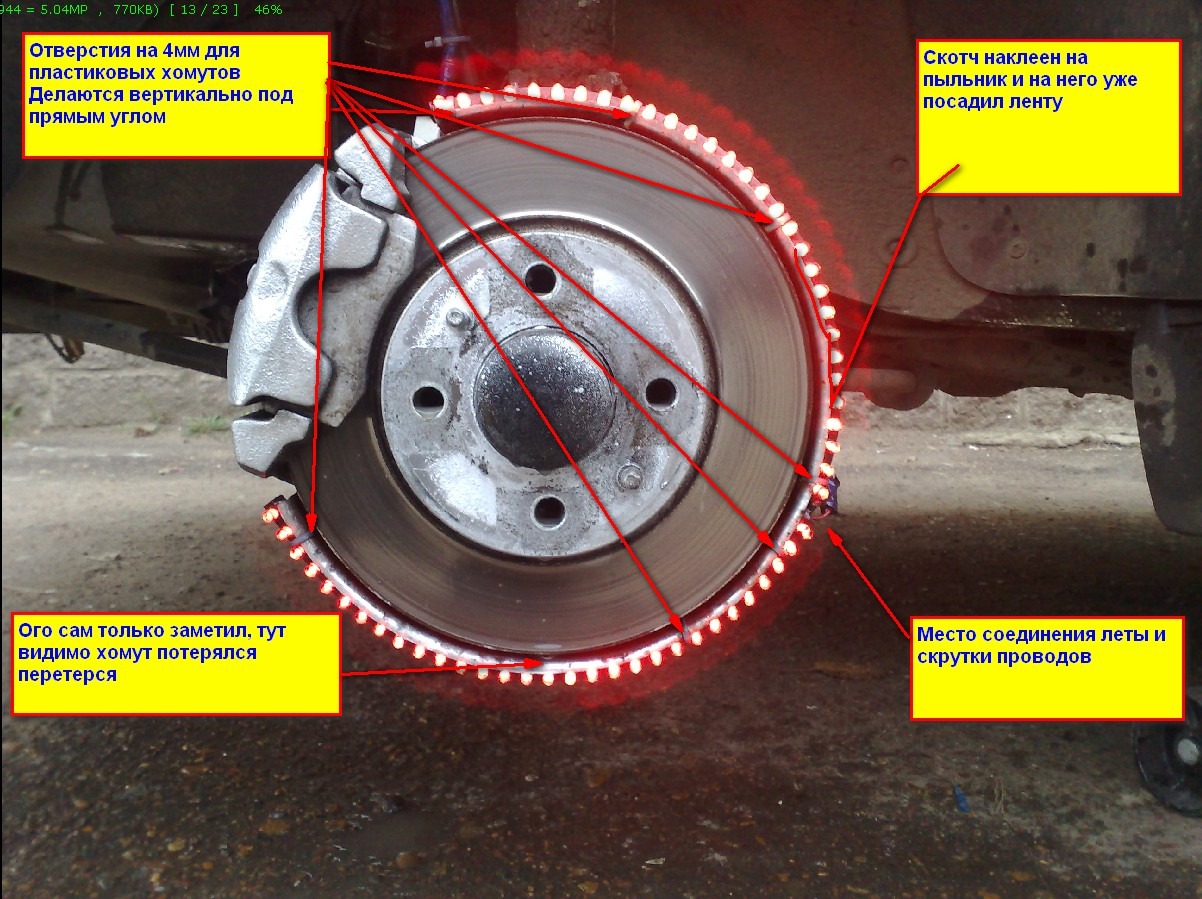
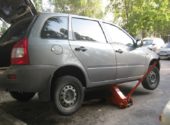
- We raise the car using a jack, unscrew the wheel and remove it. The brake disc housing is purified from dirt and dust, as well as degrease it with acetone.
- We wind the tape on the casing and cut the extra pieces. Connect both ends with glue.
- In a location where the LED tape is connected, it is necessary to climb the wire and insulate with its electrical tape or thermal agent. Also, you need to additionally consolidate the LEDs of the clamps.
- Repeat all three points for the other wheels.
- When the wires are connected, each of them, we bring to your own stabilizer connected to the battery.
- The last step is to hide the wires in corrugated tubes and think through the path of the wires to avoid short circuit.

LED backlight numbers do it yourself
At the moment there are two most popular and basic ways that can be drawn numbers by car:
- Replacing regular lighting lamps on LED.
- Installation of additional backlight.
When selecting the first option, you need to unscrew the ceiling and replace the heating lamp to the LEDs in advance of the selected color. To do this, we remove the chromed strip from the bumper, and then, and the plane itself.
Light bulbs should be unscrewed extremely gently, since the holder on the body is very easy. Using a sharp knife and a thin flat screwdriver, we need, starting from the middle, disassemble the plafong in half. Also, with acetone or solvent, you need to degrease the ceiling, immediately before installing the LED light bulbs.
The second option is the principle of illumination of speakers and buttons by LED lamps. It is necessary to take a piece of plexiglas, no more than three millimeters with built-in LEDs, there must be at least eight that the lighting was bright enough.
The back of the glass and the end are stuck in the foil, it will perform the role of the reflector. We guide the LEDs at the corners and we rush with the help of sealant. Do not forget that the diode lens is not necessary. Ultimately, we connect two wires to a special button or directly to the backlight.
Additional illumination can also be created from LED tape, it is possible to buy it in a variety of shades and sizes. Often, the installation of such a tape is produced directly in the car. You need to cut off the amount of material you need and proceed to the soldering, the soldering iron must be quite powerful. We clean the ends of the wires and gently solder with the diode tape.
To connect a single-color tape, you need to connect it to the on-board network. An identical way is connected to a multicolor tape, but you need to install the controller between the battery and the device. Some LED ribbons have a special adhesive base and are easily attached, but if there is no such, it is worth using plastic clamps or set the tape directly into the regular ceiling.

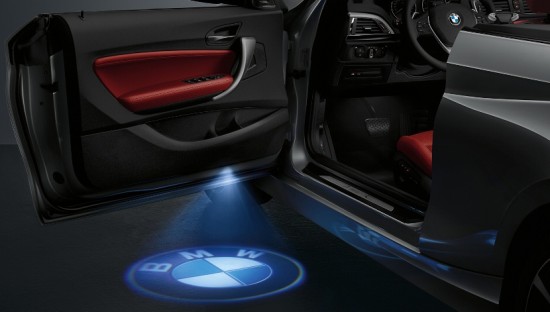
LED illumination headlights do it yourself
LED illuminated headlights referred to as "angel eyes". Such a type of front optics tuning gained wide popularity among motorists, it is not only a decorative admission, but also contributes to improving safety and comfort while driving.
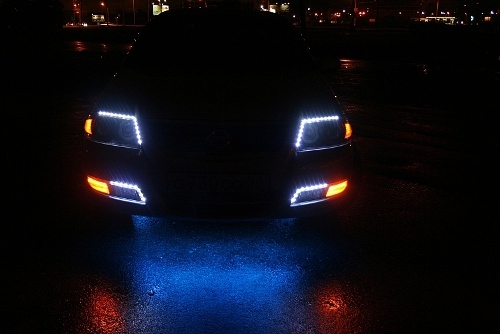
To begin with, we need to dismantle the optics detail where we are going to connect the LED backlight. It may be the front headlights, rear lights or dimensions. We thoroughly disconnect the pharmacy from the nutrition, disassemble, and, after measuring the desired piece of tape, put in place.
In principle, the power of elasticity should keep the tape, but you can set additional fixation in the form of a superclay. Next to the circuit you need to turn on the stabilizer and make an assembly.

Whether additional backlight is allowed and for what is fine
Most drivers believe that additional backlight on the car is illegal. I would like to dispel your doubts, because in fact the backlight is not an external lighting device or device for feeding special light signals. Therefore, it should be permitted and fines for LED lighting of the car at the moment is not provided. But some DPS workers manage to convince motorists in the opposite. In this case, remind the inspector that such a special light signal and the problem must be solved. You need to know that the truth is on your side.
As for the backlight of the bottom of the car, you may be fined only if the light bulbs fall out of other drivers, this in advance must be taken care of what the backlight is directed strictly down. However, the most reliable way to avoid various fines or other directions against you sanctions from inspectors, is the legalization of the backlight of the car. You can get a special permit on it, and then the DPS employees will not have any chances.
The only thing that is really illegal is the illumination of headlights. However, this question is quite controversial. For example, white backlight can still be legalized, and for blue or red highlighting headlights, you threaten the deprivation of driver's license for half a year.
Related Materials
- Stove 2110, bad warm stove 2110, VAZ 2110 heating system, repairing the heating system VAZ 2110 with their own hands
- VAZ 2114 stove blows with cold air, stove 2114, bad warm stove VAZ 2114, device and repair of heating VAZ 2114 do-it-yourself, removing the stove VAZ 2114
- How to subdominize the car. How to put a jack. Types of jacks for cars.
- VAZ 2109 Fuse Block, VAZ 2109 Fuse Block Carburetor, VAZ 2109 Fuse Block Injector, Old VAZ 2109 Fuse Block, VAZ 2109 Fuse Block, VAZ Fuse Block 2109
- Car exhaust gas catalyst, faulty catalyst, pluses and cons of the catalyst, how to change the catalyst for the planeencitel
- Stove blowing cold air VAZ 2114, badly blowing the stove VAZ 2114, why badly blowing the stove VAZ 2114
- How to find out the owner of the car by the number of his car, check the car by the number of the traffic police machine, check the car by the state number of the car for free
- How to choose Used tires, Useful Tips
- Winter car road, pressure in passenger car tires in winter, good battery for the car in winter, whether to warm the car in winter
- In winter, the car is poorly started. How to make a car in winter, do you need to warm up the car in winter, useful tips
- Economy fuel consumption machines, the most economical car consumption
- Tires brands for passenger cars, labeling of car tire labeling, residual passenger car tire protector, how to pick a tire on a car brand, car tire tread pattern
- Working transmission operation, mechanical gearbox clutch work, driving with manual gearbox, useful tips
- Rear beam Peugeot 206 sedan, rear beam device Peugeot 206. Rear beam Peugeot 206 Malfunction, repair of the rear beam Peugeot 206
- Diesel fuel in winter, additive for diesel fuel in winter, how to choose the best diesel fuel
- Diesel winter does not start. How to start diesel in winter, heating diesel in winter.
- Japanese bridgestone tires, winter studded bridgestone tires, bridgestone tires brand
- Tire marking decoding for passenger cars, labeling wheels, how to choose the right tires on the disks
- Diesel engine in winter, launch of the diesel engine in winter, what oil to fill in a diesel engine in winter, useful tips
- Recovered tires, bus tire, restored tire protector, can I use them
- Choose winter tires, which is a winter tires, which pressure in winter tires should be marked with winter tires, how to choose the right winter tires, the best winter tires 2019
- Steering rail rail, knock of steering rack, reasons for the knock and repair of the steering rack do it yourself
- Cameless car tires, a set for repair of tubeless tires, repair of the cannon-free tire do it yourself
- Russian tires, Russian tires Winter, Russian All-season tires, Voronezh AMTEL tires, Tires "Matador Omsk Tire", Kama-tires are world-class bus
- How to open a car without a key. Lost the key from the car what to do, the key from the car inside the car
- Silent tires, quiet winter tires, quiet studded bus, which tires to choose, overview tires
- Tires and safety, safety of the bus, why it is necessary to constantly monitor car tires
- Rules of safe driving of the car in the rain and slush, safe driving of the car for beginners
- Rust converter which is better for cars, rust converters to choose how to use rust transducer, professionals
- Polishing the body of the car do it yourself, how to choose a polishing paste, useful tips
- Engine durability, engine life, how to extend engine life
- Knock in the car. Knock when moving a car. What can knock in the car. How to determine the cause of the knock.
- ABS car, what is ABS car, ABS system malfunction, ABS diagnostics
- Overtaking a car when you can start overtaking a car, rules of traffic rules
- Fuel pump VAZ 2110, VAZ 2110 gas station scheme, VAZ 2110 fuel pump device, VAZ 2110 gas station repair,
- Automotive antennas for radio, automotive antenna device, car antenna do it yourself
- Front suspension Kalina, device front suspension Kalina, knock in front suspension Kalina, repair of front suspension Kalina
- Shock absorber Oil, best oil shock absorbers, pumping oil shock absorbers, how to properly pump oil shock absorber
- Clutch malfunctions, touches clutch, causes a clutch malfunction, how to eliminate
- Viscounts of the fan, work uniforms of the fan, malfunction of the ventilator fan, repair of the ventilator fan


Comments