Unfortunately, the heating system of the domestic car industry leaves much to be desired. This question is especially relevant in winter. Since flaw is not only unpleasant, but also harmful to health. In addition, with a faulty, the glass heating system is freezed, covered with ice and in anem. In such conditions, visibility on the road is insignificant.
Content
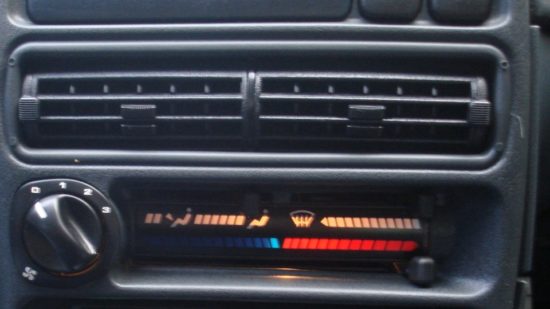
Stove device 2114.
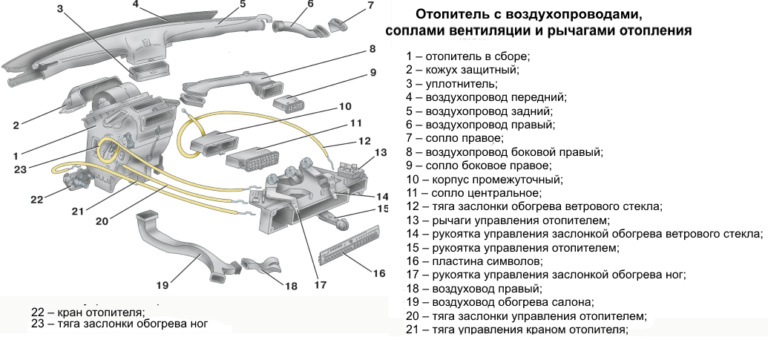
The main elements of the heating system:
- Fan.
- A resistor that controls the power of the fan engine function.
- Cranic.
- The dampers by which air is supplied to the salon.
- Radiator.
- Power position switch.

With a good functioning of the system in the heater radiator, coolant across the stove crane. The driver independently controls the temperature of the air entering the cabin when the crane opens and closes. It is created heat due to the cooler, which reaches the radiator. If the engine is heated, the temperature of the coolant grows up to 95 degrees.
The heater has three modes of operation, on which the fan speed depends. The latter is independently controlled by the driver through the position switch. Depending on the position of the crane in the cabin blows warm or cold air. Guide air dampers. Adjusting the heater flap is performed manually.
The stove of VAZ 2114 causes a malfunction

For the heater of VAZ 2114 such malfunctions are characteristic:
- Leak in the radiator.
- Exactness of air ducts.
- The radiator is scored.
- Located one of the aircraft hoses.
- Faulty stove motor.
- Faulty resistor.
How to replace the stove radiator 2114
To replace the stove radiator, you will need the following tools:
- New radiator.
- Empty container.
- Spanners.
- Screwdriwer set.
Order of work:
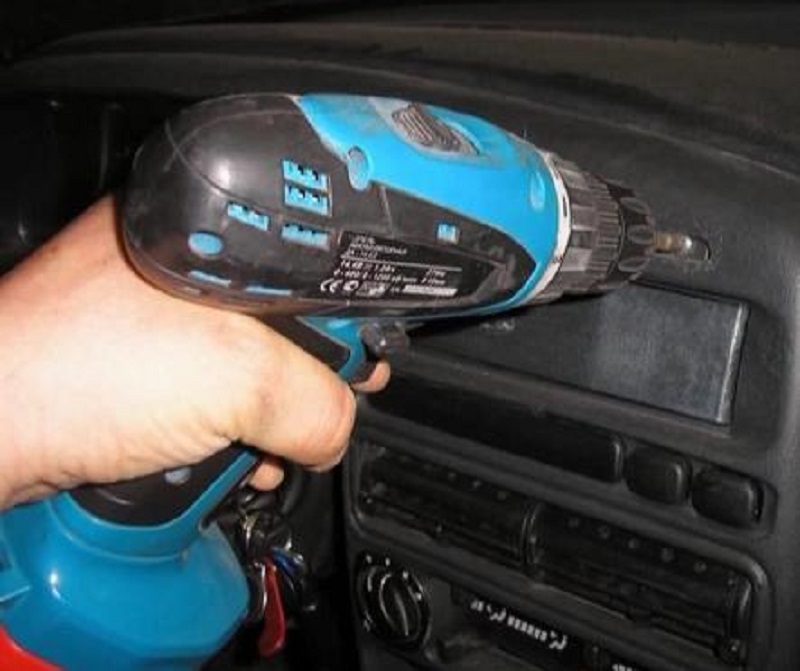
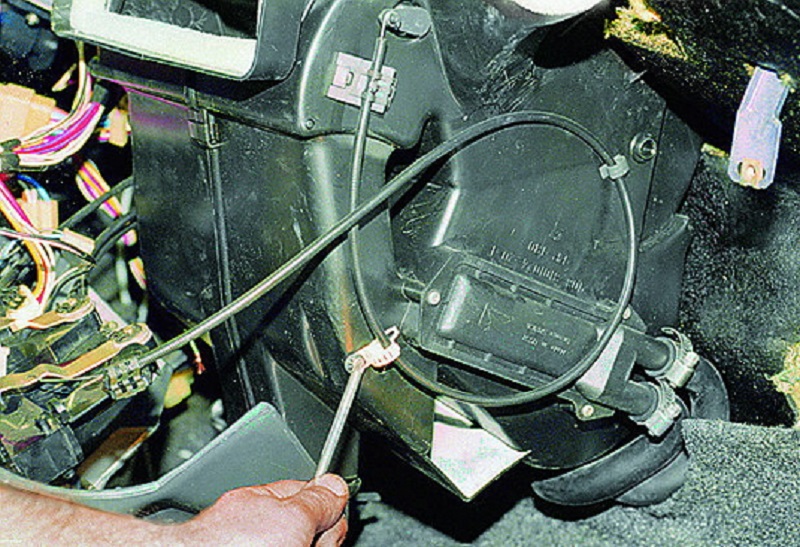
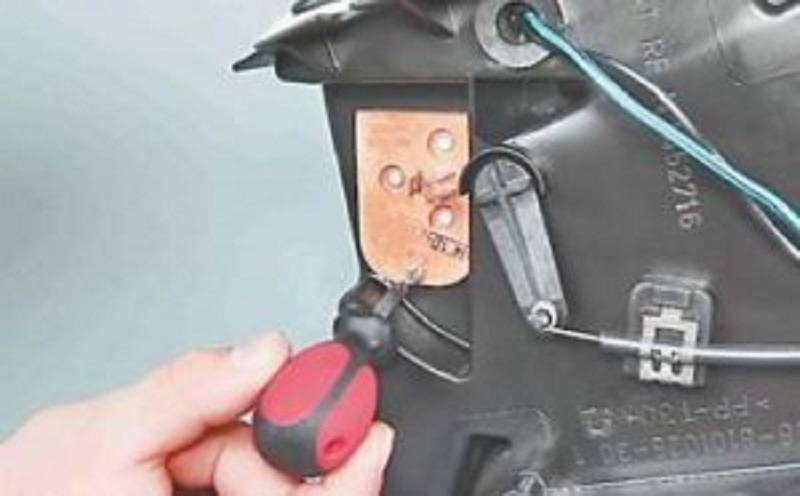
- First, drain the coolant, which will then be replaced. Then move to the lounge and unscrew the screws located under the plastic plug (see photo).
- Next, free the flap of the appliance from the mount - it is holding a self-tapping screw. Directly the shield itself is not yet needed.
- Remove the coil of the steering column by unscrewing the attachment from the bottom.
- Now do the connector going on the cigarette lighter.
- Then dismantle the radio. As a rule, its removal takes place without problems, the main thing is to disconnect all the plug. It is recommended to sign them or mark them.
- After completion of these operations, you will have access to the plastic console - remove the screws from both sides, they are symmetrically arranged.
- Next, remove the switch for fan stove and adjustment checkboxes.
- At this stage, you can disconnect the central console from the torpedo. Then remove the terminals from all buttons and the plug. Next, dismantle the diagnostic connector that holds the self-tapping screw. I pull out the central console from the salon.
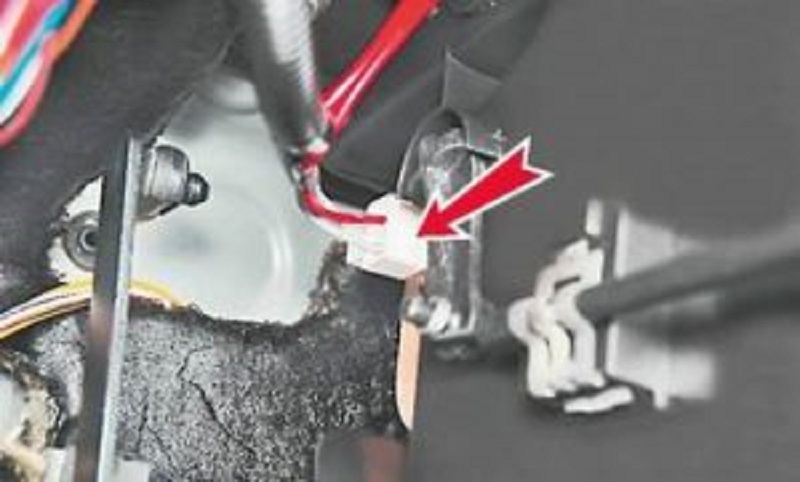
- Remove the two screws that hold the metallic base (as in the photo).
- The next step will be the removal of the fasteners of the torpedo located on both sides.
- The iron base also has fasteners that need to be unscrewed.
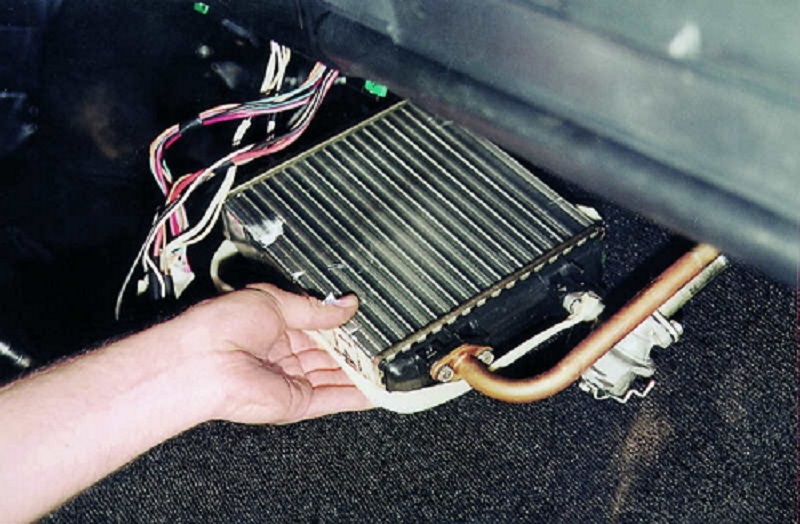
- Now that the iron design is free, it can be removed, pre-pulling the computer. Slightly lift the instrument panel and substitute the wood. So you will get access to the radiator.
- The stove radiator is attached by clamps - remove them.
- Drain all the coolant and replace the radiator.


Replacement Motorchik Stove 2114
Order of work:

- De-in the electric chain, disconnecting minus from the battery.
- Under the instrument panel, disconnect the plus wire of the motor.
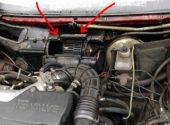
- In the motor compartment, unscrew two bolts holding the stove casing.
- Disconnect the "Mass" - unscrew the fastening bolt of the wire.
- Unscrew two bolts securing the fan to the heater housing.
- Remove the duct grille.
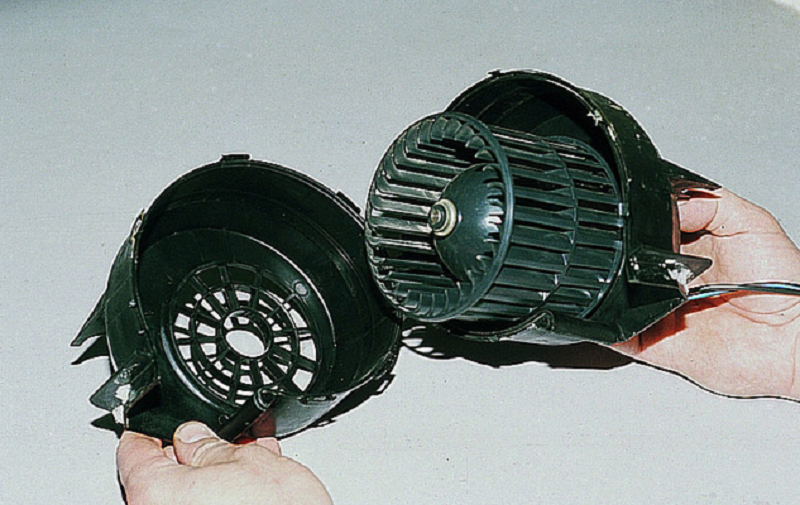
- We take the motor from the engagement, pressing it towards him towards him.
- Turn the element 90 degrees and remove the casing.
- The assembly is performed in the reverse order. Pay attention to the fixation of the power contacts, in order to avoid reassembly of the node.

Adjusting the flap of the stove VAZ 2114
Order of work:

- Remove the bracket holding the cable shell on the stove case.
- On the left there is a yellow lever that is made of galvanized.
- Take this lever on yourself, towards the cabin car. In such a position, it is considered open to the maximum.
- Tighten the cable and adjust its length. The correct is the setting when in the right position of the long lever located on the lever block, the adjustable device will be in the maximum open position.
- Configuring the position of the cable, secure it secure it.
Replacing additional resistor of the stove VAZ 2114

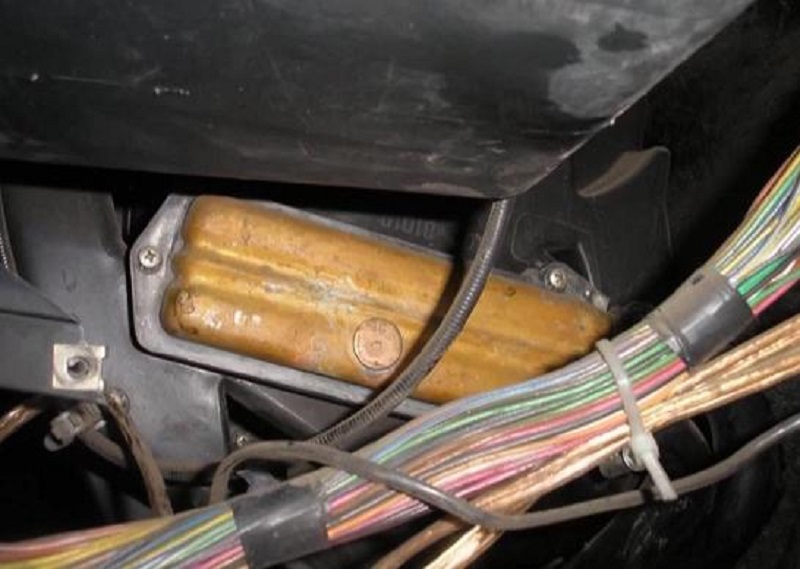
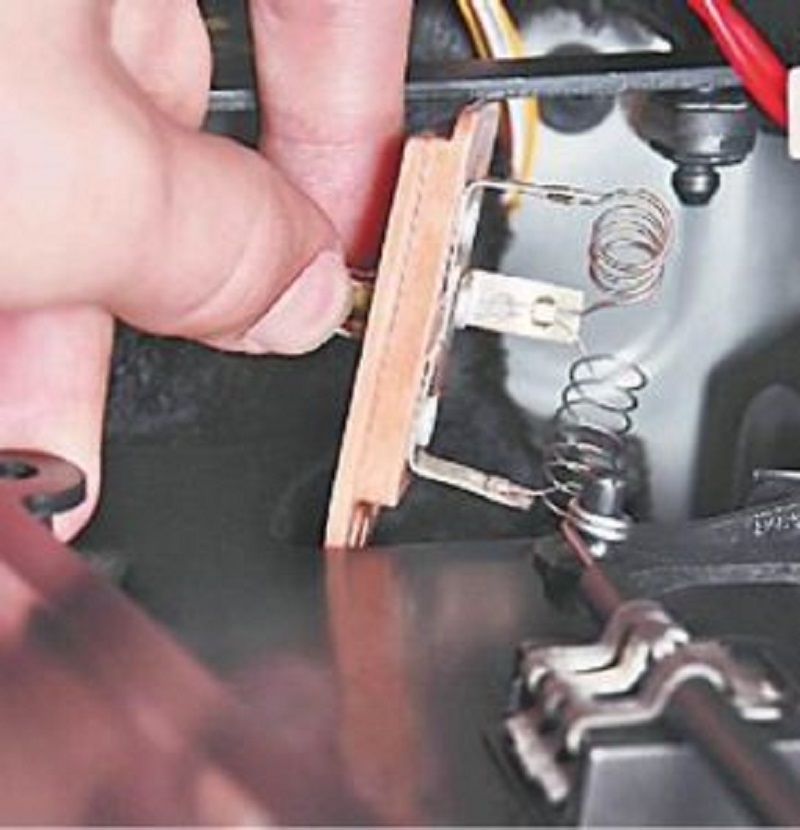
To adjust the speed of operation of the stove on the VAZ 2114 there is an additional resistor. The resistor has two helix with a resistance of 0.82 and 0.23 ohms. When the heater is turned on, the current goes through two spirals. When the second speed is turned on, the current will go through one helix with a resistance of 0.23 Ohm. And when the third mode is turned on, the current will go past the resistor. The additional resistor is under the gas pedal.
The resistor, as a rule, does not require repair. Often it breaks as a result of burning contacts. In this case, it is necessary to clean the contacts. A block can also be mounted.
Replacement of the resistor:
- First remove the left lining of the dashboard console.
- Disconnect from the additional wire resistor.
- Unscrew the screws of the attachment of an additional resistor.
- Remove the additional resistor.
- Look at the integrity spirals.
- Using a multimeter, check the cutter on the cliffs.
- If there are breaks, replace the resistor.
- Installing the resistor is performed in reverse order.


Related Materials
- Stove 2110, bad warm stove 2110, VAZ 2110 heating system, repairing the heating system VAZ 2110 with their own hands
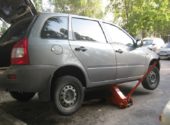
- How to subdominize the car. How to put a jack. Types of jacks for cars.
- VAZ 2109 Fuse Block, VAZ 2109 Fuse Block Carburetor, VAZ 2109 Fuse Block Injector, Old VAZ 2109 Fuse Block, VAZ 2109 Fuse Block, VAZ Fuse Block 2109
- Car exhaust gas catalyst, faulty catalyst, pluses and cons of the catalyst, how to change the catalyst for the planeencitel
- Stove blowing cold air VAZ 2114, badly blowing the stove VAZ 2114, why badly blowing the stove VAZ 2114
- How to find out the owner of the car by the number of his car, check the car by the number of the traffic police machine, check the car by the state number of the car for free
- How to choose Used tires, Useful Tips
- Winter car road, pressure in passenger car tires in winter, good battery for the car in winter, whether to warm the car in winter
- In winter, the car is poorly started. How to make a car in winter, do you need to warm up the car in winter, useful tips
- Economy fuel consumption machines, the most economical car consumption
- Tires brands for passenger cars, labeling of car tire labeling, residual passenger car tire protector, how to pick a tire on a car brand, car tire tread pattern
- Working transmission operation, mechanical gearbox clutch work, driving with manual gearbox, useful tips
- Rear beam Peugeot 206 sedan, rear beam device Peugeot 206. Rear beam Peugeot 206 Malfunction, repair of the rear beam Peugeot 206
- Diesel fuel in winter, additive for diesel fuel in winter, how to choose the best diesel fuel
- Diesel winter does not start. How to start diesel in winter, heating diesel in winter.
- Japanese bridgestone tires, winter studded bridgestone tires, bridgestone tires brand
- Tire marking decoding for passenger cars, labeling wheels, how to choose the right tires on the disks
- Diesel engine in winter, launch of the diesel engine in winter, what oil to fill in a diesel engine in winter, useful tips
- LED backlight of the car, the backlight of the bottom of the car, the backlight of the legs in the car, the backlight in the door of the car, the backlight of the car is fine
- Recovered tires, bus tire, restored tire protector, can I use them
- Choose winter tires, which is a winter tires, which pressure in winter tires should be marked with winter tires, how to choose the right winter tires, the best winter tires 2019
- Steering rail rail, knock of steering rack, reasons for the knock and repair of the steering rack do it yourself
- Cameless car tires, a set for repair of tubeless tires, repair of the cannon-free tire do it yourself
- Russian tires, Russian tires Winter, Russian All-season tires, Voronezh AMTEL tires, Tires "Matador Omsk Tire", Kama-tires are world-class bus
- How to open a car without a key. Lost the key from the car what to do, the key from the car inside the car
- Silent tires, quiet winter tires, quiet studded bus, which tires to choose, overview tires
- Tires and safety, safety of the bus, why it is necessary to constantly monitor car tires
- Rules of safe driving of the car in the rain and slush, safe driving of the car for beginners
- Rust converter which is better for cars, rust converters to choose how to use rust transducer, professionals
- Polishing the body of the car do it yourself, how to choose a polishing paste, useful tips
- Engine durability, engine life, how to extend engine life
- Knock in the car. Knock when moving the car. What can knock in the car. How to determine the cause of the knock.
- ABS car, what is ABS car, ABS system malfunction, ABS diagnostics
- Overtaking a car when you can start overtaking a car, rules of traffic rules
- Fuel pump VAZ 2110, VAZ 2110 gas station scheme, VAZ 2110 fuel pump device, VAZ 2110 gas station repair,
- Automotive antennas for radio, automotive antenna device, car antenna do it yourself
- Front suspension Kalina, device front suspension Kalina, knock in front suspension Kalina, repair of front suspension Kalina
- Shock absorber Oil, best oil shock absorbers, pumping oil shock absorbers, how to properly pump oil shock absorber
- Clutch malfunctions, touches clutch, causes a clutch malfunction, how to eliminate
- Viscounts of the fan, work uniforms of the fan, malfunction of the ventilator fan, repair of the ventilator fan

Comments