The presence in the fuel of various dirt and other impurities makes the process of cleaning nozzles in fact inevitable. It is not rare after forty thousand kilometers of mileage nozzles requires washing, and sometimes before. Many car owners in order to save preference to self-cleaning nozzles. How to do - read further in the article.
Content
- VAZ fuel injectors, signs of contamination of nozzles
- Nozzle cleaning, which gives cleaning nozzles
- Cleaning nozzles using additives in gasoline, good or not
- Tools, fixtures, consumables for work
- Preparatory work, how to get to nozzles, step-by-step instructions
- Cleaning the nozzles, the phased running of the swelling
- What needs to be replaced when cleaning nozzles
- The advice of the pro, what kind of spraying the nozzles is considered the norm
- Cleaning nozzles, how to clean nozzles without removal
- Nozzle, how to clean the nozzles ultrasound, pros and cons of this method
VAZ fuel injectors, signs of contamination of nozzles
It is possible to understand that the nozzles are contaminated, it is possible on the behavior of a power unit, namely:
- Dips in the operation of the motor.
- The engine troit on the cold.
- Increased exhaust toxicity.
- Large fuel consumption.
- Fell the power of the power unit and so on.
Nozzle cleaning, which gives cleaning nozzles
The difference in the behavior of the motor after cleaning the nozzles directly depends on the degree of contamination. The more the nozzles were contaminated, the better there will be an effect in the end. As a rule, the power of the power unit increases, the fuel consumption is reduced and different problems associated with the incorrect operation of the motor disappear. Starting a cold engine will become easier, and idling - more even, turns at the cold start will immediately rise to normal.
Cleaning nozzles using additives in gasoline, good or not
There is no unambiguous answer to this question, since this is the case of everyone. Some prefer to clean the nozzles of ultrasound, others dismantle them and clean themselves, considering that this is the most effective way, but the third give preference to clean the nozzles by additives into fuel. The modern market offers a huge number of different additives in gasoline for cleaning nozzles, and each vehicle has its own degree of contamination, different mileage, the quality of gasoline, and so on.
Tools, fixtures, consumables for work
You will need:
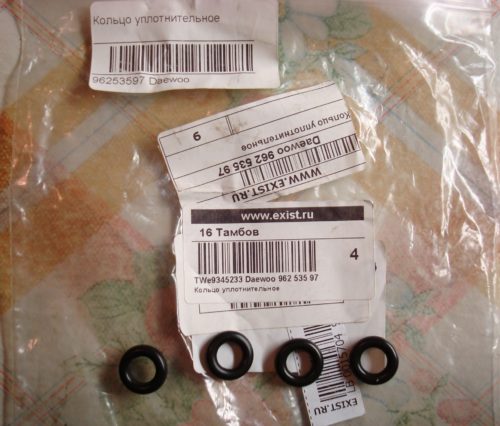
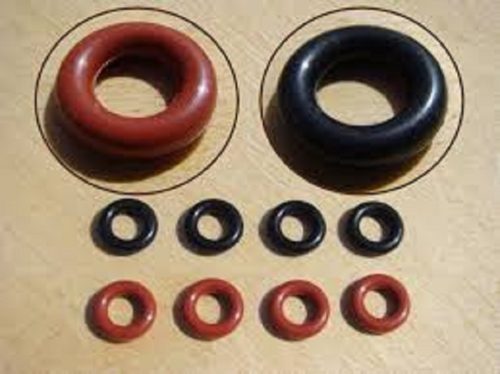
- Sealing rings on fuel pipes (four pieces).
- Rubber rings nozzles (eight pieces).
- Tumbler (12 V) and light bulb (10 W).
- Electrical wire (two meters).
- The syringe, the output diameter of which is ten millimeters (ideal for it, if you do not dismail the sealing ring from the nozzle).
- Rubber tube.
- Fluid for washing nozzles - solvent, vens, carburetor cleaner and so on.
- The key to "8" in the form of a rhombus.
Preparatory work, how to get to nozzles, step-by-step instructions
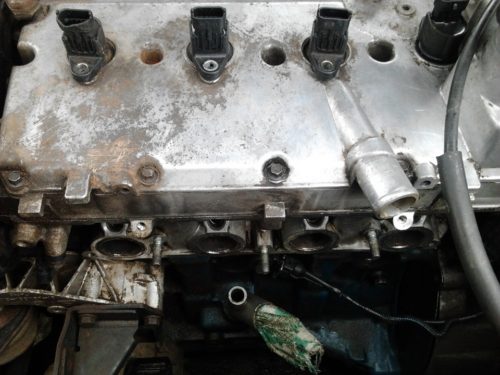
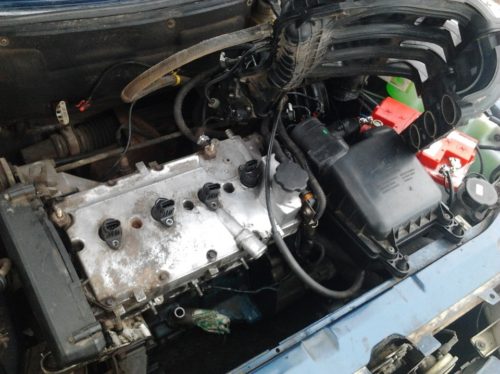
Before proceeding to the disassembly of the engine, it is desirable to reset the pressure in the fuel rape, for which we disconnect the wiring harness from the fuel pump. Next, we start the motor and we are waiting for a while until the power unit stalls. It must be done so many times until the vehicle ceases to start.
Then we do the following:
- We dismantle the nozzle that goes from the air filter.
- Disconnect the wiring harnesses of the nozzles.
- Next, disconnect the harnesses of the idling regulator and the throttle sensor.
- Disconnect the white vacuum hose from the pressure regulator. Act carefully, because antifreeze may fall.
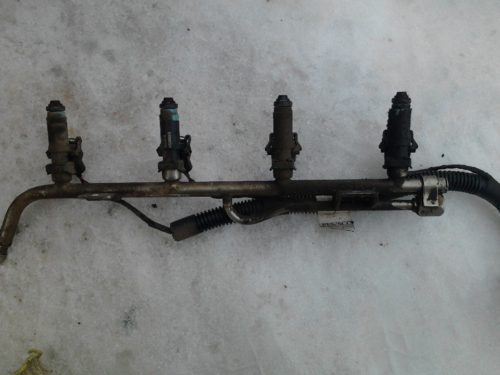
- Then you need to unscrew the fuel supply tubes in the ramp. Be very neat, fuel can be fuel.
- For convenience, remove the gas cable.
- Now you need to unscrew the plates fastening bolt, which presses fuel hoses.
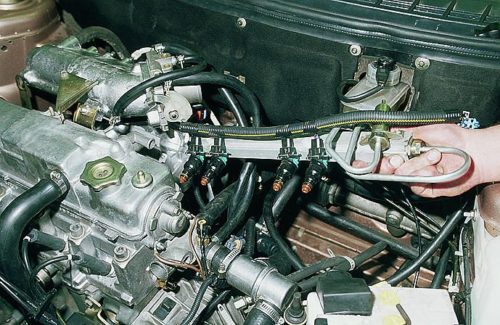
- To remove the fuel ramp, you should unscrew two bolts using a hexagon to 8.
- Next, dismantle the ramp with nozzles - it is removed tightly, since the nozzles are very tightly sitting.
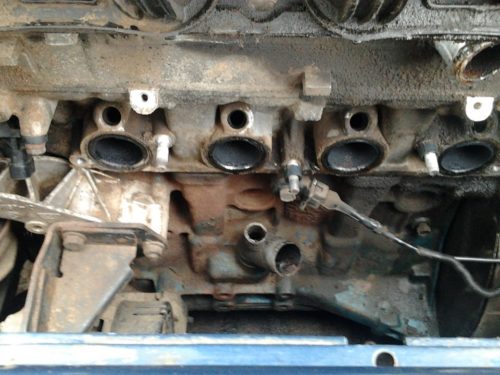
- The design is raising up and fixed behind a wiper leash using a wire segment. On the 16-valve engine to remove the ramp more complicated than on an 8-valve.
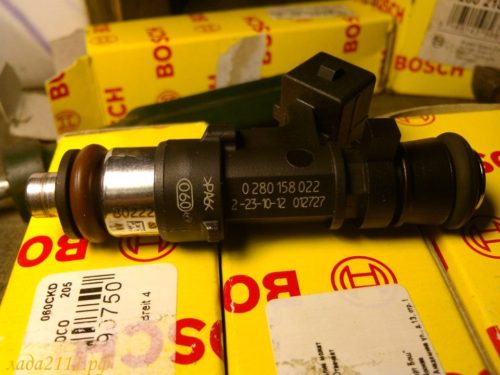
- To remove the nozzles, we disconnect the staples that hold the electrical connector, and then the bracket holds the nozzle. It is advisable to put a rag because the fuel is poured, and the nozzle should not be laid on the dirt.
Cleaning the nozzles, the phased running of the swelling
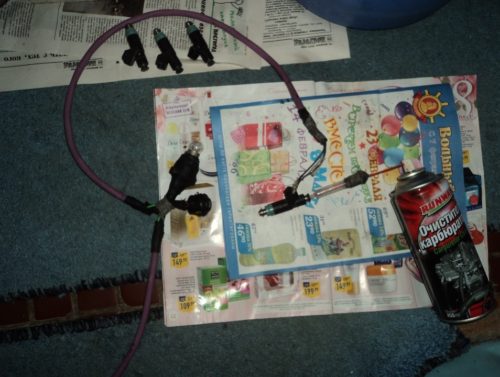
It is advisable to cover the holes in the ramp so that the lacquer does not drop there any foreign object. Now go to clean the nozzles. Since at 12 V and 3 W, the nozzle does not open, it is necessary to use 12 V and 10 W, which will require a lamp serving as a damper. Connector for nozzles connect to 12 in the lamp and microswitch.
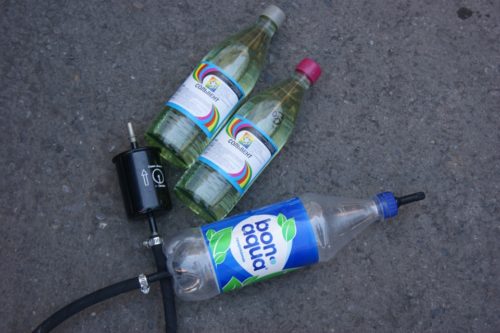
Since the nozzles cleaning will occur under pressure, all fasteners should be strong enough. Collect the device to be supplied to the nozzle cleaning fluid by different methods. For example, you can glue the rubber tube in the sprayer head with a thermoclate / clamp or use the syringe, which is most convenient.
Injectors cleaning technology:
- We dismantle the sealing rubber ring from the nozzle.
- On the knuckle shank we dress the rubber tube.
- We connect the wires to the car's battery - the polarity of the connection can be any.
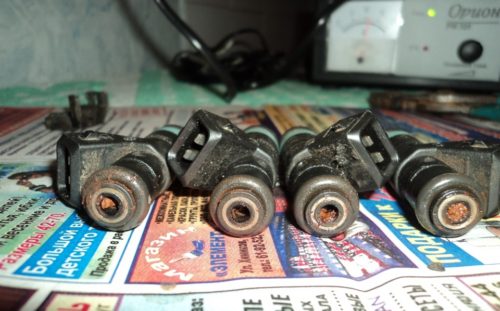
- Holding a design in the hands, you must click on the cylinder head until the hiss stops and the pressure is not balanced.
- The nozzle is directed to the side and click on the button.
The cleaning procedure must be repeated two or three times for each nozzle. If nozzles are really contaminated, then the first portion of the fluid will change the type of jet coming out of the nozzles.
What needs to be replaced when cleaning nozzles
After cleaning, it is necessary to replace old rubber seals, as well as the grid (if necessary). It is advisable not to lubricate the rubber bands with oil. The injectors will take about two to four hours of time.
The advice of the pro, what kind of spraying the nozzles is considered the norm
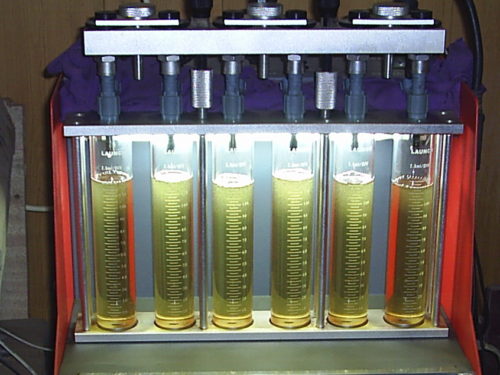
Spraying the nozzles should be clearly distinguishable and uniform. The nozzle cleaning procedure must be performed until it becomes such.
Cleaning nozzles, how to clean nozzles without removal
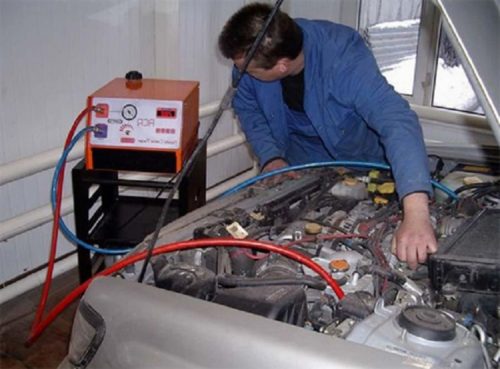
It is worth saying that cleaning nozzles without dismantling from the car is not a complete wash, but only preventive measures. In most cases, this event helps, but the results are only predicted, and the effect may be short-lived, since the networks have not been dismantled and there is no visual control of work, as well as testing the balance of performance, but nevertheless, this method works.
In addition, after such cleaning, the candles immediately come into disrepair, as a result of which it is desirable to exercise this event on spare candles that have already worked out. At the service station, this process is as follows:
- Connects construction (self-made or acquired) for pressure supply.
- The pressure rises to 3.2 atm.
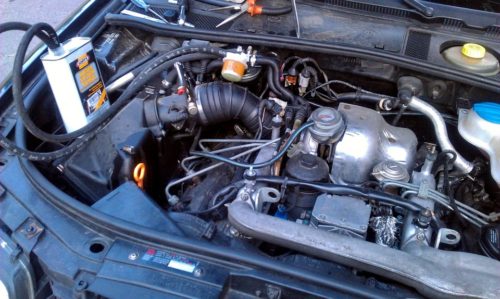
- The motor starts ten minutes, after another ten minutes he is given to stand.
- Next again, the power unit is created and, podging, burn the entire cleaner. The smell of exhaust, when working, resembles the smell of kebab.
- Changes of candles that were covered in Nagar. The whole procedure lasts about an hour.
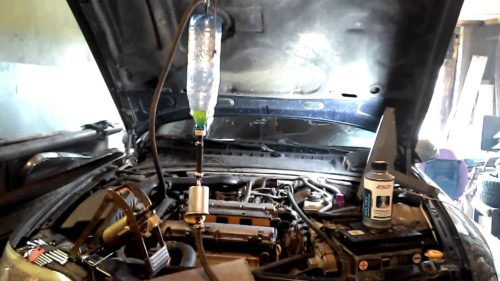
How to wash the nozzles on your own without dismantling with the help of remedies:
- The air intake corrugation must be disconnected from the receiver.
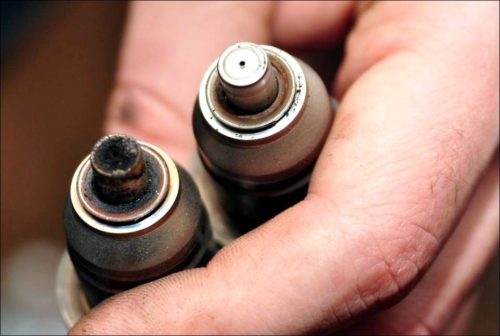
- In the ramp you should reset the pressure.
- Next, you need to disconnect the fuel line from the ramp.
- Then we take the carburetor cleaner and spray in the ramp.
- By Ramp, connect the pump hose (electrical, foot, manual) or connect the cleaner cylinder and ramp hose.
- Next, we pump the pressure at least 2 atm.
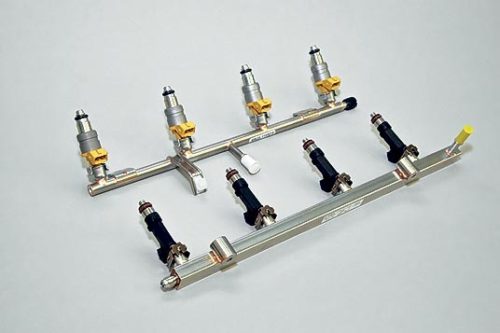
- Now you need to insert into the jack of the nozzles prepared connector with wires.
- Now, several times on the nozzle we bring meals briefly.
- Connect the next nozzle.
- Process repeat for each nozzle.
- Clean until the cylinder is over with a cleaner.
- Disconnect from the ramp hose.
- We close the hood and leave the car until the morning for venting / dying.
- In the morning connect the air and fuel line.
Nozzle, how to clean the nozzles ultrasound, pros and cons of this method
The benefits of this method is rather contradictory. Some believe that ultrasound kills the nozzles, because it destroys the mesh, others claim the opposite - that this is the necessary event when cleaning the nozzles and that it is mandatory to be combined with their washing when dismantling. According to some specialists, ultrasound has an impact on the ceramic components of the nozzle, so the period of influence must be reduced to a minimum. Another disadvantage of the ultrasound method of cleaning is a high cost.
Related Materials
- Stove 2110, bad warm stove 2110, VAZ 2110 heating system, repairing the heating system VAZ 2110 with their own hands
- VAZ 2114 stove blows with cold air, stove 2114, bad warm stove VAZ 2114, device and repair of heating VAZ 2114 do-it-yourself, removing the stove VAZ 2114
- How to subdominize the car. How to put a jack. Types of jacks for cars.
- VAZ 2109 Fuse Block, VAZ 2109 Fuse Block Carburetor, VAZ 2109 Fuse Block Injector, Old VAZ 2109 Fuse Block, VAZ 2109 Fuse Block, VAZ Fuse Block 2109
- Car exhaust gas catalyst, faulty catalyst, pluses and cons of the catalyst, how to change the catalyst on the planeencitel
- Stove blowing cold air VAZ 2114, badly blowing the stove VAZ 2114, why badly blowing the stove VAZ 2114
- How to find out the owner of the car by the number of his car, check the car by the number of the traffic police machine, check the car by the state number of the car for free
- How to choose Used tires, Useful Tips
- Winter car road, pressure in passenger car tires in winter, good battery for the car in winter, whether to warm the car in winter
- In winter, the car is poorly started. How to make a car in winter, do you need to warm up the car in winter, useful tips
- Economy fuel consumption machines, the most economical car consumption
- Tires brands for passenger cars, labeling of car tire labeling, residual passenger car tire protector, how to pick a tire on a car brand, car tire tread pattern
- Working transmission operation, mechanical gearbox clutch work, driving with manual gearbox, useful tips
- Rear beam Peugeot 206 sedan, rear beam device Peugeot 206. Rear beam Peugeot 206 Malfunction, repair of the rear beam Peugeot 206
- Diesel fuel in winter, additive for diesel fuel in winter, how to choose the best diesel fuel
- Diesel winter does not start. How to start diesel in winter, heating diesel in winter.
- Japanese bridgestone tires, winter studded bridgestone tires, bridgestone tires brand
- Tire marking decoding for passenger cars, labeling wheels, how to choose the right tires on the disks
- Diesel engine in winter, launch of the diesel engine in winter, what oil to fill in a diesel engine in winter, useful tips
- LED backlight of the car, the backlight of the bottom of the car, the backlight of the legs in the car, the backlight in the door of the car, the backlight of the car is fine
- Recovered tires, bus tire, restored tire protector, can I use them
- Choose winter tires, which is a winter tires, which pressure in winter tires should be marked with winter tires, how to choose the right winter tires, the best winter tires 2019
- Steering rail rail, knock of steering rack, reasons for the knock and repair of the steering rack do it yourself
- Cameless car tires, a set for repair of tubeless tires, repair of the cannon-free tire do it yourself
- Russian tires, Russian tires Winter, Russian All-season tires, Voronezh AMTEL tires, Tires "Matador Omsk Tire", Kama-tires are world-class bus
- How to open a car without a key. Lost the key from the car what to do, the key from the car inside the car
- Silent tires, quiet winter tires, quiet studded bus, which tires to choose, overview tires
- Tires and safety, safety of the bus, why it is necessary to constantly monitor car tires
- Rules of safe driving of the car in the rain and slush, safe driving of the car for beginners
- Rust converter which is better for cars, rust converters to choose how to use rust transducer, professionals
- Polishing the body of the car do it yourself, how to choose a polishing paste, useful tips
- Engine durability, engine life, how to extend engine life
- Knock in the car. Knock when moving the car. What can knock in the car. How to determine the cause of the knock.
- ABS car, what is ABS car, ABS system malfunction, ABS diagnostics
- Overtaking a car when you can start overtaking a car, rules of traffic rules
- Fuel pump VAZ 2110, VAZ 2110 gas station scheme, VAZ 2110 fuel pump device, VAZ 2110 gas station repair,
- Automotive antennas for radio, automotive antenna device, car antenna do it yourself
- Front suspension Kalina, device front suspension Kalina, knock in front suspension Kalina, repair of front suspension Kalina
- Shock absorber Oil, best oil shock absorbers, pumping oil shock absorbers, how to properly pump oil shock absorber
- Clutch malfunctions, touches clutch, causes a clutch malfunction, how to eliminate

Comments