The belt of the gas distribution mechanism is an indispensable attribute for most modern vehicles, including for the Chevrolet Lacetti car. Despite the outstanding simplicity, this is a rather important detail for the internal combustion engine. Replacing the timing belt on Chevrolet Lacetti - the event is quite time-consuming, but it is completely simple, if you exactly act below the instructions provided.
Content
- Timing belt, what tasks do the timing belt
- Timing belt, as it works and from what material
- How often change the timing belt
- How much to change the timing belt, what signs talk about the need to replace the timing belt
- Broke the timing belt, which leads such a breakdown
- Timing belt, why the replacement of the belt is better to do in the set
- Tools, fixtures, consumables
- Safety technique
- Replacing the timing belt Chevrolet Lacetti, step by step work
- Tips Profi, how to check the timing belt tension
Timing belt, what tasks do the timing belt
The task is that the camshaft rotated at a speed, exactly the identical half of the crankshaft turnover. A half a century ago, the GRM chain drive was used in the automotive industry, and all attempts to adapt the belt for this were misunderstanding. Much time passed before the belt drive began to dominate. But he has several significant advantages - simplifying the design, low noise and a decrease in the mass of the power unit.
Today, manufacturers prefer to install belt drives on their cars. But it is impossible to say unequivocally that the chain is worse than the belt. The chain drive also has its advantage - durability, correlated with the duration of the motor itself. Therefore, even in our time, some manufacturing companies stop their choice on the chain mechanism. In addition, such motors are usually equipped with automatic tensioners. The service life of the ordinary belt very rarely exceeds 60 thousand kilometers, and the simplicity of the design entails the need for permanent service - pull-up, replacement, control over the status of the belt.
Timing belt, as it works and from what material
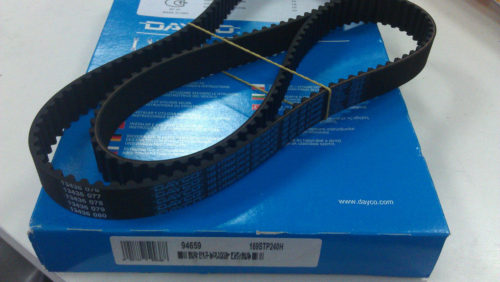
In order for the timing belt to work reliably, the following conditions must be observed - the optimal state of the pulleys and rollers along which the belt is moved, the correct belt tension, its absolute protection against oil and dirt. The design of the belt is quite simple and something resembles a car tire.
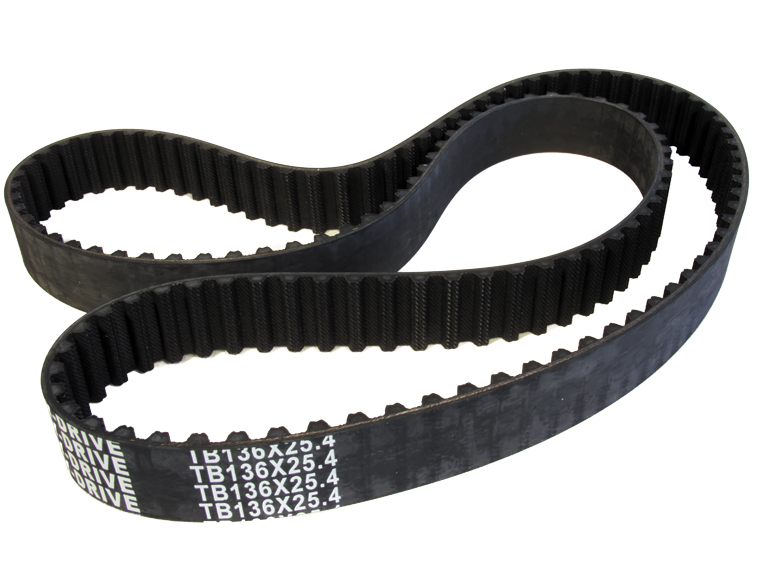
Therefore, most companies that specialize in tire production also produce belts. The basis of the timing belt - cord - the plexus of durable threads from fiberglass. Inside Cords are a teeth from wear-resistant materials (as a rule, nylon), and outside it protects the layer of rubber, the thickness of which is about five millimeters. The design of the belts is quite diverse. It may differ in the width of the belt, the number and step of the teeth, as well as their profile (there are about twenty types of teeth profiles).
How often change the timing belt
The replacement of the timing belt on Chevrolet Lacetti, according to the maintenance regulations, it is necessary to conduct every 60,000 mileage kilometers. However, most specialists recommend to reduce the change in the replacement period due to complex operating conditions. As for the verification of the state of the belt, then on the car Chevrolet lacetta should be carried out every 30 thousand kilometers.
How much to change the timing belt, what signs talk about the need to replace the timing belt

- Wearing material. The timing belt is able to wear out the same way as, for example, tire. If the belt material is worn, it can occur to open it or slipping. Especially often this happens at large loads on the motor's motor. For example, when tracing a trailer or trailer, as well as in wet weather.
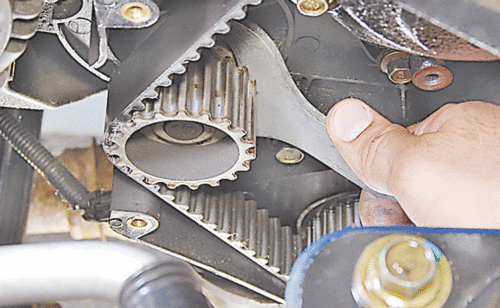
- Belt abrasion. This happens, as a rule, with the deviation of the pulley and the tensioner roller from the rear position, as well as when the bearing malfunction and elevated temperature. In case of inspection, you can notice the wear of the belt teeth - its tissue base (dilated fabric fibers and uneven texture).
- Detachment or cracks. This feature of worniness is obvious. It is necessary to explore the rear and front surface of the belt. The presence of cracks, especially if there are many of them, indicates a strong worn.
- Hardening the opposite surface of the toothed belt is the opposite surface of the belt is hard, not elastic and glitter. In this case, the belt becomes unsinkable, as a result of which no longer provides the desired contact with the pulley.
- Elongation. Material wear is capable of leading a strong belt elongation, as a result of which the tension roller moves beyond the permissible boundaries. This reduces the rigidity and total belt tension, and, consequently, the overall performance of the mechanism.
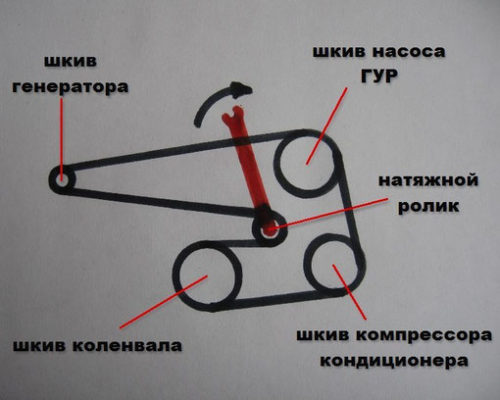
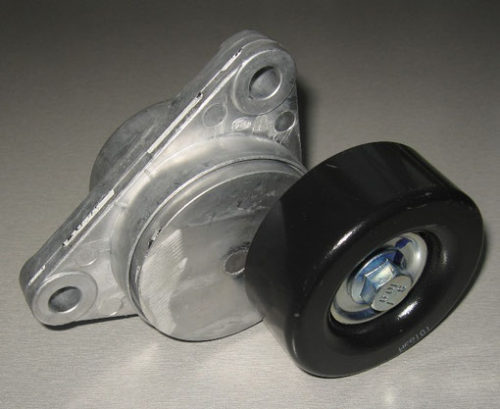
- Deviation from the designated position. This feature indicates that the internal elements of the tensioning roller are quite close to breakage. If the roller fails, it will lead to increased noise, temperature and vibrations.
Broke the timing belt, which leads such a breakdown
The crash of the timing belt can entail a mass of unpleasant consequences that are different, ranging from the need to replace the timing belt and to restore the gas distribution mechanism and motor overhaul.

The most difficult situation is when the valve is bent as a result of the belt break. This is simply explained. The gap can happen in the period when the valves dropped to the fuel injection or the release of gases. At the same time, the movement of pistons in the cylinders is still continuing and they are able to hit them from all over force. In this case, the "meeting" may end pretty badly.
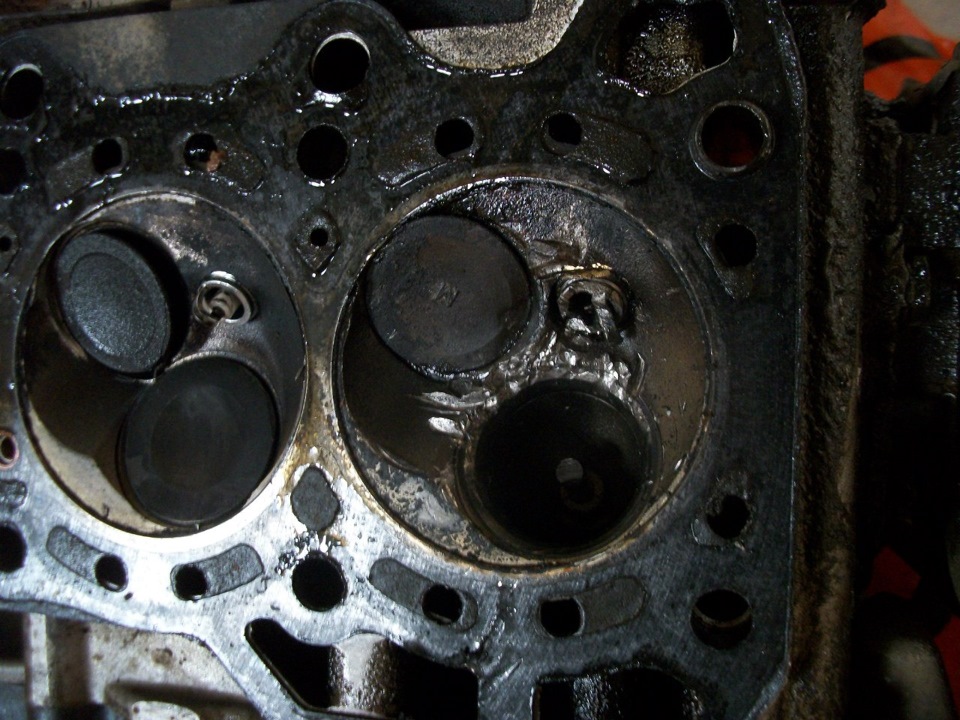
Estimate the degree of damage can be evaluated only after dismantling the motor head and estimate the state of the piston system and valves. It should be noted that the valve defect cannot immediately see - for diagnostics requires special equipment.
Timing belt, why the replacement of the belt is better to do in the set
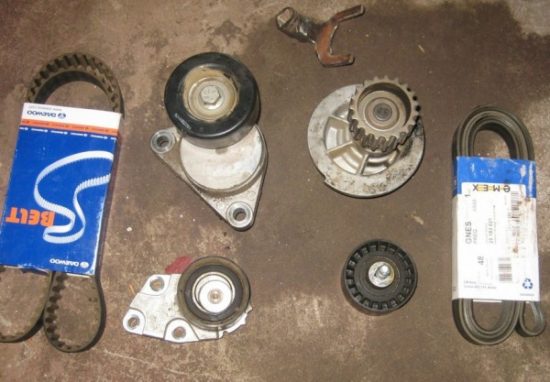
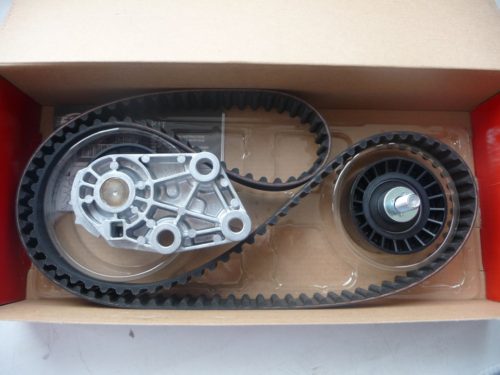
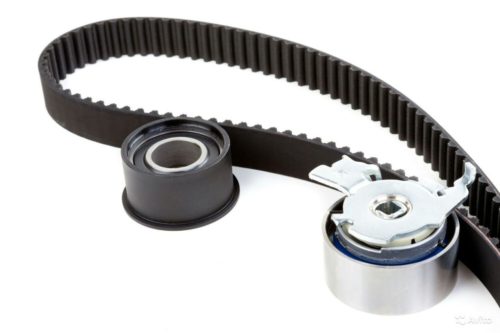
To avoid problems in the future, the replacement of the timing belt is desirable to produce together with pumps and rollers. This is not a mandatory action, however, if there are additional funds, it is best not to be lazy because it will affect the efficiency of the new timing belt.
In addition, to fulfill the replacement, you will have to fully disassemble all the components of this equipment, including the pump with rollers. Thus, the replacement of consumables the cost of this procedure will not increase much, and it will not take a lot of time, but it will increase the service life of the replaced aggregate.
Tools, fixtures, consumables
- Heads on "10", "12", "14", "17", "32".
- Adjustable emphasis.
- Hexagon on "5".
- The key to "41".
- Passatia.
Safety technique
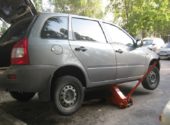
It is impossible to work under the vehicle if it is posted only on the jack. As insurance at mandatory, use the Factory Condition Station. It is forbidden to hang the car on two or more jacks. To protect your hands from bruises and cuts with "power" operations, you should work in gloves.
Replacing the timing belt Chevrolet Lacetti, step by step work
- Open the hood and dismantle a decorative lining with a motor, for which you need to unscrew four nuts.
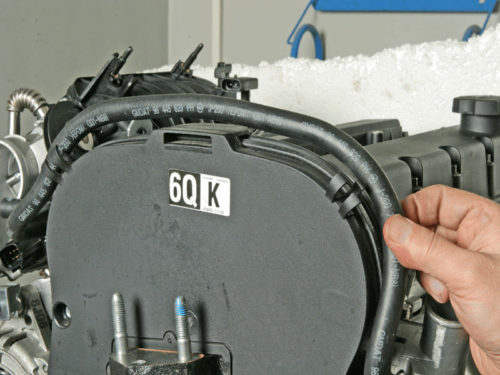
- For convenience, dismantle the air filter housing. To do this, with the cover of the air filter, we unscrew the four screws, as well as the coat of air nozzle. We dismantle the lid and air filter. To remove the filter housing itself, unscrew two more bolts.
- Now remove the drive belt - pull the drive roller using the key to "17" and dismantle the belt from the pulleys. Next, you should unscrew two bolts and remove the top cover of the timing cover.
- We make removal of the front right wheel and the lateral anther of the motor, which is attached to three pistons and two bolts.
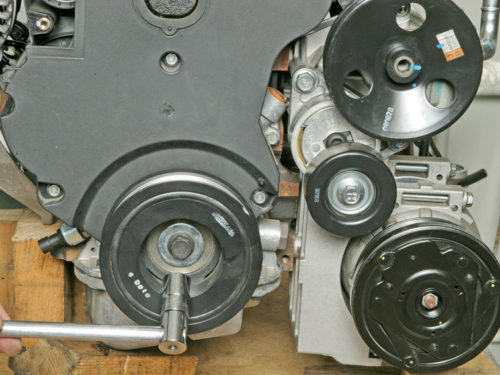
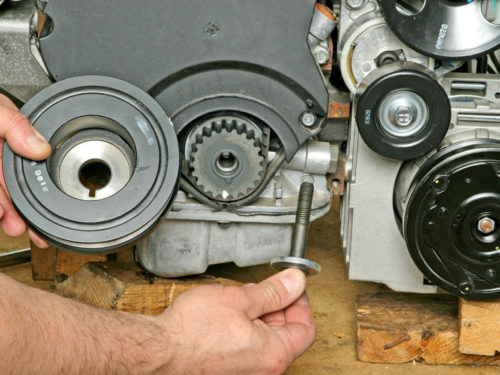
- We unscrew the crankshaft pulley, for which you fix the flywheel using a large slotted screwdriver through the viewing window. Then, with a welder and head on "17" we unscrew and dismantle the crankshaft pulley.
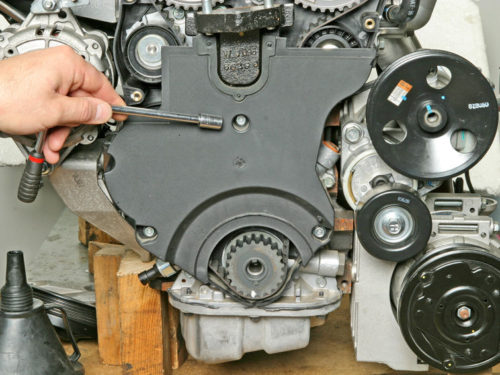
- You should also remove the bottom cover of the timing belt, which is attached by three cogs.
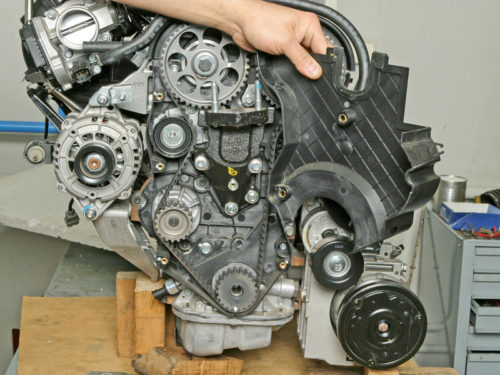
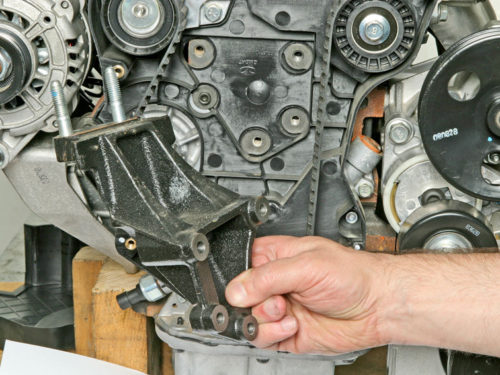
- The next step is to remove the engine support, for what you need to install an additional jack for a power unit under the pallet. Then we unscrew 3 nuts and 1 bolt using the key to "14" and dismantle the OBS support.
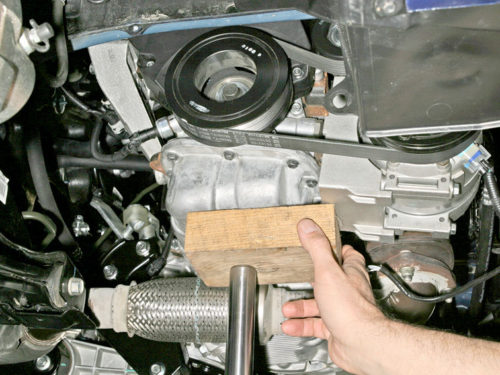
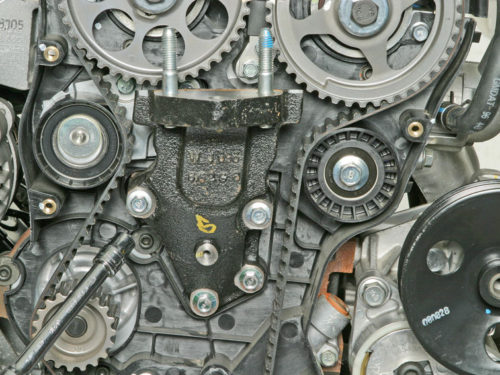
- We unscrew the four bolts around the perimeter of the support bracket and remove the bracket.
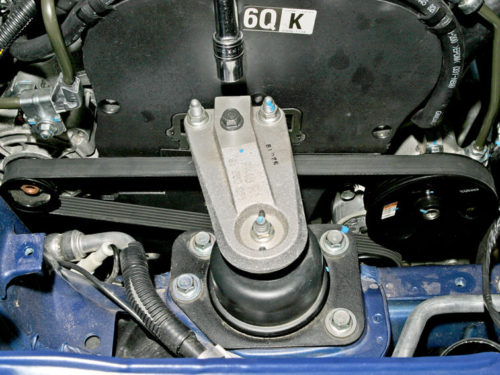
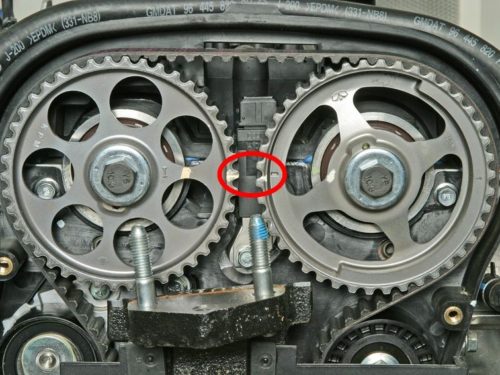
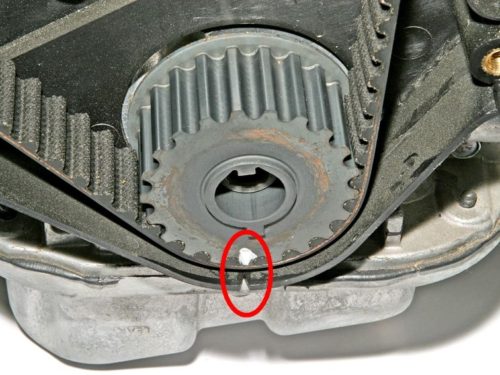
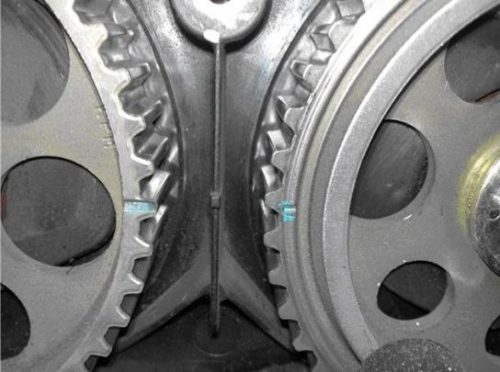
- Further, on all pulleys, we set the timing tags. On the crankshaft pulley it will be below.
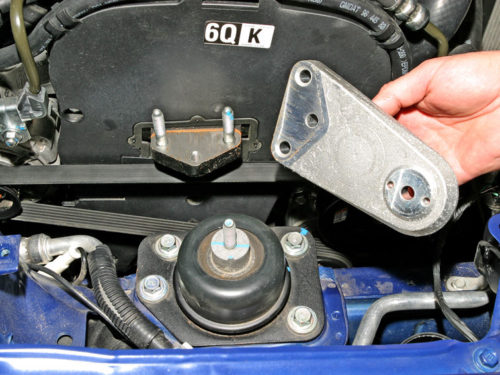
- For the convenience of rotation of the crankshaft, tighten the pulley bolt back.
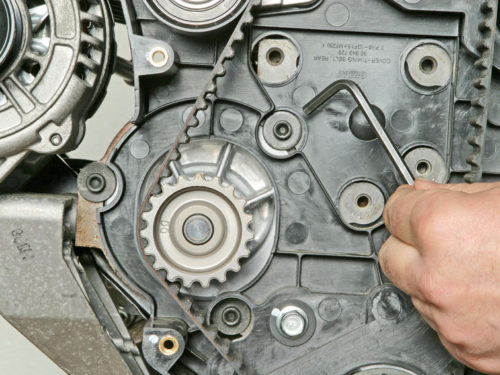
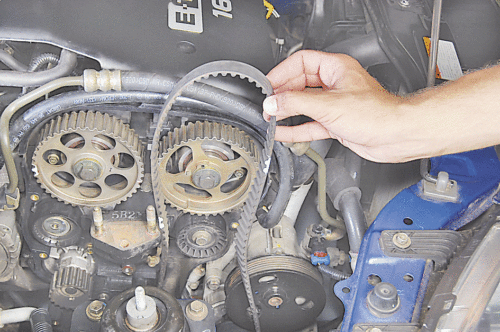
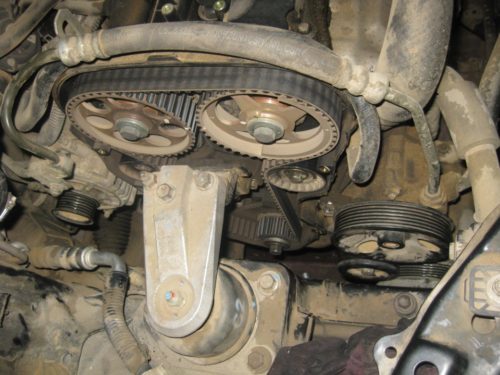
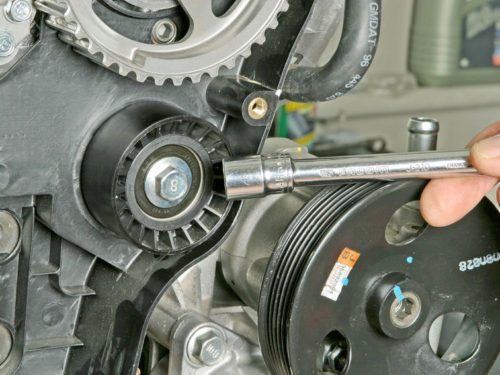
- Now proceed to replacing the timing belt. Using the key to "14", we unscrew the parasitic roller, which is located on the right and dismantle the belt, after which we unscrew the roller tensioner, which is attached by three bolts.
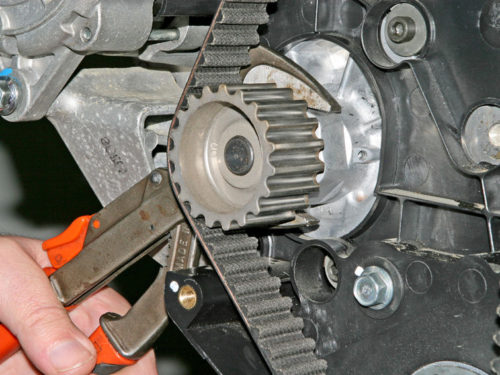
- Before mounting the belt, check the tags, because after removing they could be knocked down.
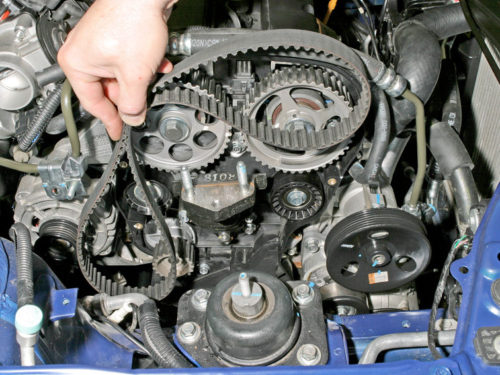
- When it remains only to wear a belt on the pump, move the roller tensioner, after which it is up to the end of the belt and check the installation of the labels.
- Next, scroll the crankshaft clockwise on one or two turns and check the labels again.
Tips Profi, how to check the timing belt tension
To check the tension of the timing belt, turn the crankshaft two to three times clockwise and look at the tensioner roller teeth. It is necessary that they stood opposite each other - plus-minus a few millimeters. If the readings differ, you will have to adjust the belt tension using pumps.
Related Materials
- Stove 2110, bad warm stove 2110, VAZ 2110 heating system, repairing the heating system VAZ 2110 with their own hands
- VAZ 2114 stove blows with cold air, stove 2114, bad warm stove VAZ 2114, device and repair of heating VAZ 2114 do-it-yourself, removing the stove VAZ 2114
- How to subdominize the car. How to put a jack. Types of jacks for cars.
- VAZ 2109 Fuse Block, VAZ 2109 Fuse Block Carburetor, VAZ 2109 Fuse Block Injector, Old VAZ 2109 Fuse Block, VAZ 2109 Fuse Block, VAZ Fuse Block 2109
- Car exhaust gas catalyst, faulty catalyst, pluses and cons of the catalyst, how to change the catalyst on the planeencitel
- Stove blowing cold air VAZ 2114, badly blowing the stove VAZ 2114, why badly blowing the stove VAZ 2114
- How to find out the owner of the car by the number of his car, check the car by the number of the traffic police machine, check the car by the state number of the car for free
- How to choose Used tires, Useful Tips
- Winter car road, pressure in passenger car tires in winter, good battery for the car in winter, whether to warm the car in winter
- In winter, the car is poorly started. How to make a car in winter, do you need to warm up the car in winter, useful tips
- Economy fuel consumption machines, the most economical car consumption
- Tires brands for passenger cars, labeling of car tire labeling, residual passenger car tire protector, how to pick a tire on a car brand, car tire tread pattern
- Working transmission operation, mechanical gearbox clutch work, driving with manual gearbox, useful tips
- Rear beam Peugeot 206 sedan, rear beam device Peugeot 206. Rear beam Peugeot 206 Malfunction, repair of the rear beam Peugeot 206
- Diesel fuel in winter, additive for diesel fuel in winter, how to choose the best diesel fuel
- Diesel winter does not start. How to start diesel in winter, heating diesel in winter.
- Japanese bridgestone tires, winter studded bridgestone tires, bridgestone tires brand
- Tire marking decoding for passenger cars, labeling wheels, how to choose the right tires on the disks
- Diesel engine in winter, launch of the diesel engine in winter, what oil to fill in a diesel engine in winter, useful tips
- LED backlight of the car, the backlight of the bottom of the car, the backlight of the legs in the car, the backlight in the door of the car, the backlight of the car is fine
- Recovered tires, bus tire, restored tire protector, can I use them
- Choose winter tires, which is a winter tires, which pressure in winter tires should be marked with winter tires, how to choose the right winter tires, the best winter tires 2019
- Steering rail rail, knock of steering rack, reasons for the knock and repair of the steering rack do it yourself
- Cameless car tires, a set for repair of tubeless tires, repair of the cannon-free tire do it yourself
- Russian tires, Russian tires Winter, Russian All-season tires, Voronezh AMTEL tires, Tires "Matador Omsk Tire", Kama-tires are world-class bus
- How to open a car without a key. Lost the key from the car what to do, the key from the car inside the car
- Silent tires, quiet winter tires, quiet studded bus, which tires to choose, overview tires
- Tires and safety, safety of the bus, why it is necessary to constantly monitor car tires
- Rules of safe driving of the car in the rain and slush, safe driving of the car for beginners
- Rust converter which is better for cars, rust converters to choose how to use rust transducer, professionals
- Polishing the body of the car do it yourself, how to choose a polishing paste, useful tips
- Engine durability, engine life, how to extend engine life
- Knock in the car. Knock when moving the car. What can knock in the car. How to determine the cause of the knock.
- ABS car, what is ABS car, ABS system malfunction, ABS diagnostics
- Overtaking a car when you can start overtaking a car, rules of traffic rules
- Fuel pump VAZ 2110, VAZ 2110 gas station scheme, VAZ 2110 fuel pump device, VAZ 2110 gas station repair,
- Automotive antennas for radio, automotive antenna device, car antenna do it yourself
- Front suspension Kalina, device front suspension Kalina, knock in front suspension Kalina, repair of front suspension Kalina
- Shock absorber Oil, best oil shock absorbers, pumping oil shock absorbers, how to properly pump oil shock absorber
- Clutch malfunctions, touches clutch, causes a clutch malfunction, how to eliminate



Comments