With the onset of cold weather, every car enthusiast tries to create comfortable and warm conditions for staying in the cabin of his car, because I don't want to freeze anyone. But if the warm air does not do, it should be determined than it may be due to. In this article, we will consider repairing the control of Lada Kalina Lada.
Content
- How the stove works on Kalina
- Lada Kalina Stove Device
- Where is the stove on Kalina
- How does Kalina stove control
- Tools, consumables, fixtures
- How to remove the control unit on Kalina
- How to find a malfunction
- How to repair the control of the stove of Kalina
- How to change the heater control unit
- Tips Prof.
How the stove works on Kalina
The principle of operation of the stove is a subtle-exhaust. Air masses in the car are warmed up using a special fluid, simultaneously cooling the engine.
The principle of the heater is that the liquid heats the radiator in which heat exchange occurs, and the heated air enters the interior by means of air ducts.
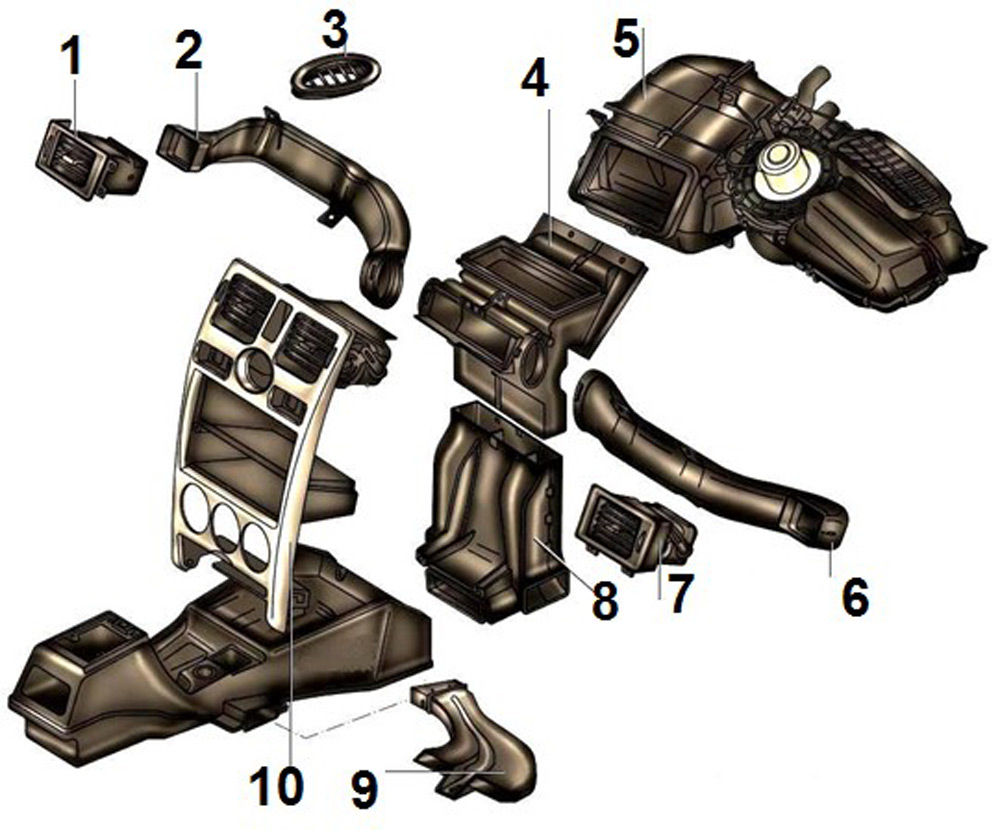
Lada Kalina Stove Device
- Side left stream output - 1.
- Left air duct - 2.
- Heated side glass - 3.
- Air splitter - 4.
- Stove - 5.
- Right ventilation air duct - 6.
- Side right output streams - 7.
- Air duct of lower heating - 8.
- Air duct heating salon - 9.
- Central output of ventilation flows - 10.
Where is the stove on Kalina
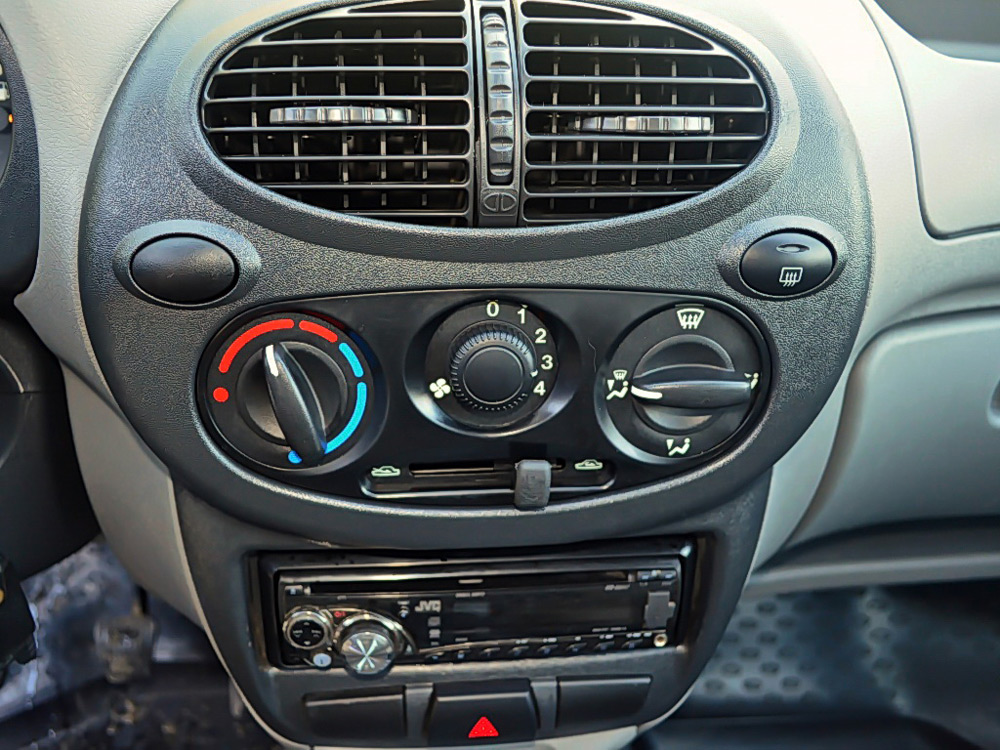
On Kalina, the stove switches are located on the central instrument panel. The heater control unit is located in the instrument panel console.
How does Kalina stove control
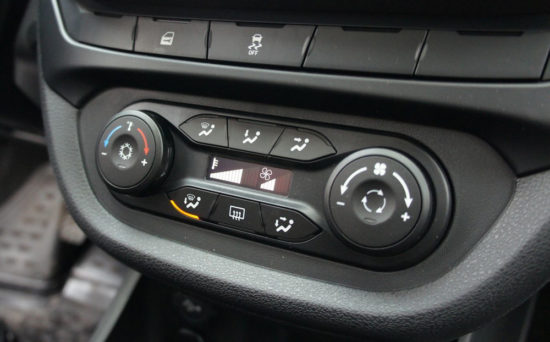
The stove control mechanisms are as follows:
- Controller control of air flow dispenser.
- Fan function regulator.
- Temperature regulator of the stove.
- Lever to switch the recycling flap.
The temperature regulator translates from the cold mode to hot and back. Air supply is controlled by a switch having four operating modes of the electric fan. The fan speed increases with the rotation of the handle to the right.
Tools, consumables, fixtures
For removal of the control unit, cruciform and spline screwdrivers will be required.
How to remove the control unit on Kalina
Order of work:
- Open the hood and disconnect the minus terminal from the battery.
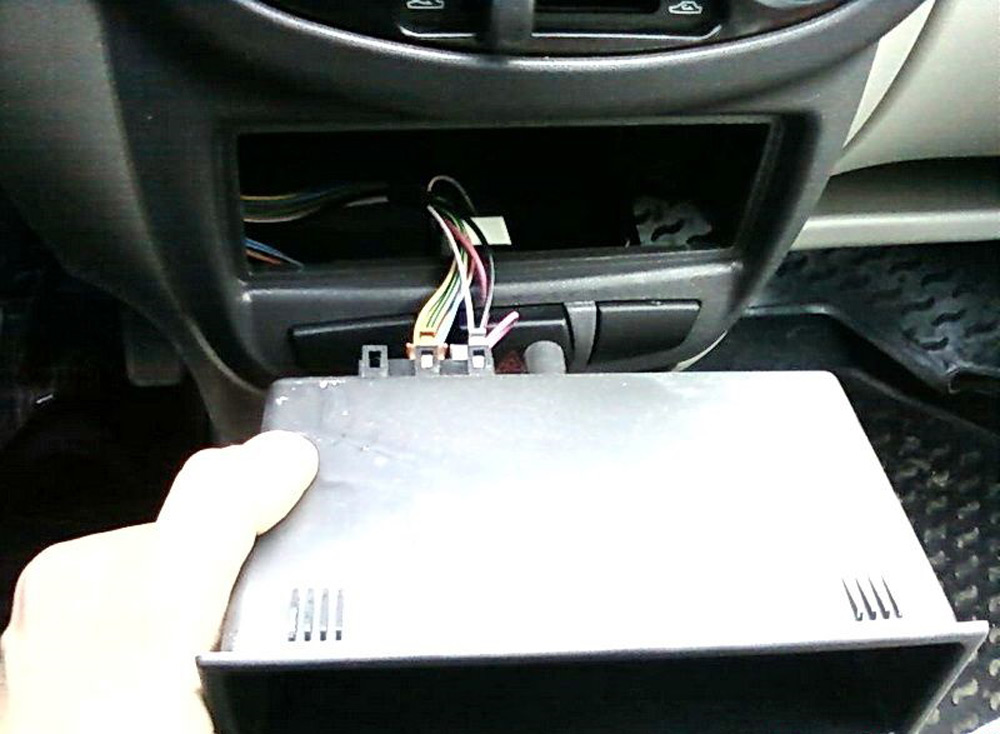
- Using a slotted screwdriver, remove the guide radio tape recorders from the installation location.
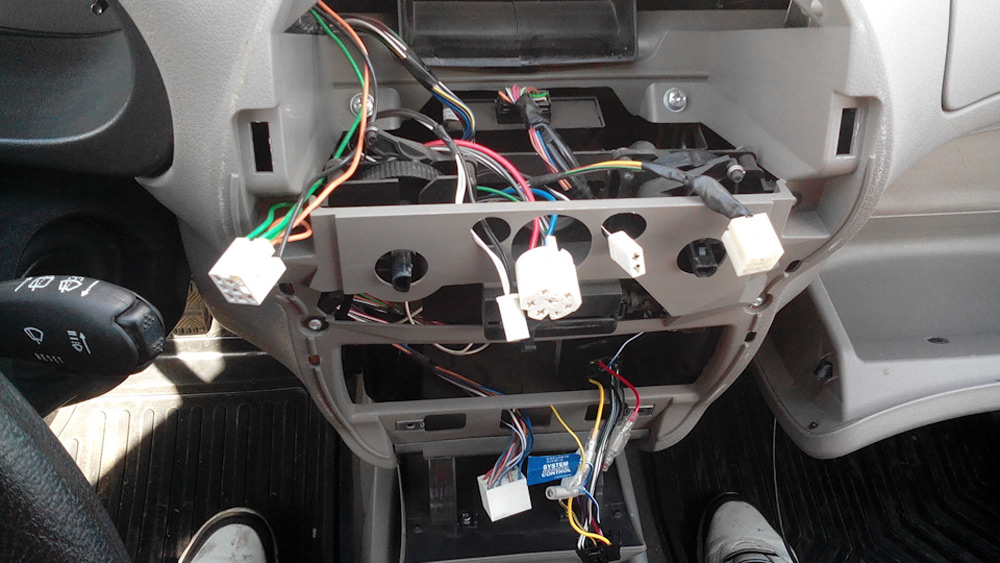
- Disconnect the connectors and chips from the sled. You should sign the connections that you disconnect.
- Remove the lever, controlling the air recycling flap. It is under the central handle regulating the speed of rotation of the fan.
- Remove two handles: the right, distributing air supply, and the left, regulating the temperature of the incoming air.
- Then remove two plugs that are on both sides of the emergency stop button.
- Unscrew the two screws that fasten the lining from below and are under the plugs.
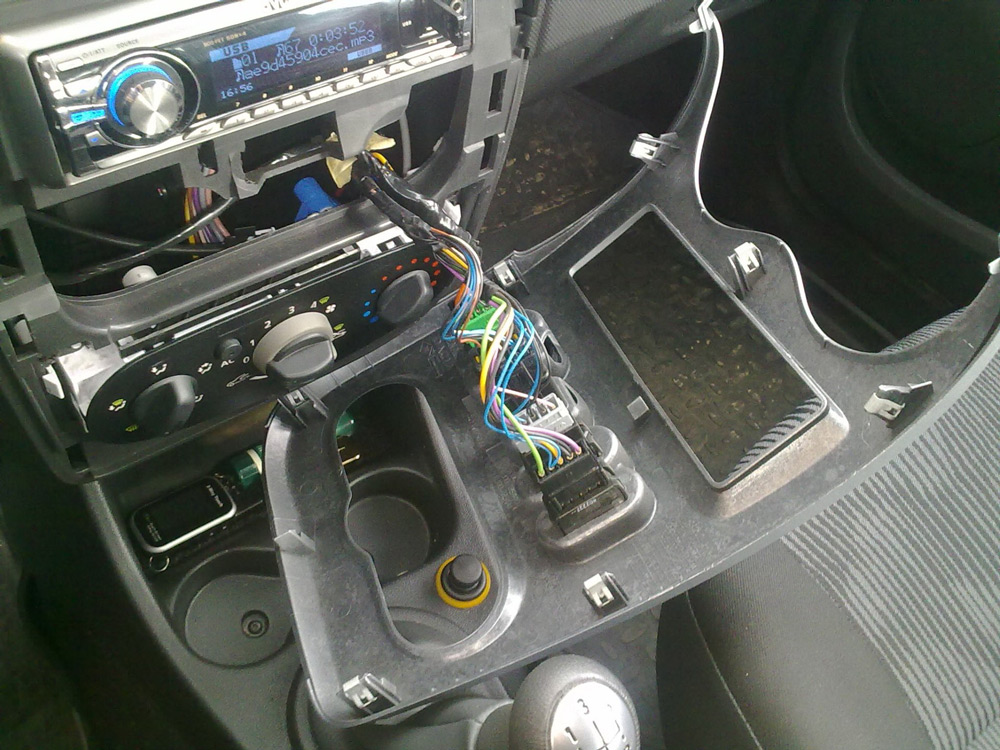
- Slowly pull on the lining, freeing it from metal latches located at the top of the instrument panel overlay. Take the panel to the side.
- Disconnect the connectors and chips that come from:
- alarm buttons;
- buttons including rear window heating;
- enclosures of the lamps of the instrument panel;
- the switching unit of the stove electric fan mode. - Make sure the stove block is available for removal.
How to find a malfunction
If cold air blows out of the stove and heat does not come, consider the main causes of such faults:
- Praying the stove switching regulator cable. Most likely, the reason for such a breakdown is the flying latch, due to which the cable in one direction stretches normally, but does not reach the other.
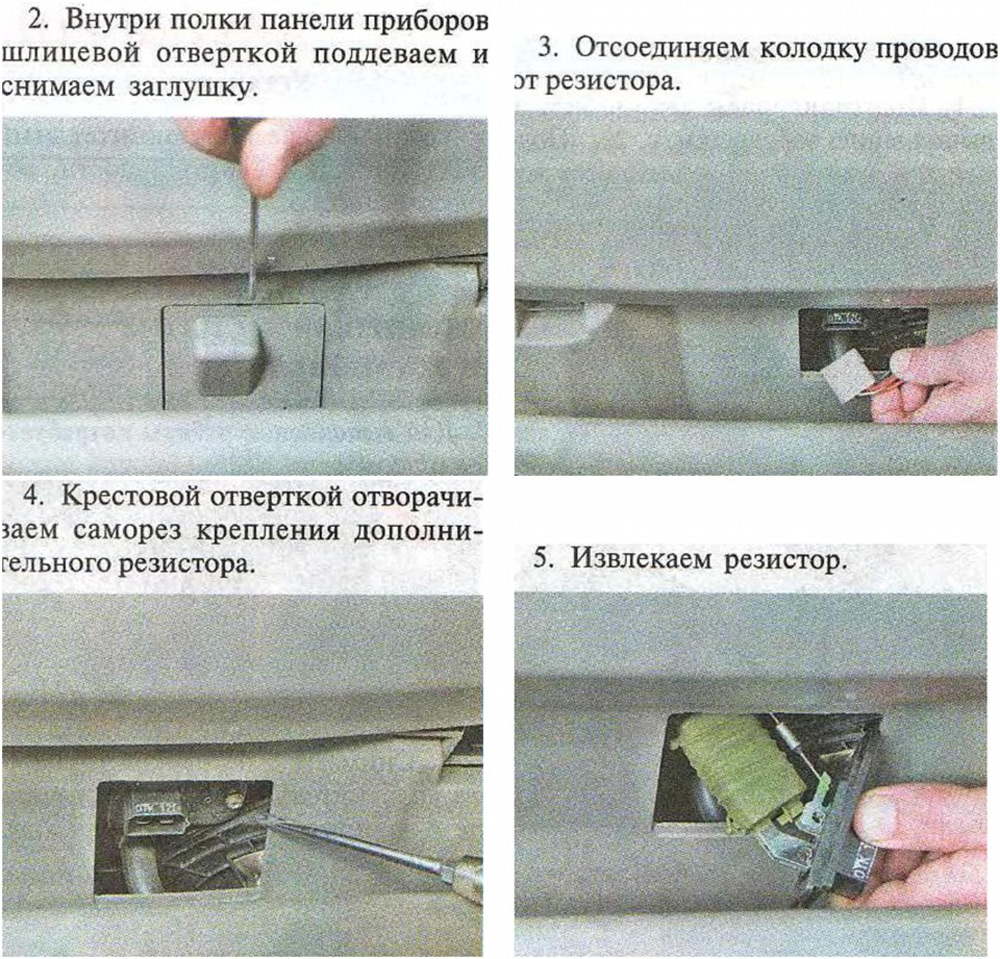
- The heater works only in the fourth speed. This is due to the failure of the thermistor.
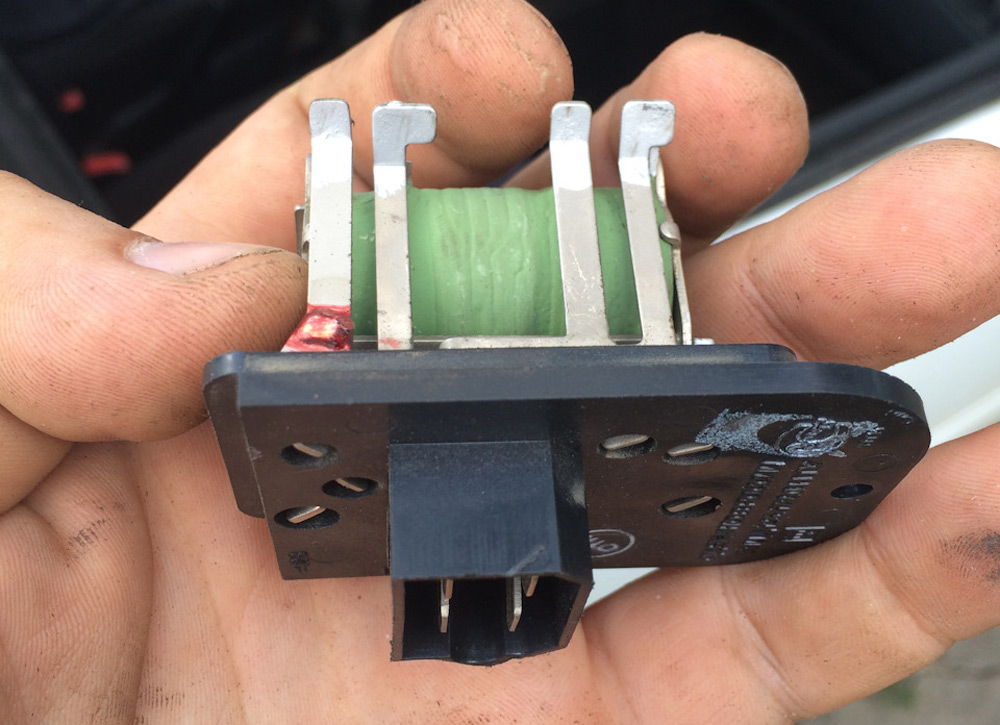
- On Kalina, the stove switch is most often broken due to sharp inclusion, which often occurs as a result of not strong plastic.
How to repair the control of the stove of Kalina
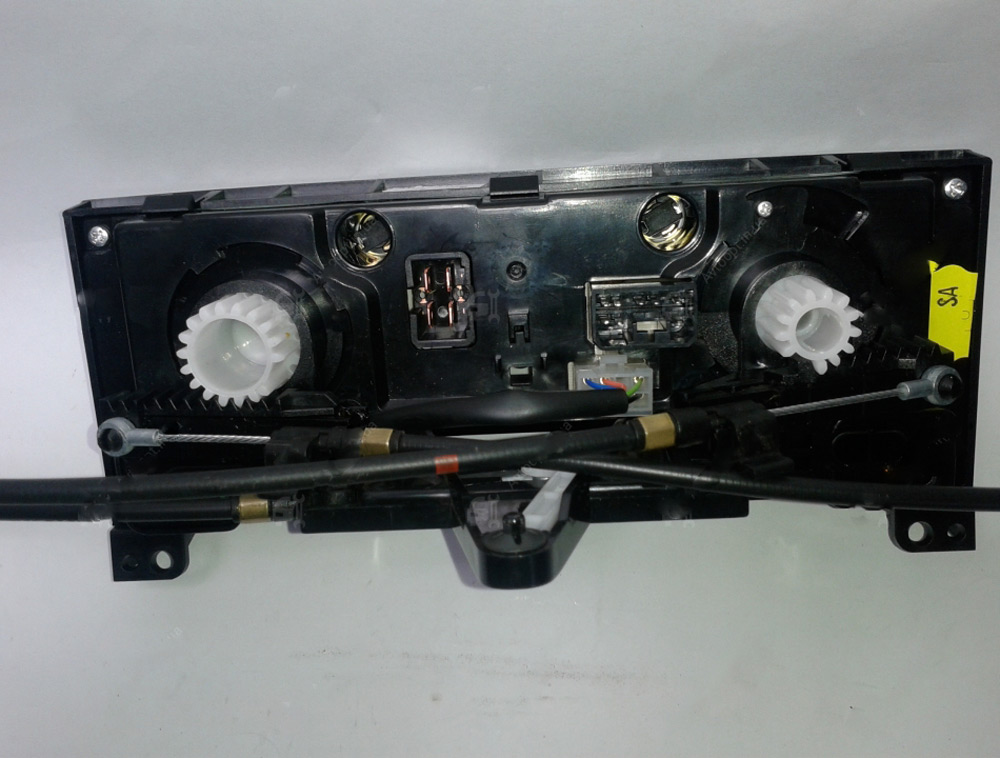
The impossible or difficult switching of the temperature regulator can be due to the switch of the switch itself. Replacing the stove switch on Kalina is performed quite easily (provided that the dismantling operation of the stove control mechanism will already be completed). On the rear console of the control panel, unscrew the four fastening screws of the switch block. Remove the fixtures of the cables fastening and output the closures from the engagement with the drive device. Replace the broken switch. The assembly is performed in the reverse order. When performing these works, mark the marker location of the cables on the lever block. It is necessary in order to install traction correctly during the assembly.
The main causes of the breakdown of the stove temperature controller can be: a blast of a thermistor or a broken connection wire. Such malfunctions are eliminated by replacing the broken element and by soldering the wires. Also, the stove regulator can stop working due to the failure of the temperature sensor, which is quite rare. This sensor is located inside the ceiling in the car.
How to change the heater control unit
Order of work:
- Remove the lining from the console.
- We unscrew the four screws that secure the control unit to the instrument panel frame.
- We dismantle the cable locks that are involved in the heater management.
- Remove cables with drive mechanisms. Source the position of the cables on the block elements to install everything for previous places during the assembly. The hardest thing is to wear cables and fasten with a latch.
- Remove the control unit with air conditioning.
- We put a new block on the car.
- We collect the elements of the node in the reverse order and put the lining of the instrument panel console.
Tips Prof.
Now it remains only to check the stove for performance. We start the car, check the work of the dampers in various positions and modes of the functioning of the fan of the stove. Next, warming up the motor to the operating temperature and make sure that the stove warms normally.
Related Materials
- Stove 2110, bad warm stove 2110, VAZ 2110 heating system, repairing the heating system VAZ 2110 with their own hands
- VAZ 2114 stove blows with cold air, stove 2114, bad warm stove VAZ 2114, device and repair of heating VAZ 2114 do-it-yourself, removing the stove VAZ 2114
- How to subdominize the car. How to put a jack. Types of jacks for cars.
- VAZ 2109 Fuse Block, VAZ 2109 Fuse Block Carburetor, VAZ 2109 Fuse Block Injector, Old VAZ 2109 Fuse Block, VAZ 2109 Fuse Block, VAZ Fuse Block 2109
- Car exhaust gas catalyst, faulty catalyst, pluses and cons of the catalyst, how to change the catalyst for the planeencitel
- Stove blowing cold air VAZ 2114, badly blowing the stove VAZ 2114, why badly blowing the stove VAZ 2114
- How to find out the owner of the car by the number of his car, check the car by the number of the traffic police machine, check the car by the state number of the car for free
- How to choose Used tires, Useful Tips
- Winter car road, pressure in passenger car tires in winter, good battery for the car in winter, whether to warm the car in winter
- In winter, the car is poorly started. How to make a car in winter, do you need to warm up the car in winter, useful tips
- Economy fuel consumption machines, the most economical car consumption
- Tires brands for passenger cars, labeling of car tire labeling, residual passenger car tire protector, how to pick a tire on a car brand, car tire tread pattern
- Working transmission operation, mechanical gearbox clutch work, driving with manual gearbox, useful tips
- Rear beam Peugeot 206 sedan, rear beam device Peugeot 206. Rear beam Peugeot 206 Malfunction, repair of the rear beam Peugeot 206
- Diesel fuel in winter, additive for diesel fuel in winter, how to choose the best diesel fuel
- Diesel winter does not start. How to start diesel in winter, heating diesel in winter.
- Japanese bridgestone tires, winter studded bridgestone tires, bridgestone tires brand
- Tire marking decoding for passenger cars, labeling wheels, how to choose the right tires on the disks
- Diesel engine in winter, launch of the diesel engine in winter, what oil to fill in a diesel engine in winter, useful tips
- LED backlight of the car, the backlight of the bottom of the car, the backlight of the legs in the car, the backlight in the door of the car, the backlight of the car is fine
- Recovered tires, bus tire, restored tire protector, can I use them
- Choose winter tires, which is a winter tires, which pressure in winter tires should be marked with winter tires, how to choose the right winter tires, the best winter tires 2019
- Steering rail rail, knock of steering rack, reasons for the knock and repair of the steering rack do it yourself
- Cameless car tires, a set for repair of tubeless tires, repair of the cannon-free tire do it yourself
- Russian tires, Russian tires Winter, Russian All-season tires, Voronezh AMTEL tires, Tires "Matador Omsk Tire", Kama-tires are world-class bus
- How to open a car without a key. Lost the key from the car what to do, the key from the car inside the car
- Silent tires, quiet winter tires, quiet studded bus, which tires to choose, overview tires
- Tires and safety, safety of the bus, why it is necessary to constantly monitor car tires
- Rules of safe driving of the car in the rain and slush, safe driving of the car for beginners
- Rust converter which is better for cars, rust converters to choose how to use rust transducer, professionals
- Polishing the body of the car do it yourself, how to choose a polishing paste, useful tips
- Engine durability, engine life, how to extend engine life
- Knock in the car. Knock when moving a car. What can knock in the car. How to determine the cause of the knock.
- ABS car, what is ABS car, ABS system malfunction, ABS diagnostics
- Overtaking a car when you can start overtaking a car, rules of traffic rules
- Fuel pump VAZ 2110, VAZ 2110 gas station scheme, VAZ 2110 fuel pump device, VAZ 2110 gas station repair,
- Automotive antennas for radio, automotive antenna device, car antenna do it yourself
- Front suspension Kalina, device front suspension Kalina, knock in front suspension Kalina, repair of front suspension Kalina
- Shock absorber Oil, best oil shock absorbers, pumping oil shock absorbers, how to properly pump oil shock absorber
- Clutch malfunctions, touches clutch, causes a clutch malfunction, how to eliminate
Comments