Refresh the color of the car on your own forces is not so difficult. If you have carefully and carefully and, of course, stock all the necessary equipment, the result will exceed all expectations.
Content
Preparation of a car to painting
First of all, the workplace and lighting is prepared. It is necessary to paint the car in a spacious room: not less than 2 m. On the perimeter of the car.
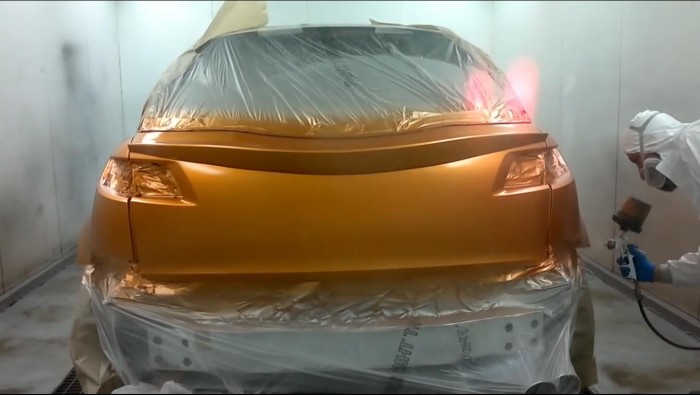
To exclude the possibility of dust from entering the purified car body, you need to carefully dive and wet all the surfaces of the room: walls, floor, ceiling. It is necessary to check that the car is well lit, so as not to miss the unpainted area. The garage or shed must be necessarily ventilated.
We are preparing tools and equipment for painting a car: usually it is a paintopult and sandpaper of different graininess. The paintopult must be well adjusted: the paint should not beat the tight jet, but to be sprayed by fan. A moisture separator should be put on the compressor, as if condensate is formed in the receiver, the air can get on the paint. Then you have to clean the paint. For its own security, you need to purchase a respirator, glasses and a disposable raner jumpsuit with a hood.
Machine painting itself - an easy event. Much more time and effort takes the preparation of the car surface to paint.
1. First you need to remove all attachments: these are bumpers, headlights, radiator grille, etc. They need to be washed and put out outdoors.
2. Then, if necessary, eliminate all body defects: chips, cracks, dents, corrosion locations need to be cleaned with a large scent or even a grinder with an abrasive nozzle. If we are talking about the color of the rusty areas, it is quite acceptable to walk by rust shredder. The surface is degreasing the White Spirit and put the putty. After complete drying, the putty is drawn by the sandpaper on 240. It is necessary to clean up until the putty becomes smooth. Again degreased and soil. The soil is processed by an emery of 800 on a wet surface. When the soil becomes perfectly smooth and aligned with the body, the process is completed.
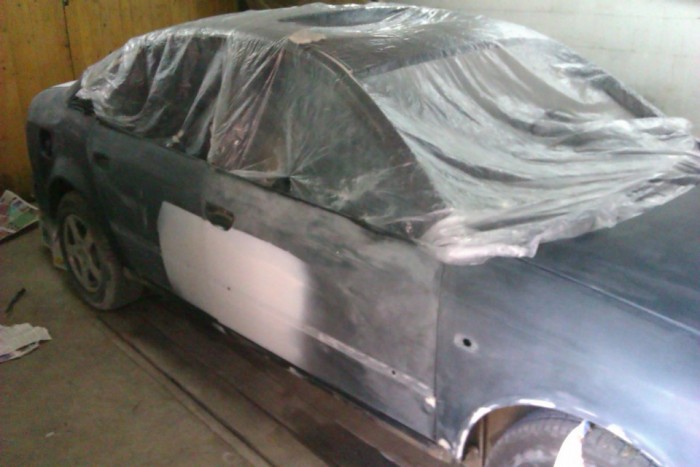
3. To places that are stained will not need to glue paper for greater tape. From the side of the stained sector, the tape does not need to stick tightly to the car so as not to create a strong drop - the step. If the scotch is slightly reached - the soil will pass under it and a smooth transition will be created.
4. The entire surface of the car needs to be evenly sanded with a skin (grove, remove gloss) to improve the adhesion of paint. It is made by an emery of 800-1000 on a wet surface.
5. Lastly, they degrease the entire surface of the car White by Spirit.
Selection of auto-email
The color gamut of auto-email is diverse and has a huge set of all sorts of shades. To get the desired one, which will be similar to the original color of the paint, sometimes there are 2-3, and even 7-10 colors, and in certain proportions. Even the smallest deviation from these proportions can give an unexpectedly incompatible effect.
There are different ways to select Automali Color:
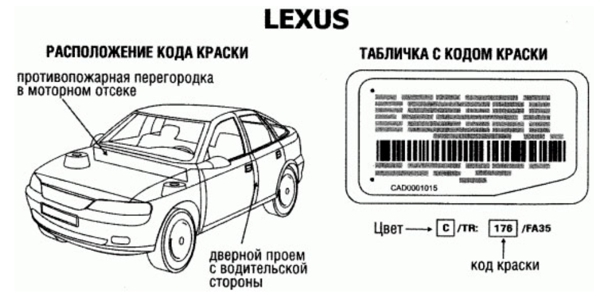
- One of them is the selection of auto-email. This code can be viewed on a special sticker placed on the inside of the hood. This method is more suitable for cases when it is planned to simply repaint the entire car completely.
- Another option of the selection of the shade is "on the eye". It is necessary to remove a small item from the car - usually this is the lid of the gas tank hatch and take it with you to the salon of the selection of auto email. On it you can pick up the color according to the samples, with natural color comparing the shades. A qualified seller-color will help you choose the hue well.
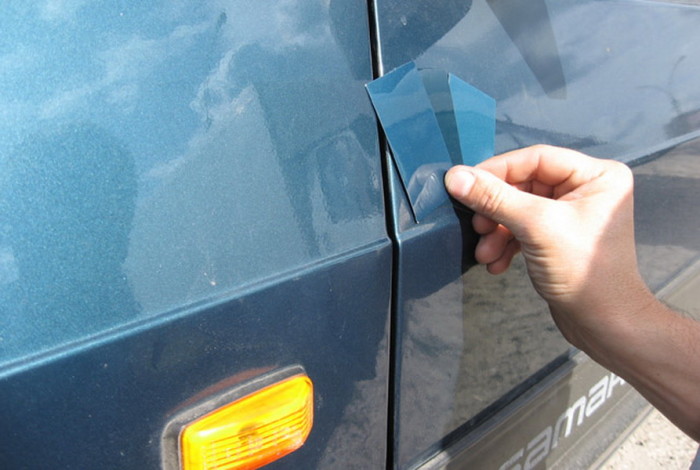
- If it is planned to stain a car part, you need to pick up auto email, which, when dried, one to one will approach the old paint. In this case, it is necessary to prefer a computer method of selection of auto-email. This is a relatively new way of selection of color: the desired color shade is selected through the selection of paint in the code on the car body using a special computer program. The computer compares the saturation of the original parts of the car and the colors offered by the color. As a result, such a shade is selected so that freshly painted autodetas is completely identical in brightness, shades, saturation with car parts.
Subtleties selection of paint
When selecting paint, some very important nuances should be taken into account:

- Before staining, you need to spend several tests without changing the intensity of application. The results are compared and determined the most suitable shade.
- With the final choice of paint, it is necessary to take into account that the final result depends on the method of applying paint.
- After drying, the paint can also change the shade - for this and need testing.
- For self-staining, it is necessary to select enamel for which the baking is not required.
Selection of auto-email in bells
The aerosol autocracy in the canopy was specifically developed so that motorists could independently restore the integrity of the body's paintwork.

Callers are easy to use and allow staining quickly. The best results are provided by the faithful selection of the type of enamel and accurate observance of the application technology. The main advantage of aerosol colors is that you do not need to spend money on special equipment (for example, to buy a spray collapse). Now in any center of the selection of auto-email, there is a service of refueling the paint an aerosol can.
Painting body car
The preparation of enamel is performed in accordance with the instructions for its use. The paint is divorced by a solvent to the desired consistency. To determine the readiness of the paint, you need to take a stick with a diameter of 2mm, omit it into the finished paint, lift it. Paint should be dragged at a speed of 3 - 4 drops per second. Then, fix the finished paint through the old tights and pour into the spray with the nozzle number 14. We put the working air pressure on 3-4ATM. Very convenient if the compressor is equipped with a pressure gauge with adjustment.
First of all, painting the roof of the car. The gun must be kept 15-25 cm from the body. Hand movements must be smooth, reciprocal. The surface is painted in 2-3 layers, with an excerpt of 15-20 minutes between layers. Then the painting of the car's hood, painting the trunk of the car, painting doors, thresholds and racks. Drying time Auto takes 24-36 hours at normal temperature +20 degrees. In no case can not smoke when staining.
If a subsequent lacquer coating is planned, then the car after painting in no way can be touched by hands so that then it does not have to degrease and there is a possibility that the solvent will erase the paint. Varnish can be applied to the newly painted paint, you can wait for a complete drying. If you plan to lacquer the surface immediately after staining, the lacquer needs to be diluted somewhere in an hour before the alleged varnish so that all air bubbles will come out of it.
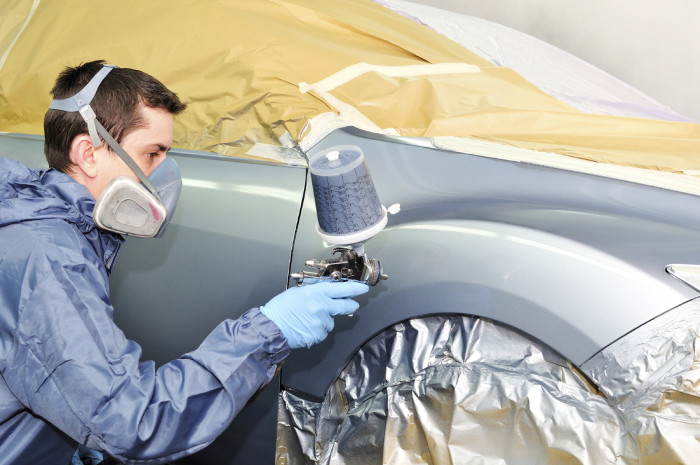
Varnish is applied in 2 layers. After a complete car drying, somewhere in a week you can polish.
How to paint a canister
The aerosol can of 2-3 minutes vigorously shake before use. The paint needs to be sprayed from a distance of 30cm at room temperature in 2-3 layers. After each layer, the interlayer drying should be made. To do this, you can use a powerful construction hairdryer.
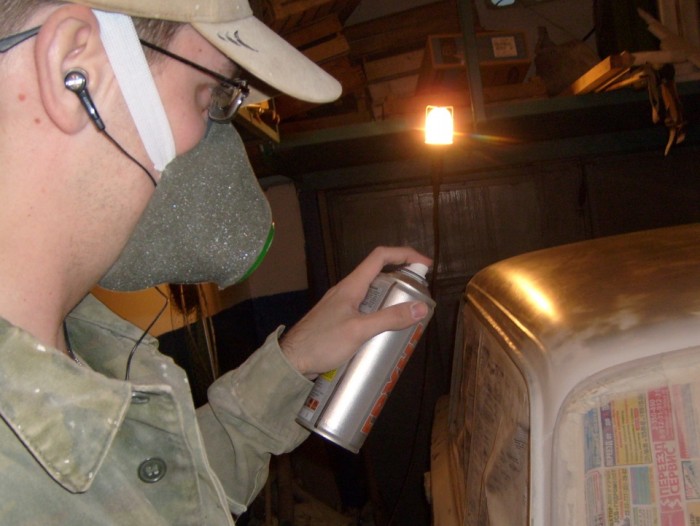
Each subsequent layer must overlap the boundary of the previous layer so that the painted stain is increased. The last layer is dried longer. At the end also coated with a transparent varnish in an aerosol can. After applying the last layer of varnish, it should be immediately during 15 seconds. Blind the border of the transition. This requires a special aerosol solvent for the transition zone. It is applied by the edge of the "torch", only on the transition zone. The latter coating should not exceed the border of the stain. The limits of the zone covered with varnish should polish so that the transition be less noticeable.
Related Materials
- Stove 2110, bad warm stove 2110, VAZ 2110 heating system, repairing the heating system VAZ 2110 with their own hands
- VAZ 2114 stove blows with cold air, stove 2114, bad warm stove VAZ 2114, device and repair of heating VAZ 2114 do-it-yourself, removing the stove VAZ 2114
- How to subdominize the car. How to put a jack. Types of jacks for cars.
- VAZ 2109 Fuse Block, VAZ 2109 Fuse Block Carburetor, VAZ 2109 Fuse Block Injector, Old VAZ 2109 Fuse Block, VAZ 2109 Fuse Block, VAZ Fuse Block 2109
- Car exhaust gas catalyst, faulty catalyst, pluses and cons of the catalyst, how to change the catalyst on the planeencitel
- Stove blowing cold air VAZ 2114, badly blowing the stove VAZ 2114, why badly blowing the stove VAZ 2114
- How to find out the owner of the car by the number of his car, check the car by the number of the traffic police machine, check the car by the state number of the car for free
- How to choose Used tires, Useful Tips
- Winter car road, pressure in passenger car tires in winter, good battery for the car in winter, whether to warm the car in winter
- In winter, the car is poorly started. How to make a car in winter, do you need to warm up the car in winter, useful tips
- Economy fuel consumption machines, the most economical car consumption
- Tires brands for passenger cars, labeling of car tire labeling, residual passenger car tire protector, how to pick a tire on a car brand, car tire tread pattern
- Working transmission operation, mechanical gearbox clutch work, driving with manual gearbox, useful tips
- Rear beam Peugeot 206 sedan, rear beam device Peugeot 206. Rear beam Peugeot 206 Malfunction, repair of the rear beam Peugeot 206
- Diesel fuel in winter, additive for diesel fuel in winter, how to choose the best diesel fuel
- Diesel winter does not start. How to start diesel in winter, heating diesel in winter.
- Japanese bridgestone tires, winter studded bridgestone tires, bridgestone tires brand
- Tire marking decoding for passenger cars, labeling wheels, how to choose the right tires on the disks
- Diesel engine in winter, launch of the diesel engine in winter, what oil to fill in a diesel engine in winter, useful tips
- LED backlight of the car, the backlight of the bottom of the car, the backlight of the legs in the car, the backlight in the door of the car, the backlight of the car is fine
- Recovered tires, bus tire, restored tire protector, can I use them
- Choose winter tires, which is a winter tires, which pressure in winter tires should be marked with winter tires, how to choose the right winter tires, the best winter tires 2019
- Steering rail rail, knock of steering rack, reasons for the knock and repair of the steering rack do it yourself
- Cameless car tires, a set for repair of tubeless tires, repair of the cannon-free tire do it yourself
- Russian tires, Russian tires Winter, Russian All-season tires, Voronezh AMTEL tires, Tires "Matador Omsk Tire", Kama-tires are world-class bus
- How to open a car without a key. Lost the key from the car what to do, the key from the car inside the car
- Silent tires, quiet winter tires, quiet studded bus, which tires to choose, overview tires
- Rules of safe driving of the car in the rain and slush, safe driving of the car for beginners
- Rust converter which is better for cars, rust converters to choose how to use rust transducer, professionals
- Polishing the body of the car do it yourself, how to choose a polishing paste, useful tips
- Engine durability, engine life, how to extend engine life
- Knock in the car. Knock when moving the car. What can knock in the car. How to determine the cause of the knock.
- ABS car, what is ABS car, ABS system malfunction, ABS diagnostics
- Overtaking a car when you can start overtaking a car, rules of traffic rules
- Fuel pump VAZ 2110, VAZ 2110 gas station scheme, VAZ 2110 fuel pump device, VAZ 2110 gas station repair,
- Automotive antennas for radio, automotive antenna device, car antenna do it yourself
- Front suspension Kalina, device front suspension Kalina, knock in front suspension Kalina, repair of front suspension Kalina
- Shock absorber Oil, best oil shock absorbers, pumping oil shock absorbers, how to properly pump oil shock absorber
- Clutch malfunctions, touches clutch, causes a clutch malfunction, how to eliminate
- Viscounts of the fan, work uniforms of the fan, malfunction of the ventilator fan, repair of the ventilator fan

Comments