The VAZ 2110 generator is a device that transforms the mechanical operation of the power unit into electrical energy. Thanks to this unit in the car, all applications that consume electricity are functioning. Some novice motorists believe that the battery is the only source of energy in the car. However, it is not. The task of the battery is the flow of current to start the engine and power supply to the starter so that it turns the crankshaft.
When the motor started, electrical equipment is already starting to eat from the generator device. The timely recharging of the battery and the quality of the functioning of electrical dependent equipment depends on the generator. If the generator fails, the entire load goes to the battery. It is worth it to discharge, and all the vehicle will remain without food. About this further in the article.
Content
- Which generator on the VAZ 2110
- Generator 2110 scheme
- Generator check 2110 Find out a malfunction
- Choosing a workplace
- Tools, fixtures, consumables
- How to remove the 2110 generator (step by step)
- In what cases generator 2110 need to be changed on a new
- How to check the dismantled generator to pay attention to
- In what cases is necessary replacement of bearings
- How to check the generator bearings, to pay attention to
- How to replace bearings with your own hands (in detail)
- Tips Prof.
Which generator on the VAZ 2110
As already mentioned, the car generator performs two functions at once: it charges the battery and feeds the power to all electrical equipment. This unit functions only when the motor is running. The "dozen" applies an alternator. The unit is in front of the engine, the work is included at the expense of the crankshaft.
Generator 2110 scheme
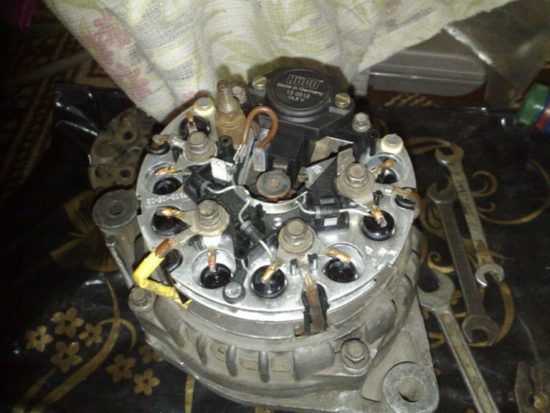
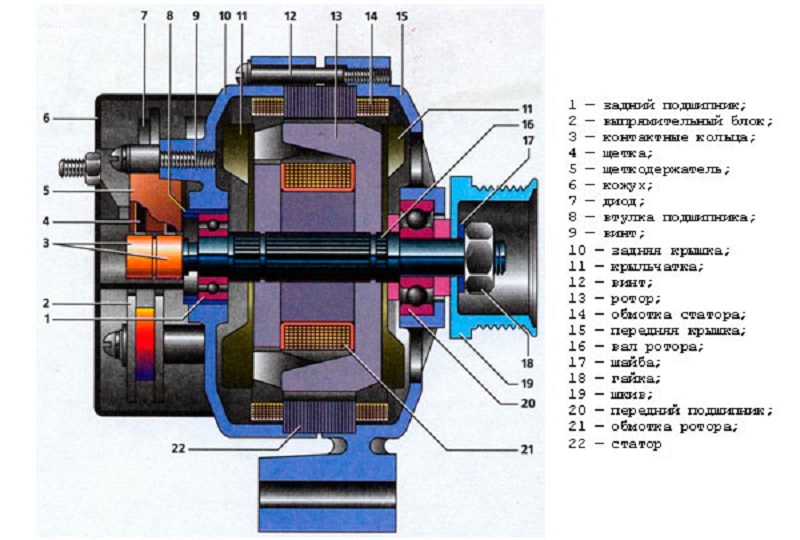
The generator device includes such components:
- Rotor.
- Stator.
- Rectifier block.
- Adjusting device.
- Generator housing.
- Brush knot.
Generator check 2110 Find out a malfunction
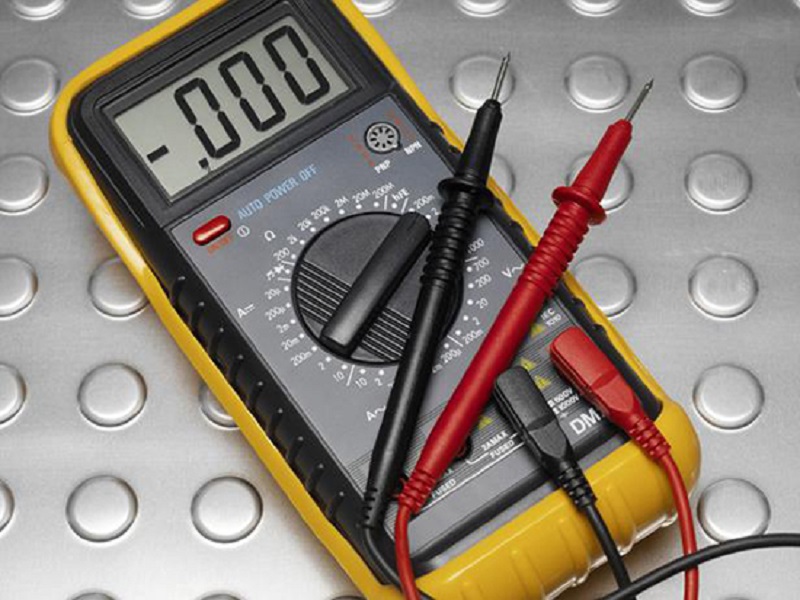
The symptoms of a faulty generator can manifest themselves differently, so it will not be possible to immediately find out what the problem is. First of all, the unstable work of electrical appliances in the car is evidenced by the unit. To make sure that the problem is in the generator, you need to perform a simple check with a voltmeter:
- Run the engine.
- Then connect the voltmeter to the contacts to the battery.
- If at idle the voltmeter shows 13.6-14 volts, and under the conditions of the electrical appliances, the device arrow does not fall below 13.5 volts, the generator operates properly. If the device shows less than 13.2 volts, then the generator requires repair.
Also, the unit is the source of the following problems: the battery does not charge when driving, a strong noise occurs in the generator, the drive belt does not scroll. You can only determine only obvious damage. Repair is the removal of faulty components and the installation of new parts.
Choosing a workplace
Working on the removal of the VAZ 2110 generator is performed on the observation pit or the elake, so that there is access to both the bottom of the vehicle and the incapregious space.
Tools, fixtures, consumables
When removing the generator device, you will need tools and materials:
- The key to "17" mm with the extension.
- The key to "10" mm.
- Screwdriver.
How to remove the 2110 generator (step by step)
Order of work:
- Remove the battery, otherwise it will not allow you to get to the nut holding the generator.
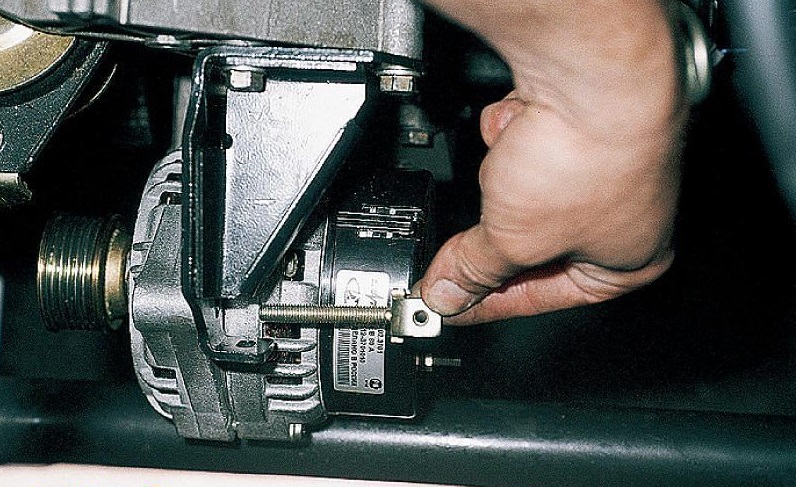
- Then remove the same nut and the regulation bar. Here you will need the key to "17" mm. You can use the extension, which will make it easier for the task, as you have to apply less effort to unscrew the fastener.
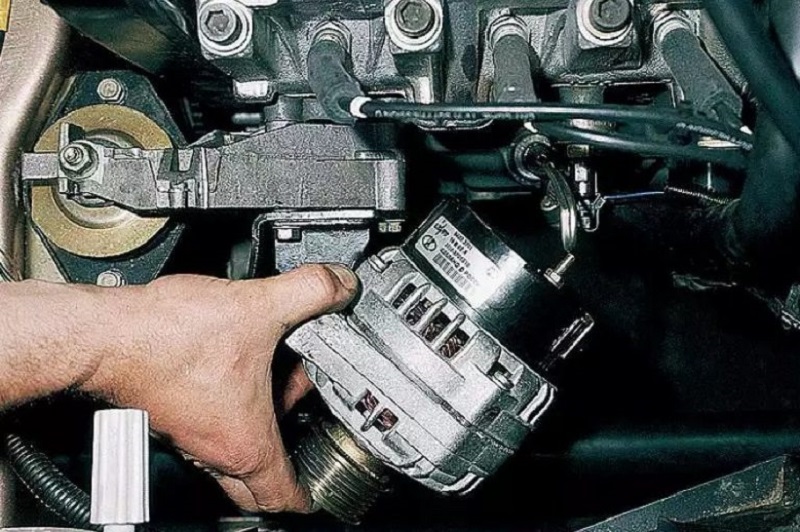
- Under the hood, remove the shield performing the dirt protective functions.
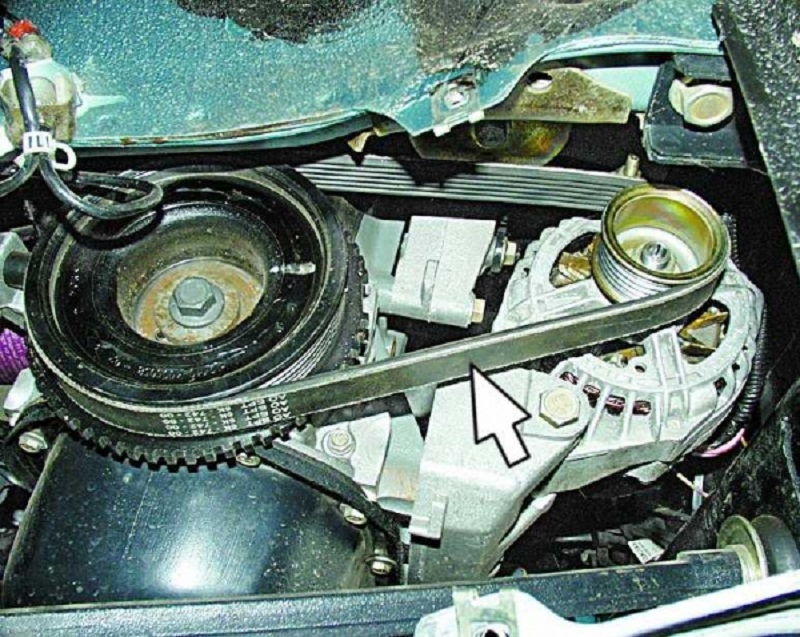
- Remove the drive belt and disconnect the wires.
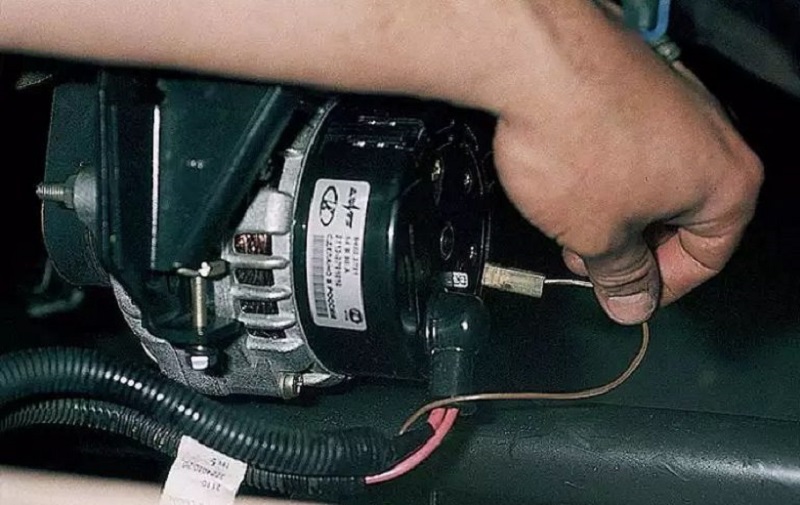
- Next, the protective cap is removed and the nut, holding the tip and the plus wire of the AKB, is unscrewed by 10 mm.
- On the fixing bracket there is another nut, it also needs to be unscrewed.
- Now you can remove the generator, having previously reversed a long bolt.
- When dismantling, do not lose the buffer sleeve.
In what cases generator 2110 need to be changed on a new
Decision on the replacement of the generator is necessary after the fulfillment of its defective (procedure, during which the state of different parts and elements of the unit is carefully studied, and the search for existing damage is performed). After completing the defect, you will understand, you need to change the generator or not. Sometimes it is enough to replace some worn items.
How to check the dismantled generator to pay attention to
When checking the dismantled generator, first of all, pay attention to the belt, because not rarely the belt adjustment allows you to solve the problem with a poorly functioning generating device.
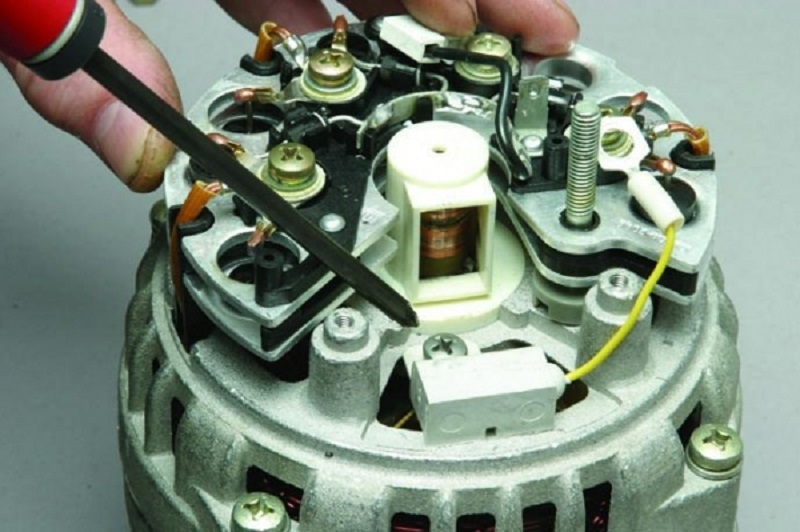
Next, check the generator brushes and the voltage regulator. If these items are worn, it is not recommended to perform their repair. It is better to buy a node assembly, which includes both elements. You can replace such a node in minutes.
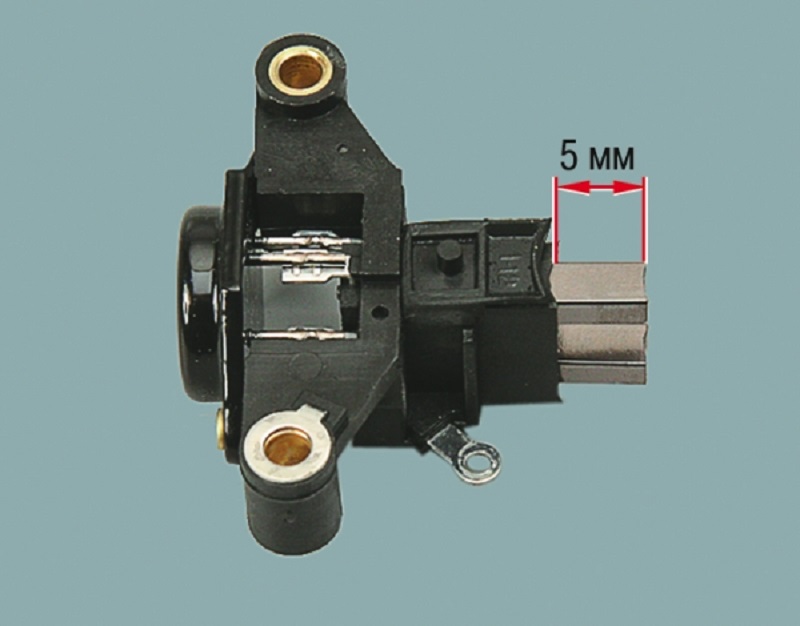
Quite often the cause of the breakdown becomes the generator relay. You can check it as follows:

- Raise the hood.
- Get the engine and turn on the second or third gear.
- Remove the minus terminal from the battery, to avoid short circuit.
- If the motor continues to work after turning off the terminal, then the relay failed.
- If the car turned off, look for a problem in the generator itself.
In what cases is necessary replacement of bearings
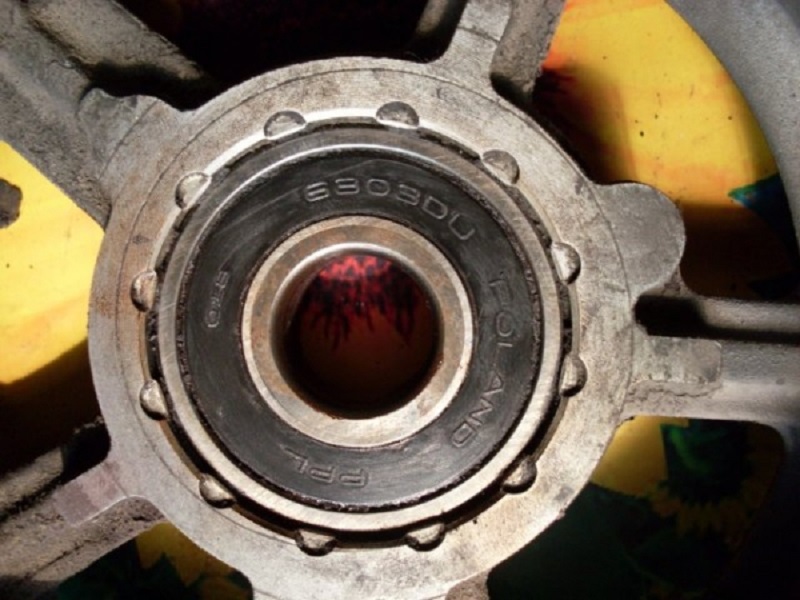
The main sign of the output of the generator bearing is a creaking and howl that you can hear when the generator device is operated. The only right solution is to replace. Howl and creak arise as a result of the fact that in the bearings, or rather, in their separators, lubricant disappears, and the bearings themselves wear out and are destroyed due to long exploitation at high loads.
How to check the generator bearings, to pay attention to

In some cases, the generator comes a thin creaking, which is often confused with the bearings fault. Although in reality it can be a water pump or timing belt roller. To check it, you just need to remove the belt. If the sound remains, it means the culprit is the bearing.
How to replace bearings with your own hands (in detail)
First consider replace front bearing:
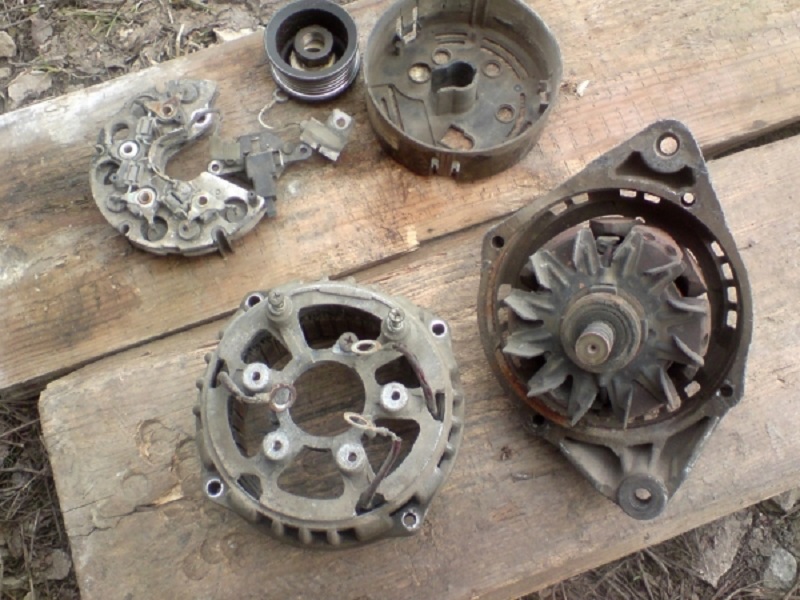
- We unscrew the fastening nut on the generator, and then you need to weaken the adjusting bolt.
- Remove the generator belt and run the engine to make sure that the damage is the generator bearing.
- If the noise is disappeared, removing the minus terminal with the battery.
- We unscrew all the wires that go to the generator.

- Remove the protection of the crankcase to get to the bottom mounting of the generator device and remove it.
- Give the generator through the boom space.
- Using a conventional screwdriver or other undergraduate tool, block the generator rotor, and then unscrew the pulley.
- Tighten the latches to the side and dismantle the device's housing.
- We unscrew the generator brushes and mounting bolts that hold the half of the generator node (4 pieces).
- Flat screwdriver way the lid and remove it.
- From the front cover bearing, remove the rotor, for which we take the nut and screw the rotor on the thread. Next, we hit the hammer on it, substituting the wooden bar.
- We find the part, the diameter of which coincides with the bearing diameter. For example, a 27 mm head is suitable.
- Touch carefully by the details so that the bearing is out of its landing place.
- Take a new bearing and lubricate it with lubricant.
- To install the new bearing you will need old. We put it on top of the new and light blows with a hammer in installing.
Now go to K. replace rear bearing:
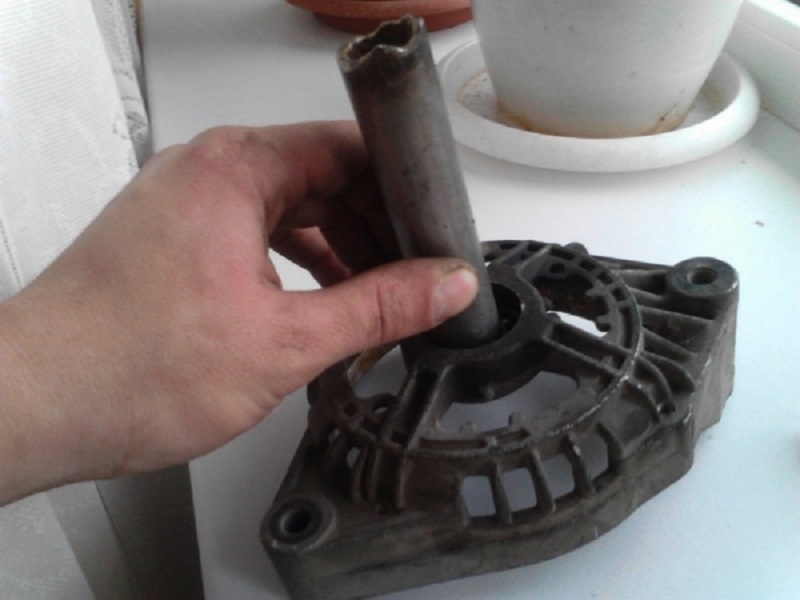
- To dismantle this item you will need a special puller.
- If the puller is missing, select the component of the chisel. An alternative option is a metal rod and a strong screwdriver.
- Using the selected tool and hammer, select the bearing. Be sure to move on the surface in the opposite direction.
- You can also dismantle the bearing using the usual horn key.
- Now we take the old bearing and the head, with the help of which the front bearing was shot. With their help, score a new bearing in your place.
- If this method does not suit you, use a tubular key or a metal pipe, the diameter of which corresponds to the diameter of the rear bearing.
Tips Prof.
It remains only to assemble the node in the reverse order. Start from the front cover of the generator device. At the end of the replacement, check the car for noise.
Related Materials
- Stove 2110, bad warm stove 2110, VAZ 2110 heating system, repairing the heating system VAZ 2110 with their own hands
- VAZ 2114 stove blows with cold air, stove 2114, bad warm stove VAZ 2114, device and repair of heating VAZ 2114 do-it-yourself, removing the stove VAZ 2114
- How to subdominize the car. How to put a jack. Types of jacks for cars.
- VAZ 2109 Fuse Block, VAZ 2109 Fuse Block Carburetor, VAZ 2109 Fuse Block Injector, Old VAZ 2109 Fuse Block, VAZ 2109 Fuse Block, VAZ Fuse Block 2109
- Car exhaust gas catalyst, faulty catalyst, pluses and cons of the catalyst, how to change the catalyst on the planeencitel
- Stove blowing cold air VAZ 2114, badly blowing the stove VAZ 2114, why badly blowing the stove VAZ 2114
- How to find out the owner of the car by the number of his car, check the car by the number of the traffic police machine, check the car by the state number of the car for free
- How to choose Used tires, Useful Tips
- Winter car road, pressure in passenger car tires in winter, good battery for the car in winter, whether to warm the car in winter
- In winter, the car is poorly started. How to make a car in winter, do you need to warm up the car in winter, useful tips
- Economy fuel consumption machines, the most economical car consumption
- Tires brands for passenger cars, labeling of car tire labeling, residual passenger car tire protector, how to pick a tire on a car brand, car tire tread pattern
- Working transmission operation, mechanical gearbox clutch work, driving with manual gearbox, useful tips
- Rear beam Peugeot 206 sedan, rear beam device Peugeot 206. Rear beam Peugeot 206 Malfunction, repair of the rear beam Peugeot 206
- Diesel fuel in winter, additive for diesel fuel in winter, how to choose the best diesel fuel
- Diesel winter does not start. How to start diesel in winter, heating diesel in winter.
- Japanese bridgestone tires, winter studded bridgestone tires, bridgestone tires brand
- Tire marking decoding for passenger cars, labeling wheels, how to choose the right tires on the disks
- Diesel engine in winter, launch of the diesel engine in winter, what oil to fill in a diesel engine in winter, useful tips
- LED backlight of the car, the backlight of the bottom of the car, the backlight of the legs in the car, the backlight in the door of the car, the backlight of the car is fine
- Recovered tires, bus tire, restored tire protector, can I use them
- Choose winter tires, which is a winter tires, which pressure in winter tires should be marked with winter tires, how to choose the right winter tires, the best winter tires 2019
- Steering rail rail, knock of steering rack, reasons for the knock and repair of the steering rack do it yourself
- Cameless car tires, a set for repair of tubeless tires, repair of the cannon-free tire do it yourself
- Russian tires, Russian tires Winter, Russian All-season tires, Voronezh AMTEL tires, Tires "Matador Omsk Tire", Kama-tires are world-class bus
- How to open a car without a key. Lost the key from the car what to do, the key from the car inside the car
- Silent tires, quiet winter tires, quiet studded bus, which tires to choose, overview tires
- Tires and safety, safety of the bus, why it is necessary to constantly monitor car tires
- Rules of safe driving of the car in the rain and slush, safe driving of the car for beginners
- Rust converter which is better for cars, rust converters to choose how to use rust transducer, professionals
- Polishing the body of the car do it yourself, how to choose a polishing paste, useful tips
- Engine durability, engine life, how to extend engine life
- Knock in the car. Knock when moving the car. What can knock in the car. How to determine the cause of the knock.
- ABS car, what is ABS car, ABS system malfunction, ABS diagnostics
- Overtaking a car when you can start overtaking a car, rules of traffic rules
- Fuel pump VAZ 2110, VAZ 2110 gas station scheme, VAZ 2110 fuel pump device, VAZ 2110 gas station repair,
- Automotive antennas for radio, automotive antenna device, car antenna do it yourself
- Front suspension Kalina, device front suspension Kalina, knock in front suspension Kalina, repair of front suspension Kalina
- Shock absorber Oil, best oil shock absorbers, pumping oil shock absorbers, how to properly pump oil shock absorber
- Clutch malfunctions, touches clutch, causes a clutch malfunction, how to eliminate


Comments