VAZ 2106 cars were produced by Volzhsky autoconecern in 1976-2006. Until the end of the 20th century, they were equipped with gasoline carburetor motors with a working volume of 1100-1600 cm³. It is worth noting that the fuel system "Sixters" included several different carburetrators, the most popular was the carburetor DAAZ 2107 "Ozone", which ensured the maximum efficiency when driving in all modes. However, this unit also had disadvantages, such as low reliability and a strange method of opening a second chamber. The main malfunctions of this device are due to the clogging of the jet channels as a result of late replacement of the cleaning component of the air filter and the use of poor-quality gasoline, breakage of springs and gaps of the diaphragm. About this further in the article.
Content
- Carburetor 2106, device and principle of operation
- Types of carburetors for VAZ 2106
- What carburetor is better for VAZ 2106
- Signs of carburetor problems 2106
- Tools, fixtures, consumables
- How to disassemble and eliminate carburetor problems 2106 (step by step)
- Carburator adjustment: installation of fuel level
- Adjusting idling
- Final checking carb adjustment 2106
- Tips Pros: Valve adjustment, ignition, carburetor - Pledge of good engine operation
Carburetor 2106, device and principle of operation
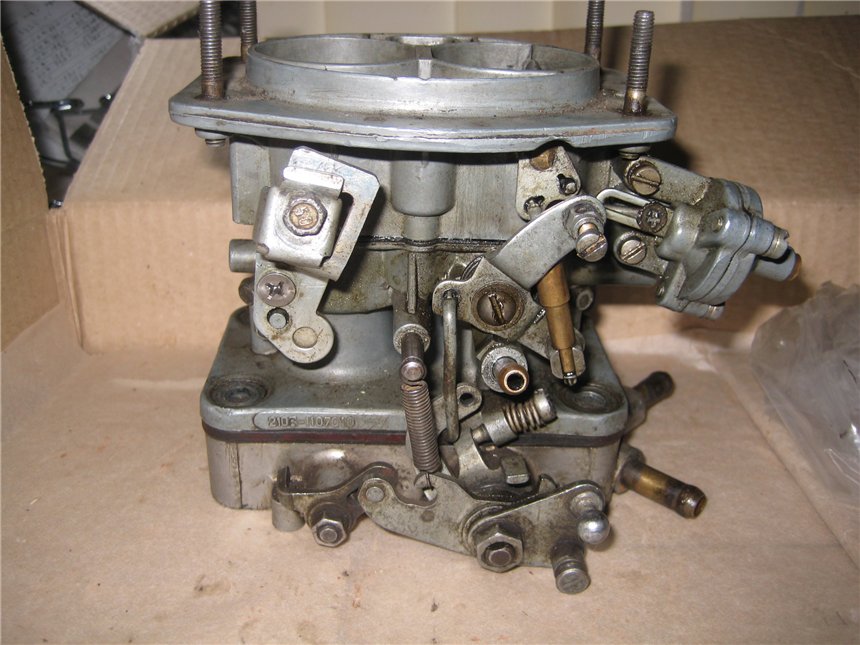
The type of this carburetor is emulsion. Fuel enters the carburetor through a needle valve and a special mesh filter. The valve binds to the float through the cable, which makes it possible to maintain a combustible level in the float chamber at the required level. Through fuel jets, fuel from the float chamber enters emulsion tubes and wells, where it is mixed with air, which comes through air jets. Next, the resulting mixture is entered into large and small diffusers. Then the emulsion is fed to the hole, overlapped by the needle of the screw screw, here it is additionally mixed with air. After that, the mixture falls into the inlet pipeline.
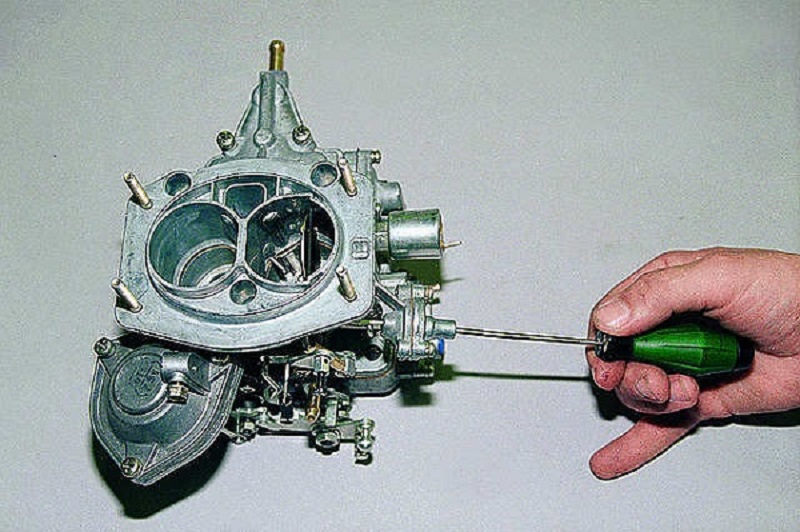
The main feature of the design of the carburetor on the VAZ 2106 is the presence of two devices that do not depend on each other. The first of them functions at idle (it consists of vacuum and electrovacuum valves equipped with air and fuel jams). The second is two cameras, beginning to function when opening a throttle damper, that is, when you press the gas pedal.
And although both systems are functioning independently, the composition of the mixture in them depends on the level of fuel, which is located in the float chamber. Consequently, changing the fuel level directly affects the operation of the systems, since their adjustment is disturbed - the motor often functions at idle and it is impossible to accurately set the turns of the XX.
Types of carburetors for VAZ 2106
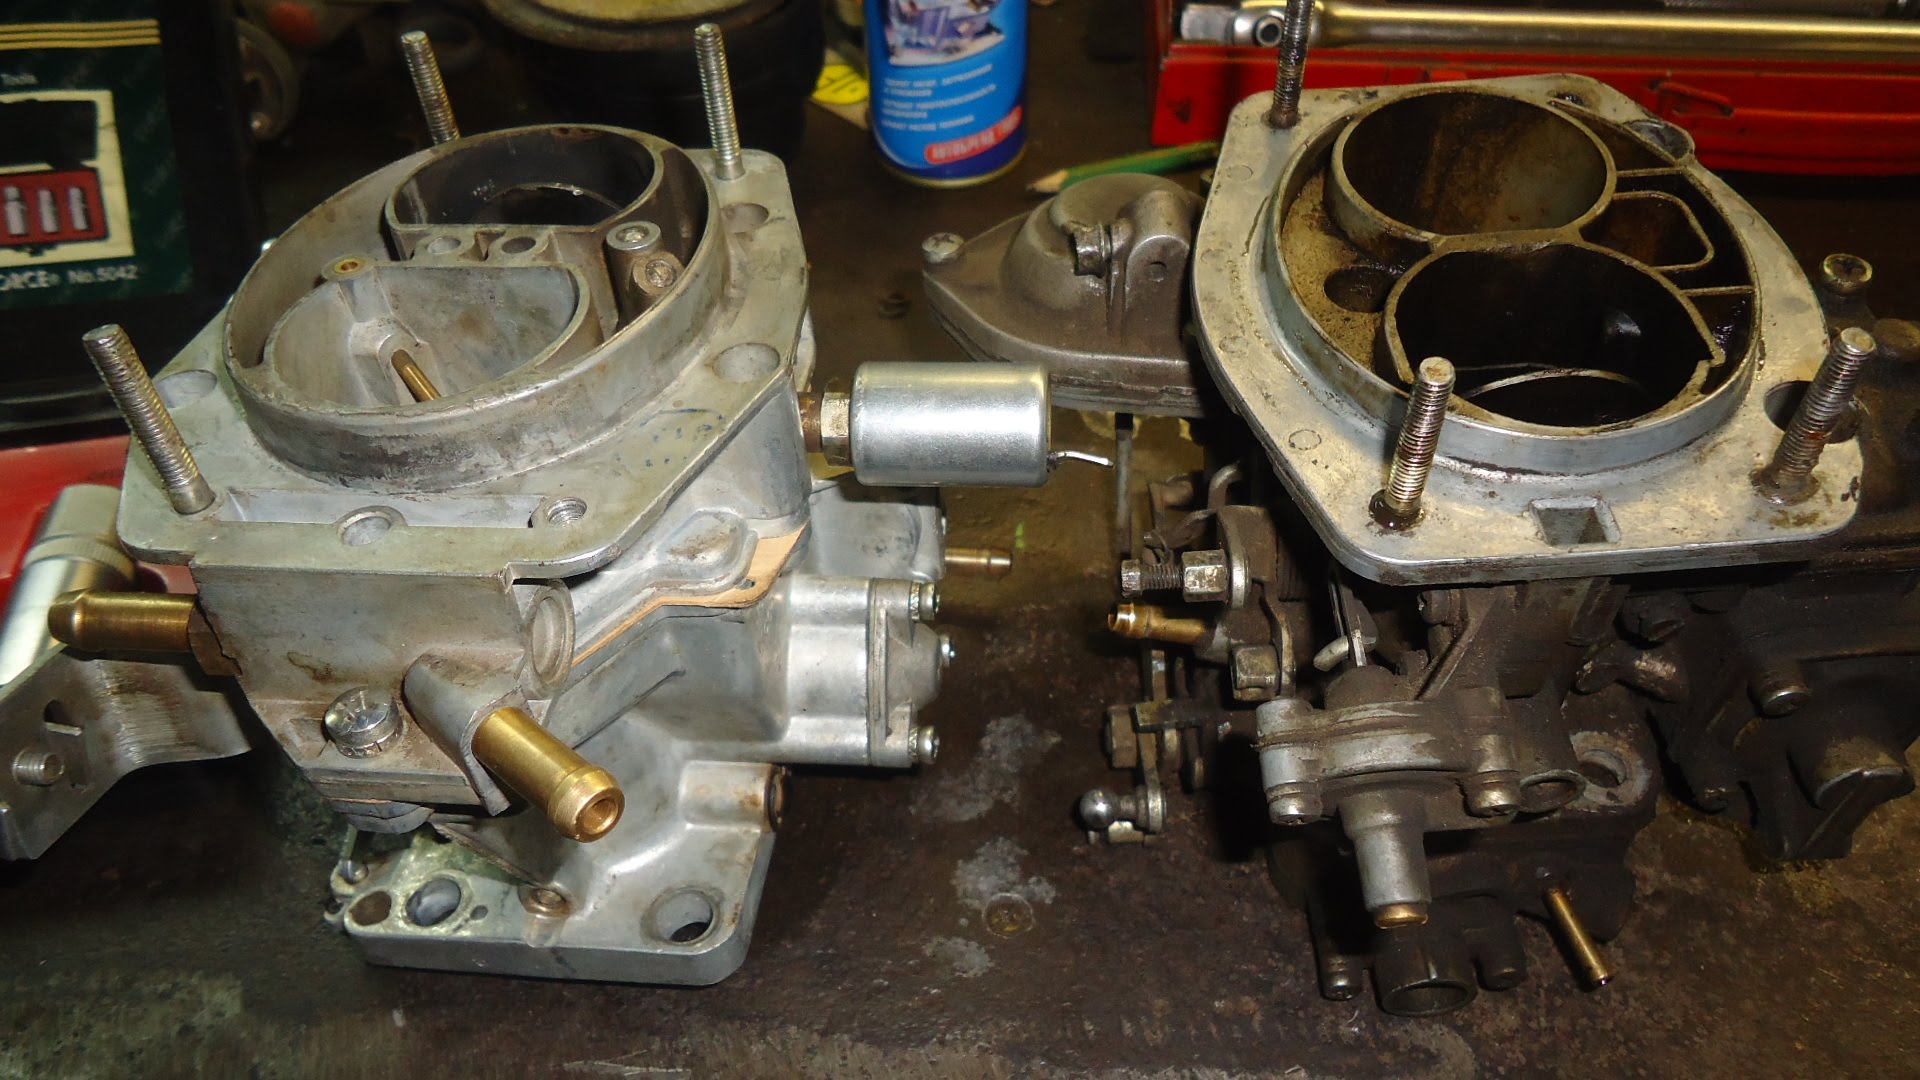
On the conveyor on the "six" installed five types of carburetors:
- DAAZ 2106-1107010. Mounted with 1.6-liter DVS on TS, released until 1980.
- DAAZ 2103-1107010 "Weber".Installed with 1.5-liter motor engines released until 1980.
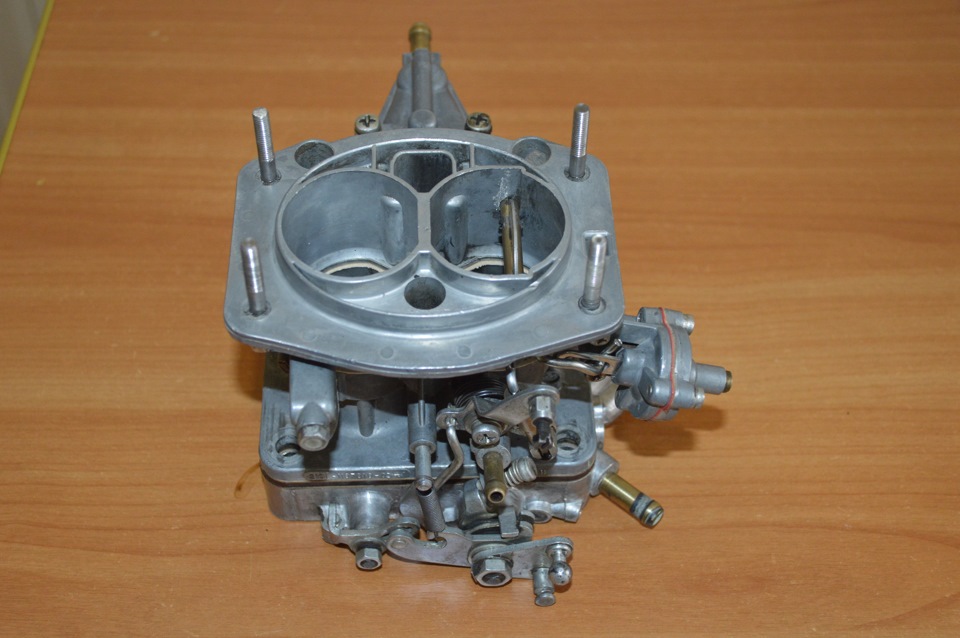
- DAAZ 2105-1107010-20 "Ozone". Mounted with 1.1-1.3-liter DVS on cars released in 1980-1991.
- DAAZ 2107-1107010-20 "Ozone". Mounted with 1.5-1.6-liter DVS on cars produced in 1980-1991.
- DAAZ 21053-1107010 "Solex".Installed on all cars from 1991 to the end of the 90s.
The first two types of carburetors can be distinguished from other units in the absence of a nozzle - a thin black or yellow hose from the carburetor to the traver - the hose of the vacuum corrector angle of the ignition advance is put on it.
You can distinguish the "ozone" from other types of devices by the "flying plate" - a pneumatic actuator in the opening of the second chamber. If there is no nozzle for the hose of the vacuum corrector, and there is a "flying plate", it is a carburetor device DAAZ 2107-1107010-10. This unit is quite rare, mounted only at a hundred to replace the first two types of devices after their breakdown.
What carburetor is better for VAZ 2106
Since the carburetors of the Solex family and Weber families were completely copied with foreign production analogs, their reliability is not subject to doubt. It is enough to regulate and clean these aggregates every 60 thousand km of run, and there will be no problems with the fuel supply in your car's engine.
But the most popular are the devices of the Ozone family. They must be adjusted and cleaned twice as often. In addition, there are many different diaphragms in them that are often rushing. The most frequent breakdowns of the melon aggregates are not a complete opening of the second chamber and the malfunction of the accelerator pump.
Signs of carburetor problems 2106
Symptoms of the most common breakdowns:
- Cotton while pressing the accelerator pedal, as if she shoots a carburetor.
- The same cotton, but already shoots the muffler.
- The car is thinking long during a ride on the highway. During pressing the gas pedal, the auto accelerates too slowly or not accelerates at all.
- Turns at idle float: they are too low, then too high.
- During switching to 2 or 3, the transmission and pressing on the accelerator pedal, the car first slows down, and then makes a jerk forward, dramatically gaining momentum.
The breakdowns that are listed in the first and second paragraphs appear as a result of detonation - fuel mixture microwaves. If detonation occurs in the silencer, then the fuel mixture is too rich, there is very little air in it. If detonation in the intake manifold, the combustible mixture is too poor, there is little gasoline in it and too much air.
The symptom described in paragraph 3 indicates a malfunction of the drive of the second chamber. Eliminated by replacing broken elements.
The situation described in 4 points indicates the need to adjust the idling.
The symptom described in 5 point indicates a breakdown of the accelerator pump - the spring replacement is needed or a diaphragm.
Tools, fixtures, consumables
To disassemble and repair the carburetor, you will need such tools:
- Flat screwdriver.
- Cross screwdriver.
- Passatia.
- Hammer.
- The key to "19".
- The key to "13".
- The key to "10".
- Knife.
In addition, you will need a thin beard or a mandrel with a length of 40 mm and a diameter of about 2-2.3 mm to discharge the axis of the float from the carburetor cover bracket.
How to disassemble and eliminate carburetor problems 2106 (step by step)
All work with the carburetor must be carried out on a clean workbench. Details removed from the carburetor should be laid so that when assembling do not confuse them. Order of work:
- We move up the lower link of telescopic thrust, overcoming the spring force, and disconnect from the three-dealer lever.

- We turn out the five fastening screws of the carburetor cover, and remove it. At the same time, try not to damage the float and gasket. If the gasket sticks to the carburetor body, separate it with a knife blade from the housing, slightly lifting the lid. We turn the carburetor cover and pour the screws from the covers of the cover in the hand.

- After removing the cover, we immediately turn it up with the float up and put on the table in this position, so as not to bend the adjusting trading tongue and not damage the float itself.
- We disconnect the telescopic craving, for which turn it in such a way that the protrusion on the thrust and the groove of the hole in the lever coincided.
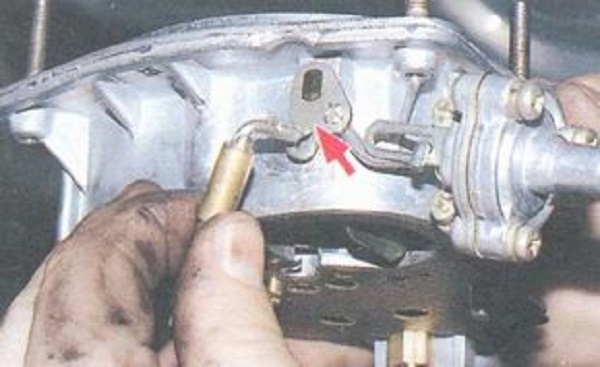
- We turn the fuel filter fastener and ...
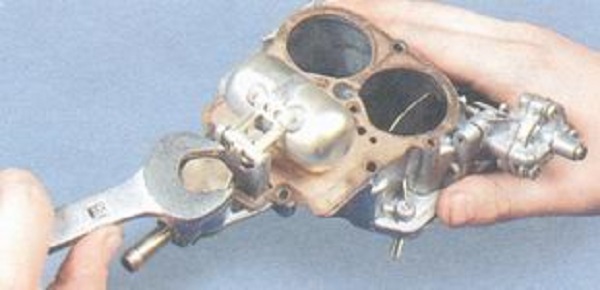
- ... We take out the fuel filter from the fuel accepted cavity.
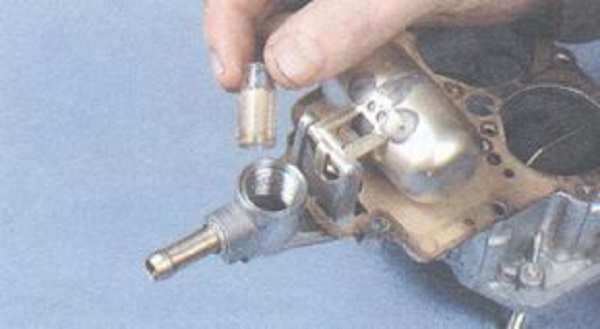
- Remove the starting device from the carburetor lid. To do this, turn the two fastening screws of its housing.

- Disconnect the launching device from the cover. Next, by deploying a device for 90 degrees, disconnect it from the thrust, withdraw from the groove of the diaphragm rod.

- Climbing a screwdriver, remove the sealing ring of the starting device from the jack of the carburetor cover.

- If you need, disassemble the starting device, turning the three fastening screws of its covers.

- Disconnect the lid and the trigger case.

- We take out a diaphragm with a cardboard gasket (in the photo) from the housing. When sticking the diaphragm to the housing, we carefully separate it with a knife blade.

- From the cover of the starter, we take a spring.

- We turn out the plug of the threaded hole, where the adjusting screw is installed.

- Turn the adjusting screw from the lid.

- Rack axis float with a tubular stand, and then with light blows with a hammer on the beard weigh the axis of the float of approximately five millimeters.

- Passages take out the axis holding the float.

- Take out the float with a stop needle.

- Disconnect the float and shut-off needle, removing the bracket with the bracket of the wireless needle.

- We remove the gasket from the carburetor covers.

- Turn the fuel valve saddle, and then remove the sealing puck of the saddle from the cover.
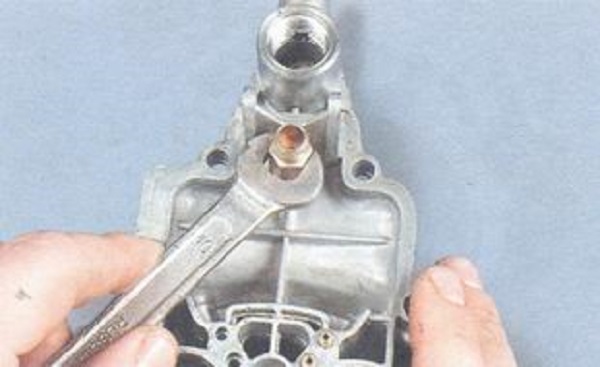
- To remove the axis of the air damper, we turn the two valve fastening screws, the opission of their eliminated ends. Next, take out the damper from the axis slot, placing its position so that in the future it is properly installed. Now the axis can be easily removed from the carburetor cover.

- From the lever pin, disconnect the pneumatic excavation rod on the axis of the flap of the 2nd combustion chamber. To do this, take a lock washer from the pole of the pin and ..

- ... Remove the pneumatic rod from the pin.

- We turn the two screws that are fastening the body of the pneumatic actuator to the carburetor, and remove the pneumatic excavation with the gasket.

- Turn the three fastening screws of the pneumatic cover.

- Disconnect the lid of the pneumatic actuator with the housing and remove the recovery spring of the diaphragm, as well as the diaphragm with the rod.

- Carefully catching a screwdriver, take out the sealing ring from the housing groove.

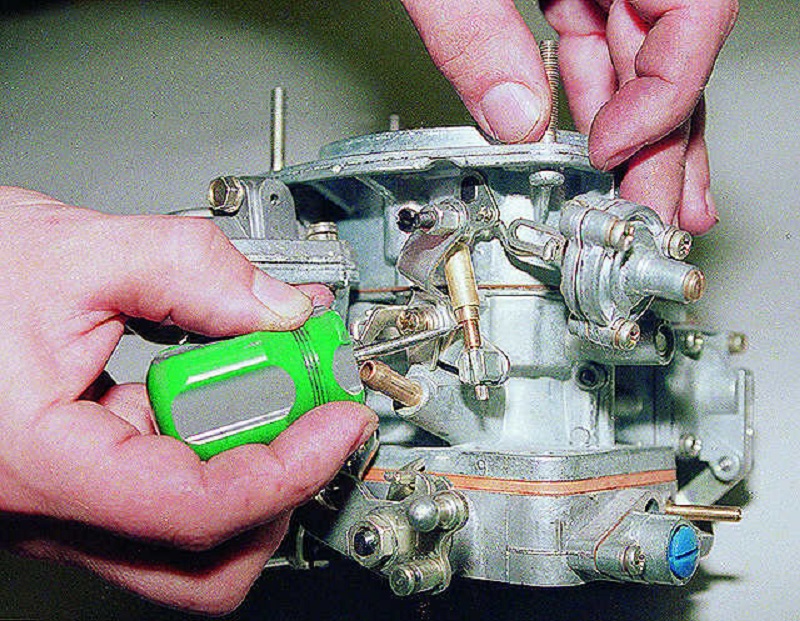
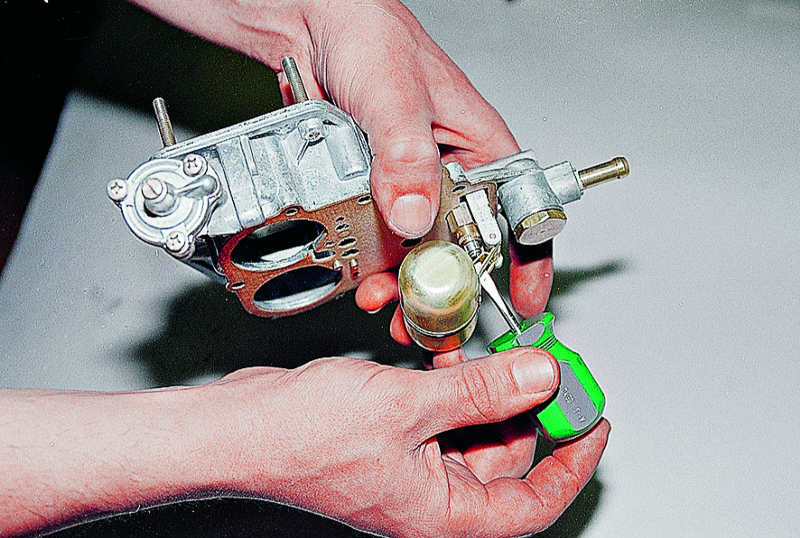
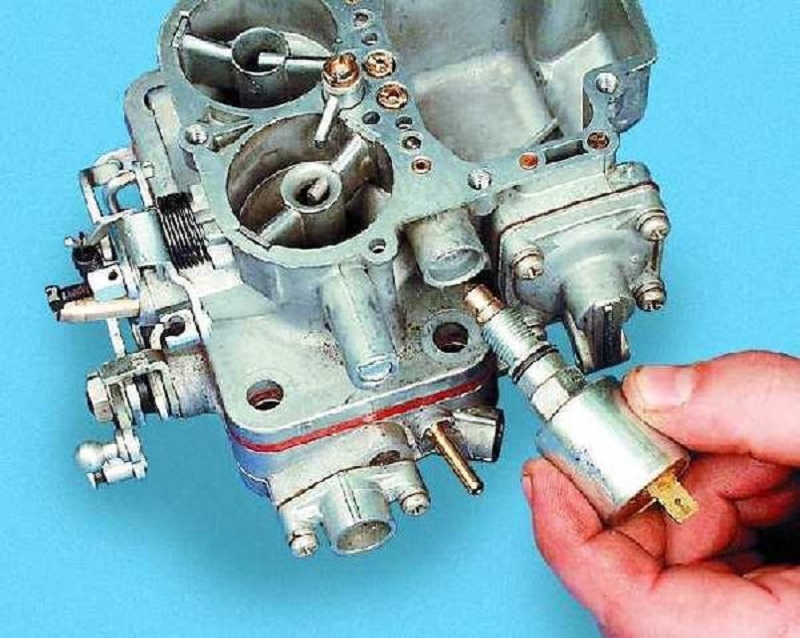
- We relax the tightening of the electromagnetic valve XX and turn out from the carburetor body the valve with fuel jam.

- From the housing of the electromagnetic valve, we remove the fuel buster XX (1) and remove the sealing ring (2). You can remove the fuel jagher with passups, wrapped with a strip of paper belt Zhikler.

- Soak fuel feeding valve screw-screw accelerator pump sprayer.

- Remove the accelerator pump sprayer with an upper sealing washer and valve screw.

- From the housing groove, we take out the lower sealing washer of the accelerator pump, or rather its sprayer.

- Soak the main air jaw 1st camera.

- We take out the emulsion tube of the 1st camera, hooking it with a crochet. You can make a hook from the stationery clips or wire of a suitable diameter. If the emulsion tube, as a result of a large number of pollution sits very tightly in the well and remove it with the help of the hook, it is not possible to screw the self-tapping screw into its central channel and remove the tube, ticking the screw head.

- Turn out from the wall of the float chamber the main fuel jammer of the 1st chamber of the carburetor.

- Soak the main air jaw 2nd cameras and ...

- ... take out the emulsion tube of the 2nd camera. As a rule, the emulsion tube of the 2nd camera is removed easily, since this chamber during operation works significantly less, which is why fewer deposits accumulates in the emulsion well of this chamber.

- Soak the main fuel jammer 2nd camera.

- Climbing the screwdriver, we move up a small diffuser of the 1st chamber and take it out of the housing, overcoming the plot of the clamps.
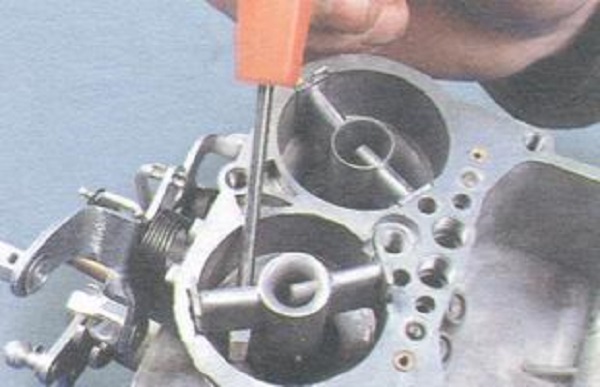
- Similarly, remove the small diffuser 2nd camera.
- Soak the fuel oil body of the transition system of the 2nd camera and remove it with the jibr. When need, remove the fatter from the housing as well as it was done for the fuel gibber XX.

- Turn the adjusting screw of the supply of the accelerator pump.

- We turn over the four fastening screws of the accelerator pump cover.

- Remove the lid along with the diaphragm and lever of the drive.

- Remove the return spring of the pump diaphragm.

- We turn over the two fastening screws of the screws of the adjustment of the amount of the mixture of the XX system and remove the sleeve together with the sealing gasket and the screw.

- Remove the gasket and ...

- ... and turn out the adjusting screw of the amount of the mixture with the sealing ring from the sleeve.

- Turn the adjusting screw quality of the mixture of the XX system and remove it along with the sealing ring.
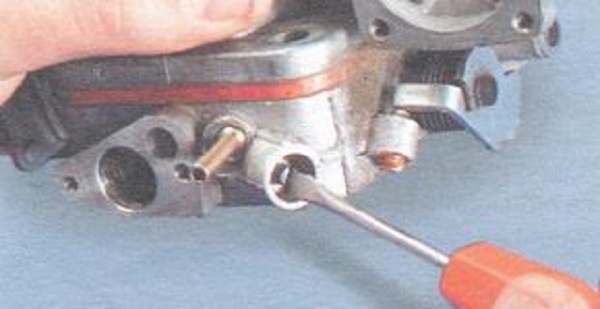
In most cases, further disassembly of the carburetor is not required, since it can be thoroughly rinsed with a non-disassembled throttle housing. The elements of the lever mechanism, the axis of throttle dampers and the flaps themselves can be removed on the non-disassembled carburetor. The need to disconnect the throttle housing appears, as a rule, to replace the damaged heat-insulating gasket or the case itself assembly.
Carburator adjustment: installation of fuel level
The level of fuel in the float chamber affects the composition of the mixture at any mode of operation of the carburetor, the toxicity of exhaust gases, the dynamics of the engine and the fuel consumption. Order of work:
- Unscrew the fastening screws of the carburetor cover and install it in a vertical position. The prerequisite for its installation is a light contact of the tray of the float and the needle ball.
- Special caliber Measure the gap between the lower surface of the float and the plane of the lid (given the cardboard gasket). It is important that the magnitude of the gap is 6.5 + 0.25 mm.
- If the magnitude of the gap is inconsistent, the magnitude is adjusted by sweeping the trading of the float.
- At the end, check the magnitude of the float, which should be 8.0 + 0.25 mm.
adjusting idling
Preparation for idling adjustment:
- Wipe the motor to + 90 * s.
- If the engine does not start, achieve the start and stable functioning of the power unit by rotating the "quantity" and "quality" of the fuel mixture.
Hope adjustment:
- Rotating the screw that adjusts the "number" of a combustible mixture, set the rotational speed of the crankshaft 820-900 rpm.
- Rotating a screw that defines the "quality" of a combustible mixture, achieve stable engine operation. Next, by screwing the screw, reduce the speed to destabilize the operation of the motor, and then increase the speed again. The purpose of the manipulation data is to install the "quality" screw to the position that ensures the sustainable functioning of the internal combustion engine at the lowest oil mixture.
- Fallen revolutions increase the "quantity" by the adjusting screw and repeat the manipulation with this adjusting screw.
- Perform several times the adjustment data.
Final checking carb adjustment 2106
To check the adjusted adjustments, start the power unit and check the performance of the motor at idle. The engine should not "TROL". During the sharp presses or release of the accelerator pedal, there should be no "failures". Otherwise you need to unscrew the screw of the "quality" slightly.
With a sharp braking, DVS should not blame. But if this happens, you also need to unscrew the adjusting screw "quality", which will enrich the quality of the fuel mixture.
Tips Pros: Valve adjustment, ignition, carburetor - Pledge of good engine operation
Adjusting the carburetor provides the correct operation of the motor, allows you to adjust the fuel consumption and increase the productive power of the engine. The carburetor is responsible for mixing air and fuel, which after that is fed into the combustion chamber. Therefore, if the fuel-air mixture will have incorrect proportions, this will lead to unsatisfactory operation of the engine.
Related Materials
- Stove 2110, bad warm stove 2110, VAZ 2110 heating system, repairing the heating system VAZ 2110 with their own hands
- VAZ 2114 stove blows with cold air, stove 2114, bad warm stove VAZ 2114, device and repair of heating VAZ 2114 do-it-yourself, removing the stove VAZ 2114
- How to subdominize the car. How to put a jack. Types of jacks for cars.
- VAZ 2109 Fuse Block, VAZ 2109 Fuse Block Carburetor, VAZ 2109 Fuse Block Injector, Old VAZ 2109 Fuse Block, VAZ 2109 Fuse Block, VAZ Fuse Block 2109
- Car exhaust gas catalyst, faulty catalyst, pluses and cons of the catalyst, how to change the catalyst for the planeencitel
- Stove blowing cold air VAZ 2114, badly blowing the stove VAZ 2114, why badly blowing the stove VAZ 2114
- How to find out the owner of the car by the number of his car, check the car by the number of the traffic police machine, check the car by the state number of the car for free
- How to choose Used tires, Useful Tips
- Winter car road, pressure in passenger car tires in winter, good battery for the car in winter, whether to warm the car in winter
- In winter, the car is poorly started. How to make a car in winter, do you need to warm up the car in winter, useful tips
- Economy fuel consumption machines, the most economical car consumption
- Tires brands for passenger cars, labeling of car tire labeling, residual passenger car tire protector, how to pick a tire on a car brand, car tire tread pattern
- Working transmission operation, mechanical gearbox clutch work, driving with manual gearbox, useful tips
- Rear beam Peugeot 206 sedan, rear beam device Peugeot 206. Rear beam Peugeot 206 Malfunction, repair of the rear beam Peugeot 206
- Diesel fuel in winter, additive for diesel fuel in winter, how to choose the best diesel fuel
- Diesel winter does not start. How to start diesel in winter, heating diesel in winter.
- Japanese bridgestone tires, winter studded bridgestone tires, bridgestone tires brand
- Tire marking decoding for passenger cars, labeling wheels, how to choose the right tires on the disks
- Diesel engine in winter, launch of the diesel engine in winter, what oil to fill in a diesel engine in winter, useful tips
- LED backlight of the car, the backlight of the bottom of the car, the backlight of the legs in the car, the backlight in the door of the car, the backlight of the car is fine
- Recovered tires, bus tire, restored tire protector, can I use them
- Choose winter tires, which is a winter tires, which pressure in winter tires should be marked with winter tires, how to choose the right winter tires, the best winter tires 2019
- Steering rail rail, knock of steering rack, reasons for the knock and repair of the steering rack do it yourself
- Cameless car tires, a set for repair of tubeless tires, repair of the cannon-free tire do it yourself
- Russian tires, Russian tires Winter, Russian All-season tires, Voronezh AMTEL tires, Tires "Matador Omsk Tire", Kama-tires are world-class bus
- How to open a car without a key. Lost the key from the car what to do, the key from the car inside the car
- Silent tires, quiet winter tires, quiet studded bus, which tires to choose, overview tires
- Tires and safety, safety of the bus, why it is necessary to constantly monitor car tires
- Rules of safe driving of the car in the rain and slush, safe driving of the car for beginners
- Rust converter which is better for cars, rust converters to choose how to use rust transducer, professionals
- Polishing the body of the car do it yourself, how to choose a polishing paste, useful tips
- Engine durability, engine life, how to extend engine life
- Knock in the car. Knock when moving the car. What can knock in the car. How to determine the cause of the knock.
- ABS car, what is ABS car, ABS system malfunction, ABS diagnostics
- Overtaking a car when you can start overtaking a car, rules of traffic rules
- Fuel pump VAZ 2110, VAZ 2110 gas station scheme, VAZ 2110 fuel pump device, VAZ 2110 gas station repair,
- Automotive antennas for radio, automotive antenna device, car antenna do it yourself
- Front suspension Kalina, device front suspension Kalina, knock in front suspension Kalina, repair of front suspension Kalina
- Shock absorber Oil, best oil shock absorbers, pumping oil shock absorbers, how to properly pump oil shock absorber
- Clutch malfunctions, touches clutch, causes a clutch malfunction, how to eliminate







Comments