VAZ 2107 is one of the most popular representatives of the domestic classics. And although such sedans are not released in our time, they actively exploit many motorists. The carburetor setting is one of the most pressing issues for the owners of the VAZ 2107.
Content
- Carburetor VAZ 2107 Device
- Carburetor VAZ 2107 Principle of operation
- Place of installation of carburetor VAZ 2107
- Causes of carburetor fault
- Signs of carburetor malfunction
- Tools, fixtures, consumables
- How to remove the carburetor with your own hands (step by step)
- How to disassemble and clean the carburetor
- How to remove the accelerator pump
- Adjusting the float chamber
- How to check the mesh filter
- Installation of the carburetor VAZ 2107
- How to adjust the carburetor
- How to adjust idle vases 2107
- Tips Prof.
Carburetor VAZ 2107 Device
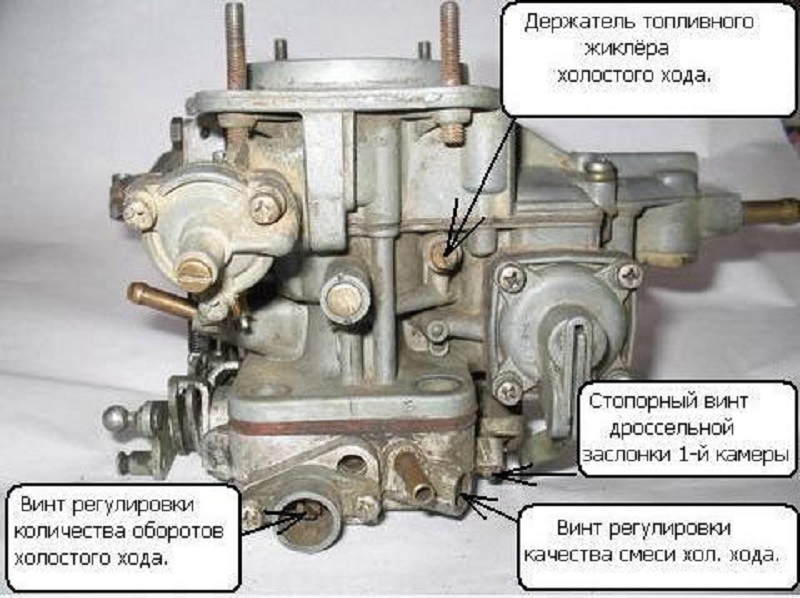
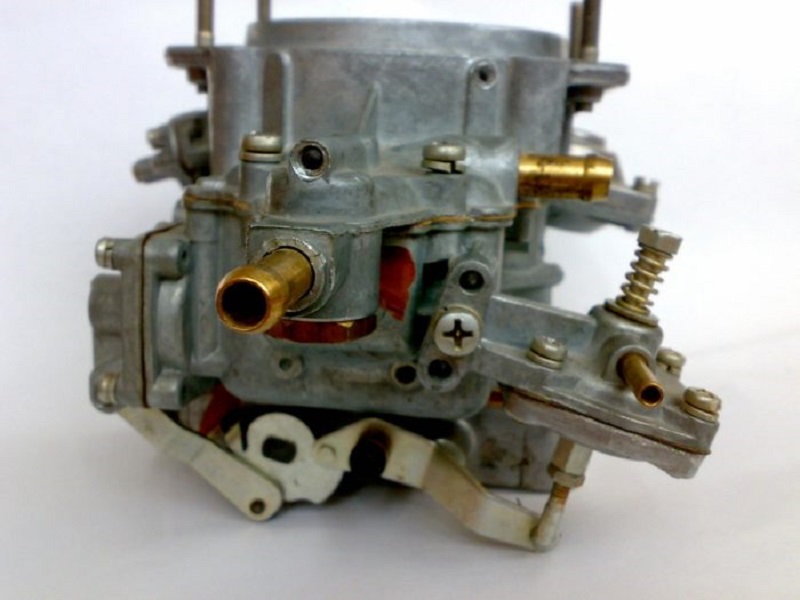
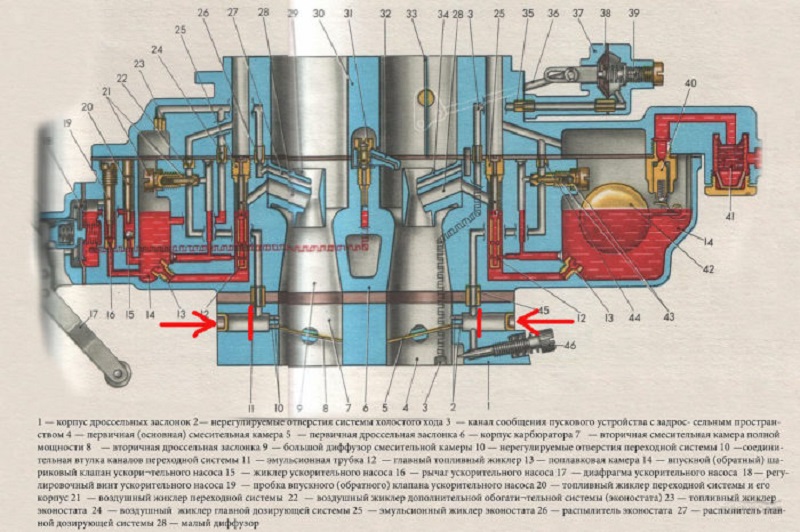
On all domestic cars, as you know, have always been standing and now standing regular carburetors Ozone, Weber and Solex. They are in demand today. On the "seven" there is a float carburetor, as a rule, the company Ozone. So, the scheme of the knotting of the carburetor "Sevenki" consists of:
- Econostat.
- Dosing systems.
- Throttle.
- Autonomous XX system.
- Cartry gases removal compartment.
- Float Camera.
- Transition system of two cameras.
- Shock valve XX.
Carburetor VAZ 2107 Principle of operation
The principle of the carburetor is simple. Its problem is based on the creation of an air-fuel mixture, mixing air and fuel in the desired proportions, after which this mixture enters the combustion chamber, where its ignition occurs. The composition of the carburetor "Sevenki" includes the following devices that ensure the distribution of the fuel mixture:
- Support for the XX engine.
- Acpercerative pump.
- Support stable fuel level.
- Eco-status system.
- Start and warm-up support.
- The main dosing chamber where air and fuel jets are located, diffuser, well, VTS sprayer, emulsion tube.
Place of installation of carburetor VAZ 2107
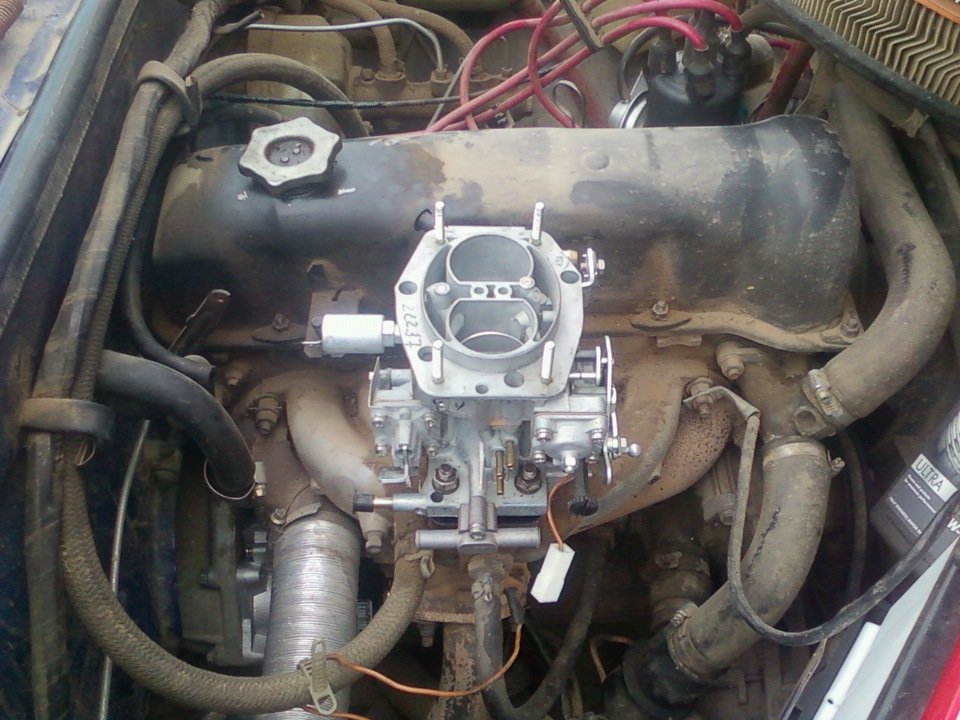
The carburetor on the "seven" is in the rotor space, slightly above the engine, on the intake manifold.
Causes of carburetor fault
The main causes of faults:
- Clogging of jets.
- Details and knots of the carburetor are outdated, as a result of which changes occurred in the composition of the mixture supplied.
- The adjustments of the carburetor changed or it is incorrectly configured, which causes changes in sections and contamination of calibrated holes.
- The carburetor is incorrectly adjusted or faults have appeared that are caused by incorrect assembly or poor-quality repairs.
Signs of carburetor malfunction
The main signs of faults:
- Stall engine
- Distribution at the guards.
- All sorts of "failures", "jerking", "jerks" when pressed for a gas pedal.
- The sluggish capacity of the vehicle to overclocking.
- Increase fuel consumption.
Tools, fixtures, consumables
- Crosshead screwdriver.
- Split screwdriver.
- Horn keys.
- Caucasics.
How to remove the carburetor with your own hands (step by step)
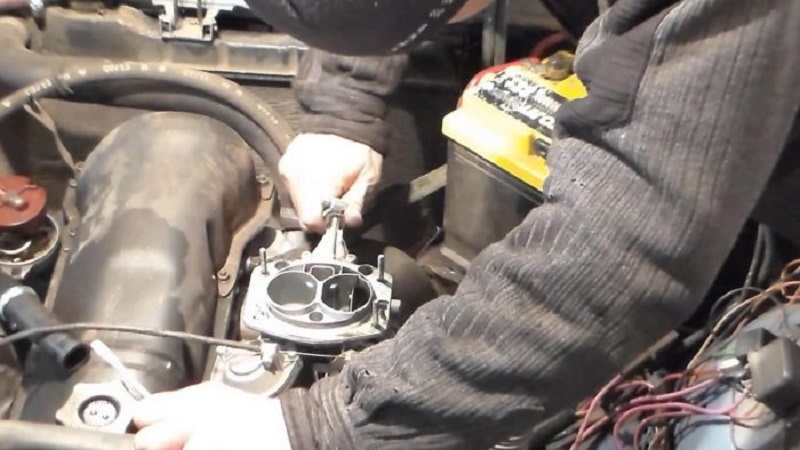
- First remove the damper drive cables from the carburetor and all attachments. Remove the air filter housing, for which it is necessary to unscrew the four nuts, which it is attached to the carburetor studs. We turn the clamping nut and pull the cable shell from the mounting bracket. Next, disconnect the throttle drive levers.

- Loosen the fastening clamp and dismantle the fuel supply hose. Then disconnect the hose that takes the cutter gases.

- Now disconnect the hose that connects the pneumatic valve and the economizer. After that, disconnect the hose from the Vacuum Regulator of the ignition distributor.

- Now you can dismantle the carburetor itself. We turn over the three nuts, which it is attached to the intake manifold.
- Do not forget to stroke the intake manifold hole with some clean material so that the different garbage does not get inside.
How to disassemble and clean the carburetor
As a rule, the need for disassembling the carburetor occurs when it is necessary to clean it.
- After removing the carburetor, it is necessary to put it on a clean surface, unscrew the fastening screws and remove its cover. Then unscrew all the jets. Next, carefully pull out emulsion tubes that are under air jilometers.

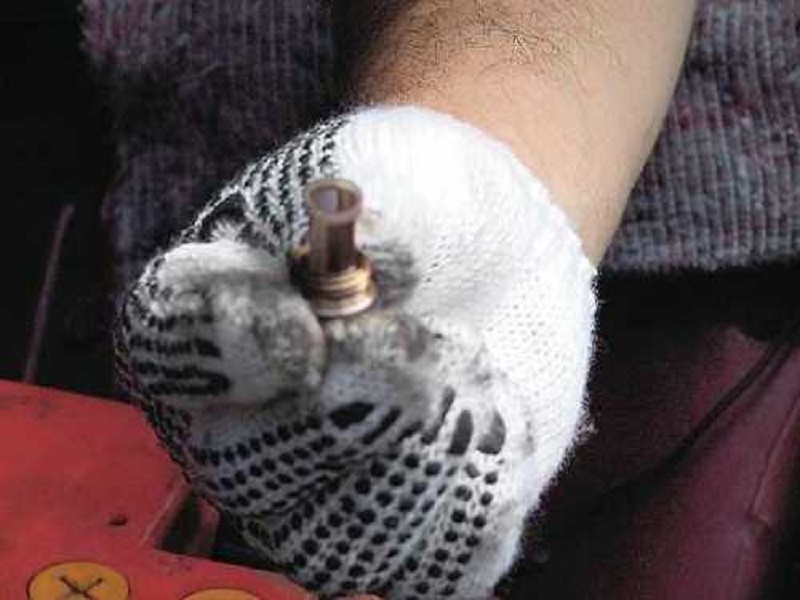
- Unscrew the acperuing pump valve and pull it out by screwdriver. Under the valve is a sealing ring, carefully dismantle it. Next, with the help of pliers, it is necessary to extract the diffusers of the secondary and primary chamber of the carburetor.

- Unscrew the accelerator pump screw and pull it out. Then unscrew the fuel transition jigger of the secondary chamber and remove it. Having unscrewed it, it is necessary to remove the jibeler itself from its body.

- From the opposite side, unscrew and remove the gasket housing in the same way, then the jecler itself is removed from the housing.
- Unscrew the four acceleration pump diaphragm fastening screws. Now remove the cover, spring and diaphragm.

- Then remove the stretch spring lever of the pneumatic drive, pull the lock-latch of the thrust and remove it from engaging with the throttle lever. We unscrew the fastening screws and remove the pneumatic drive from the carburetor.
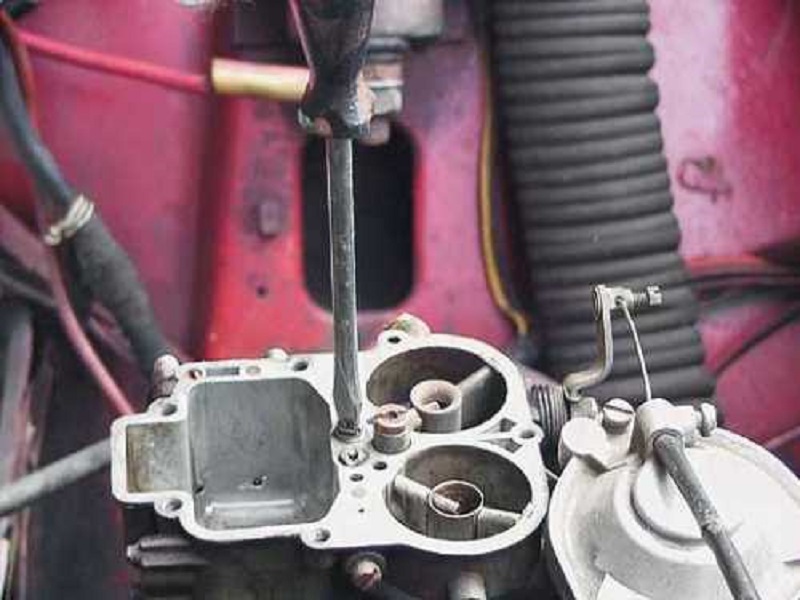
- At the last stage, the cutter is a carburetor by dismantling the throttle housing. Unscrew the two housing fastening screws and remove it together with the sealing gasket. Remove the economizer and microswitch of the EPHX block. Then we turn the inspection screws of the idling and the quality of the mixture.

- The hull of the carburetor is placed in the container where the acetone is preliminarily poured, and let it be squeezed out from Nagara. Check the condition of all components and, if necessary, change the defective elements to new ones. Do not clean the jets with metal wire, because there is a risk of damage to the inner surface of the channels. Discover the jets in acetone, and then blow with compressed air.
How to remove the accelerator pump
To remove the accelerator pump from the carburetor, unscrew the four fastening screws of its covers, and then another screw fixing directly the accelerating pump itself. Then pull it out of the housing.
Adjusting the float chamber

To adjust the float system, do the following:
- First, check the location position and align the bracket holding it (if it is deformed). It is necessary that the float is evenly immersed in the chamber.
- Then we perform adjustment in a closed needle valve. Open the camera lid and move the float. Then gently pull the bracket language.

- Get the distance between the cover of the lid and the float is not more than 7 and at least 6 mm. The distance in the submerged state should be 1-2 millimeters. If more, then the needle is faulty.

- The distance between the needle and the float under open needle valve should be 15 mm.
How to check the mesh filter
By pumping gasoline, fill the float chamber, as a result of which the shut-off valve closes. After that, move the top cover of the filter, remove the valve, wash it in the solvent, and then blow with compressed air.
If in conditions of large loads you notice violations in the operation of the motor, it means that the flow of fuel through the fuel system is impaired. In addition, it can talk about the mesh filter breakdown.
It is strictly forbidden to wipe the bottom of the float chamber with a cloth, since after that the fibers will remain on the bottom of the camera, quickly littered jets. Cleaning is performed by rubber pear. After that, blow the channels with compressed air.
As for the tightness of the shut-off needle, it is also necessary to check the pear, since its pressure compression is identical to the pressure of the fuel pump.
Installation of the carburetor VAZ 2107
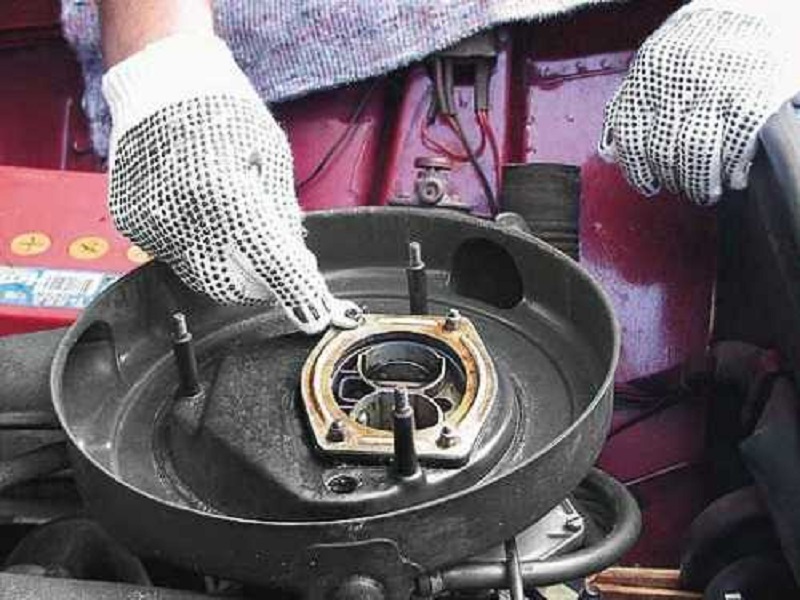
To install the carburetor back, you must apply a new seal to the place of installation, which is installed by the carburetor itself. Screw the nuts on four fasteners to ensure the tight fit of the carburetor to the collector:
- Then connect two thin hoses to ventilation and vacuum to two fittings located at the top of the carburetor device.
- Next, connect the fuel supply hose to the inlet valve. It is advisable to replace the clamp to the new one.
- On the opposite side, screw the hose to the "return".
- Then connect the EPHX wire to the electromagnetic valve.
- It is desirable to set the spring that returns the throttle to the way you will connect the air and throttle.
How to adjust the carburetor
The adjustment of the carburetor is performed in several stages:
- It is necessary to perform a detailed inspection of the carburetor, clean it from various contaminants and other flaws.
- Then clean the mesh filter and wash the float chamber.
- Next, clean the float jets.
- After that, adjust the float system, the starting mechanism and idle.
How to adjust idle vases 2107
To adjust the XX, warm the vehicle to the operating temperature and the quality screw, adjust the maximum number of revolutions, while the screw is not touched. Then the quantity screw set the value to 100 rpm more from normal. Get the motor and quality screw to adjust the speed up to the correct value.
Tips Prof.
We recommend that you see the next video on this topic.
Related Materials
- Stove 2110, bad warm stove 2110, VAZ 2110 heating system, repairing the heating system VAZ 2110 with their own hands
- VAZ 2114 stove blows with cold air, stove 2114, bad warm stove VAZ 2114, device and repair of heating VAZ 2114 do-it-yourself, removing the stove VAZ 2114
- How to subdominize the car. How to put a jack. Types of jacks for cars.
- VAZ 2109 Fuse Block, VAZ 2109 Fuse Block Carburetor, VAZ 2109 Fuse Block Injector, Old VAZ 2109 Fuse Block, VAZ 2109 Fuse Block, VAZ Fuse Block 2109
- Car exhaust gas catalyst, faulty catalyst, pluses and cons of the catalyst, how to change the catalyst for the planeencitel
- Stove blowing cold air VAZ 2114, badly blowing the stove VAZ 2114, why badly blowing the stove VAZ 2114
- How to find out the owner of the car by the number of his car, check the car by the number of the traffic police machine, check the car by the state number of the car for free
- How to choose Used tires, Useful Tips
- Winter car road, pressure in passenger car tires in winter, good battery for the car in winter, whether to warm the car in winter
- In winter, the car is poorly started. How to make a car in winter, do you need to warm up the car in winter, useful tips
- Economy fuel consumption machines, the most economical car consumption
- Tires brands for passenger cars, labeling of car tire labeling, residual passenger car tire protector, how to pick a tire on a car brand, car tire tread pattern
- Working transmission operation, mechanical gearbox clutch work, driving with manual gearbox, useful tips
- Rear beam Peugeot 206 sedan, rear beam device Peugeot 206. Rear beam Peugeot 206 Malfunction, repair of the rear beam Peugeot 206
- Diesel fuel in winter, additive for diesel fuel in winter, how to choose the best diesel fuel
- Diesel winter does not start. How to start diesel in winter, heating diesel in winter.
- Japanese bridgestone tires, winter studded bridgestone tires, bridgestone tires brand
- Tire marking decoding for passenger cars, labeling wheels, how to choose the right tires on the disks
- Diesel engine in winter, launch of the diesel engine in winter, what oil to fill in a diesel engine in winter, useful tips
- LED backlight of the car, the backlight of the bottom of the car, the backlight of the legs in the car, the backlight in the door of the car, the backlight of the car is fine
- Recovered tires, bus tire, restored tire protector, can I use them
- Choose winter tires, which is a winter tires, which pressure in winter tires should be marked with winter tires, how to choose the right winter tires, the best winter tires 2019
- Steering rail rail, knock of steering rack, reasons for the knock and repair of the steering rack do it yourself
- Cameless car tires, a set for repair of tubeless tires, repair of the cannon-free tire do it yourself
- Russian tires, Russian tires Winter, Russian All-season tires, Voronezh AMTEL tires, Tires "Matador Omsk Tire", Kama-tires are world-class bus
- How to open a car without a key. Lost the key from the car what to do, the key from the car inside the car
- Silent tires, quiet winter tires, quiet studded bus, which tires to choose, overview tires
- Tires and safety, safety of the bus, why it is necessary to constantly monitor car tires
- Rules of safe driving of the car in the rain and slush, safe driving of the car for beginners
- Rust converter which is better for cars, rust converters to choose how to use rust transducer, professionals
- Polishing the body of the car do it yourself, how to choose a polishing paste, useful tips
- Engine durability, engine life, how to extend engine life
- Knock in the car. Knock when moving a car. What can knock in the car. How to determine the cause of the knock.
- ABS car, what is ABS car, ABS system malfunction, ABS diagnostics
- Overtaking a car when you can start overtaking a car, rules of traffic rules
- Fuel pump VAZ 2110, VAZ 2110 gas station scheme, VAZ 2110 fuel pump device, VAZ 2110 gas station repair,
- Automotive antennas for radio, automotive antenna device, car antenna do it yourself
- Front suspension Kalina, device front suspension Kalina, knock in front suspension Kalina, repair of front suspension Kalina
- Shock absorber Oil, best oil shock absorbers, pumping oil shock absorbers, how to properly pump oil shock absorber
- Clutch malfunctions, touches clutch, causes a clutch malfunction, how to eliminate





Comments