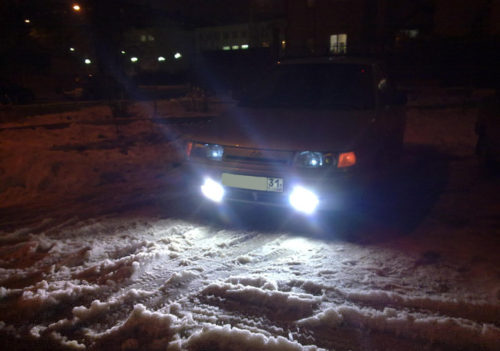
Everyone is committed to personal comfort and safety. This also applies to the lighting of the road by the vehicle at night. Therefore, many motorists are interested in how to make the installation of xenon on the VAZ 2110 was successful, however, while also did not cause complaints from the traffic police? In principle, this is solved, both for conventional headlights and fog. About this further in the article.
Content
- Xenon PTF, when the connection of xenon does not contradict the law
- Advantages and disadvantages of xenon
- Advice Prope: Focusing Lens will help not blind head drivers
- How to remove the VAZ Faro block (step by step instruction)
- Legal modules for legal installation
- Refinement of the landing room for installation on the VAZ2110 Hella module instead of the Kirzhach module (in detail)
- Xenon, installation in Kirzhach block, step-by-step instruction
Xenon PTF, when the connection of xenon does not contradict the law
It should be remembered that in the "fiction" still at the factory can mount bi-xenon lamps, as well as the corresponding lenses. These are fog lights t. N. Class D, the light of which is absolutely legal and the inspector to "Fasten" to it cannot.
To implement the installation of xenon into fog and / or conventional car headlights of the VAZ 2110, it is necessary that the entire kit, where bixenon lamps are used is absolutely legal. In the glass itself, the letter D is mandatory, which indicates that bi-xenon lamps must be connected to this headla. In this case, Xenon is legal and will not cause complaints.
If there is a letter n on the headlight glass, then halogens are used here, and problems with the traffic police are possible.
Advantages and disadvantages of xenon
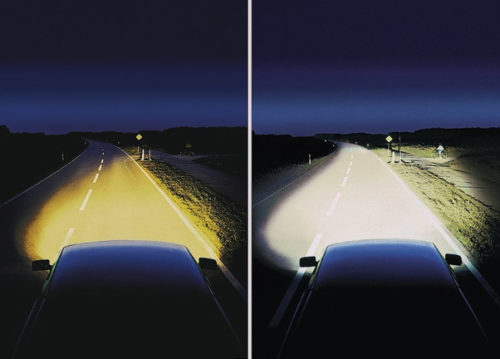
The main advantage of xenon lamps is their high power. A similar halogen lamp gives light with significantly smaller intensity than xenon. The large intensity of the light flux is able to provide significant advantages to the owner of xenon headlights in high-speed capabilities, maneuvering and safety in conditions of insufficient visibility. In addition, the color spectrum of xenon lamps is close as possible to daylight, which reduces the fatigue of the eye of the motorist.
Another important advantage of xenon lamps is the absence of a filament in their design. Xenon lamps are capable of listening to three thousand hours when "halogens" give a maximum of one thousand hours of operation. It is also not worth discounting the more economical power consumption of xenon lamps, which is 35 W against 55 W at the "halogen".
This significantly saves battery charge and reduces the load on the generator. In addition to the other, xenon optics is more protected from melting, since its heating during operation is no more than 60 percent of the halogen temperature.
With independent installation of xenon optics, its main disadvantage - blinding the drivers of the counter transport for quite a long time, which can lead to the creation of an emergency. But, if xenon lamps are correctly installed and configured, such problems, as a rule, does not occur. The blinding of drivers of the oncoming machines is possible only when xenon optics are not adjusted at all or adjusted incorrectly at home.
Also possible problems of another plan. Adjusting the lamps can be significantly difficult as a result of the dispersion of the light flux for such a variation. In addition, the self-diagnosis systems of new machines in some cases do not perceive xenon optics, as a functionable component of the chain. Thus, the on-board computer determines the lamp burning as a result of its smaller power consumption. In other words, the lack of standard power consumption of the lamp, the computer diagnoses how its burnout.
Insuitableness of xenon optics to an electrical circuit, which is designed for halogen lamps, is able to cause such a negative phenomenon as shimmering light. In such mode, the lamps serve much less laid, and constant flickering quite quickly tires the motorist's eyes. The problem with the diagnostics of the lamps with a computer can be corrected by installing a special block that imitates for diagnostic systems xenon lamp as a "halogen". In some cases, the problem is solved by the usual replacement of the xenon lamp transformer.
Advice Prope: Focusing Lens will help not blind head drivers
In order not to blind the drivers of the oncoming transport, it is necessary to install a focusing lens, which provides a stream of light of high brightness and high definition, as well as the excellent quality of the light beam as a result of a special lens glass, which is included. In addition, focusing lenses are able to evenly dispel the light of the headlights, with the help of which the clear boundary is laid between the illuminated and darkened areas. Therefore, when using such lenses, it is impossible to blind pedestrians or towards towards motorists.
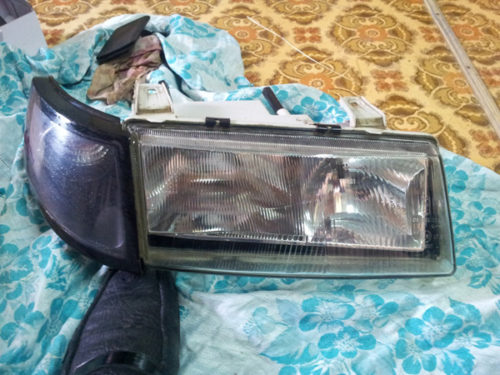
How to remove the VAZ Faro block (step by step instruction)
- Develop a car by removing the "minus" terminal from the battery.
- Next, we turn off all the connectors from the headlights.
- Then unscrew all the bolts from the top attachment.
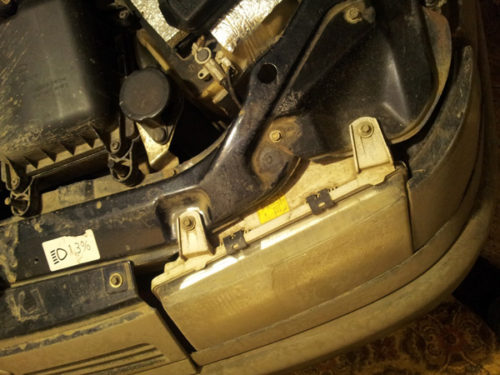
- After that, remove the grille from the radiator.
- We unscrew one bolt, which is attached from below the block headlight.
- With the help of a screwdriver, we seek the lining and remove it.
- Next, we take the key to ten and unscrew the mounting nut to the bracket.
- Then remove the headlight block.
- Now we use the screwdriver and turn the cylinder lock of the hydrocorrector, after which they remove it.
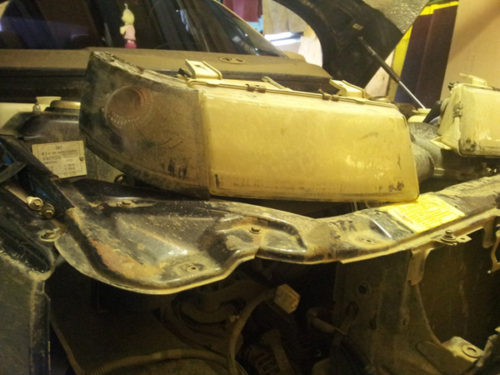
- We dismantle the rotation pointer. To do this, unscrew several bolts.
Legal modules for legal installation
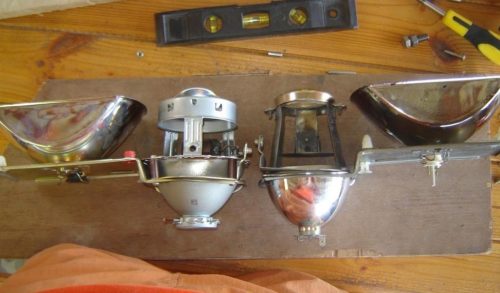
To make a legitimate installation, it is advisable to buy a good legal module. Work perfectly, for example, headlights from HELLA, but necessarily the second generation, as they have quite wide lenses. Designation of these headlights - Lens G2. They are installed regularly on BMW E60, i.e. quality at height.
But there are small differences with the 2110 installed on the VAZ 2110, as a result of which they should be finalized.
It will take two pieces:
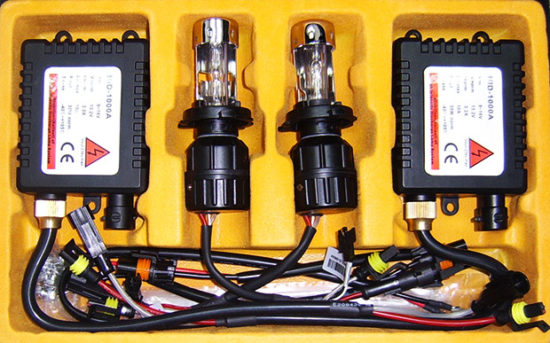
- Bixenon lamps.
- Ignition unit.
- Ignitor.
- Hella lenses.
Refinement of the landing room for installation on the VAZ2110 Hella module instead of the Kirzhach module (in detail)
- The landing place that is intended for the regular Kirzhach module must be changed under HELLA.
- We connect bixenon lamps to the standard - everything coincides here and fits.
- Install a new module.
- Next, fix the ignition unit.
Xenon, installation in Kirzhach block, step-by-step instruction
- Preparing wires. Traditionally brown - on minus, yellow - on plus. Two plus, as well as two minuses in turn, crimp and carefully insulated.
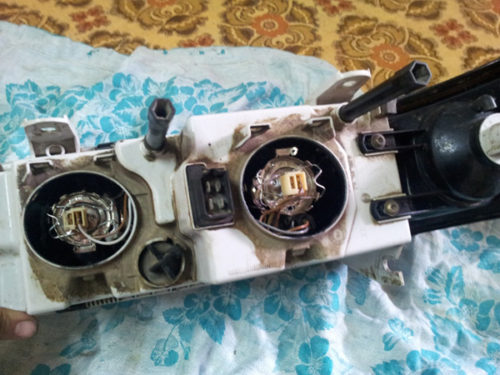
- We processes the holes with the holes under the lamp, trying on the bulbs. Just do not cease.
- Install bixenon lamps.
- In the protective cover, we stretch the wiring from the lamp. However, for this you need to drill the corresponding hole.
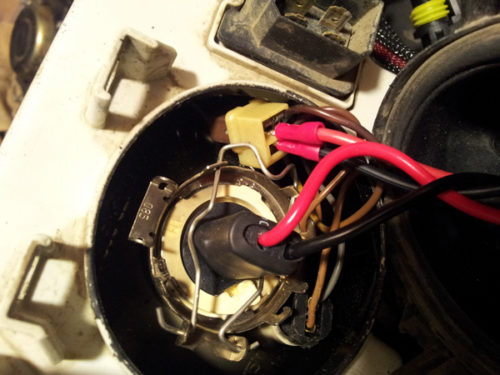
- Mount and fastened in the head chapter. Do not confuse polarity.
- Connect the ignition unit according to the scheme that goes along with the lamp.
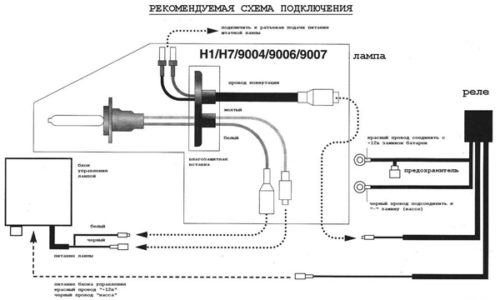
- Mount the lights back.
- Connect the battery.
Related Materials
- Stove 2110, bad warm stove 2110, VAZ 2110 heating system, repairing the heating system VAZ 2110 with their own hands
- VAZ 2114 stove blows with cold air, stove 2114, bad warm stove VAZ 2114, device and repair of heating VAZ 2114 do-it-yourself, removing the stove VAZ 2114
- How to subdominize the car. How to put a jack. Types of jacks for cars.
- VAZ 2109 Fuse Block, VAZ 2109 Fuse Block Carburetor, VAZ 2109 Fuse Block Injector, Old VAZ 2109 Fuse Block, VAZ 2109 Fuse Block, VAZ Fuse Block 2109
- Car exhaust gas catalyst, faulty catalyst, pluses and cons of the catalyst, how to change the catalyst for the planeencitel
- Stove blowing cold air VAZ 2114, badly blowing the stove VAZ 2114, why badly blowing the stove VAZ 2114
- How to find out the owner of the car by the number of his car, check the car by the number of the traffic police machine, check the car by the state number of the car for free
- How to choose Used tires, Useful Tips
- Winter car road, pressure in passenger car tires in winter, good battery for the car in winter, whether to warm the car in winter
- In winter, the car is poorly started. How to make a car in winter, do you need to warm up the car in winter, useful tips
- Economy fuel consumption machines, the most economical car consumption
- Tires brands for passenger cars, labeling of car tire labeling, residual passenger car tire protector, how to pick a tire on a car brand, car tire tread pattern
- Working transmission operation, mechanical gearbox clutch work, driving with manual gearbox, useful tips
- Rear beam Peugeot 206 sedan, rear beam device Peugeot 206. Rear beam Peugeot 206 Malfunction, repair of the rear beam Peugeot 206
- Diesel fuel in winter, additive for diesel fuel in winter, how to choose the best diesel fuel
- Diesel winter does not start. How to start diesel in winter, heating diesel in winter.
- Japanese bridgestone tires, winter studded bridgestone tires, bridgestone tires brand
- Tire marking decoding for passenger cars, labeling wheels, how to choose the right tires on the disks
- Diesel engine in winter, launch of the diesel engine in winter, what oil to fill in a diesel engine in winter, useful tips
- LED backlight of the car, the backlight of the bottom of the car, the backlight of the legs in the car, the backlight in the door of the car, the backlight of the car is fine
- Recovered tires, bus tire, restored tire protector, can I use them
- Choose winter tires, which is a winter tires, which pressure in winter tires should be marked with winter tires, how to choose the right winter tires, the best winter tires 2019
- Steering rail rail, knock of steering rack, reasons for the knock and repair of the steering rack do it yourself
- Cameless car tires, a set for repair of tubeless tires, repair of the cannon-free tire do it yourself
- Russian tires, Russian tires Winter, Russian All-season tires, Voronezh AMTEL tires, Tires "Matador Omsk Tire", Kama-tires are world-class bus
- How to open a car without a key. Lost the key from the car what to do, the key from the car inside the car
- Silent tires, quiet winter tires, quiet studded bus, which tires to choose, overview tires
- Tires and safety, safety of the bus, why it is necessary to constantly monitor car tires
- Rules of safe driving of the car in the rain and slush, safe driving of the car for beginners
- Rust converter which is better for cars, rust converters to choose how to use rust transducer, professionals
- Polishing the body of the car do it yourself, how to choose a polishing paste, useful tips
- Engine durability, engine life, how to extend engine life
- Knock in the car. Knock when moving the car. What can knock in the car. How to determine the cause of the knock.
- ABS car, what is ABS car, ABS system malfunction, ABS diagnostics
- Overtaking a car when you can start overtaking a car, rules of traffic rules
- Fuel pump VAZ 2110, VAZ 2110 gas station scheme, VAZ 2110 fuel pump device, VAZ 2110 gas station repair,
- Automotive antennas for radio, automotive antenna device, car antenna do it yourself
- Front suspension Kalina, device front suspension Kalina, knock in front suspension Kalina, repair of front suspension Kalina
- Shock absorber Oil, best oil shock absorbers, pumping oil shock absorbers, how to properly pump oil shock absorber
- Clutch malfunctions, touches clutch, causes a clutch malfunction, how to eliminate


Comments