To call the fuel-air mixture, and in injection, and in the carburetor motors of internal combustion, a high-voltage ignition coil is required. The emergence of new motor power systems in the market caused changes in the Ignition systems of the VAZ. The ignition distributors, referred to, gradually go into the past. To replace them, new devices come - VAZ 2114 ignition modules.
Content
Module VAZ2114, device and principle
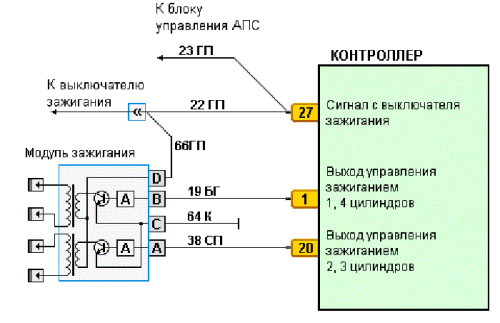
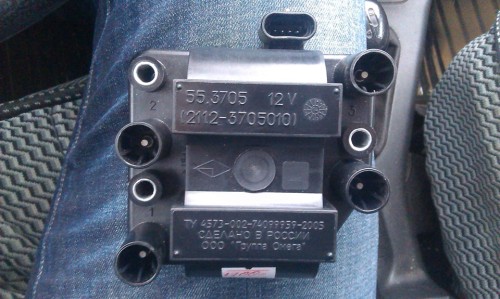
The VAZ Ignition Module is an advanced engine starting system. Its principle of operation is actually not different from standard systems. If high-voltage voltage in outdated systems was generated by disconnecting of contacts in the ignition system distributor, then the pulse generator in the module are signals supplied by the control unit.
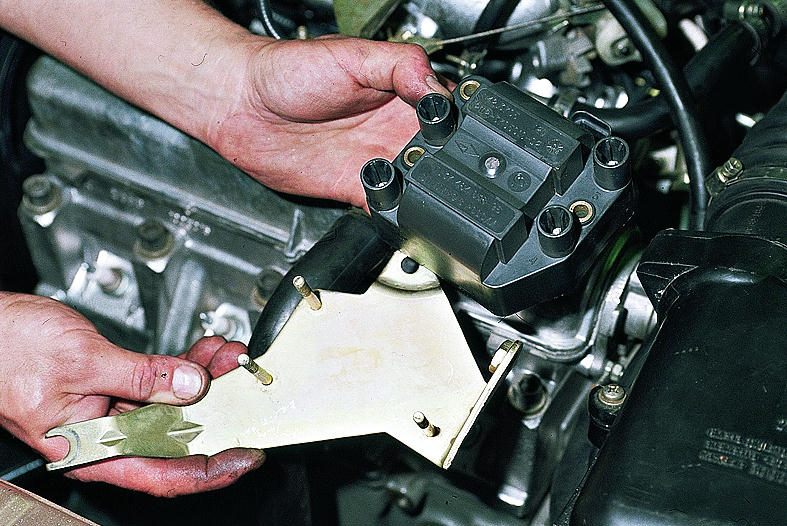
Signals from sensors from sensors are collected on the motor and the control pulse is generated, which is sent to the ignition module. From the voltage of the on-board network, it forms high-voltage voltage and directs to the cylinder candle to ignite the air-fuel mixture.
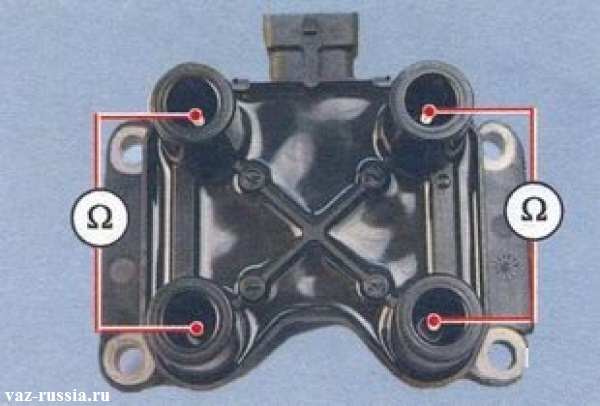
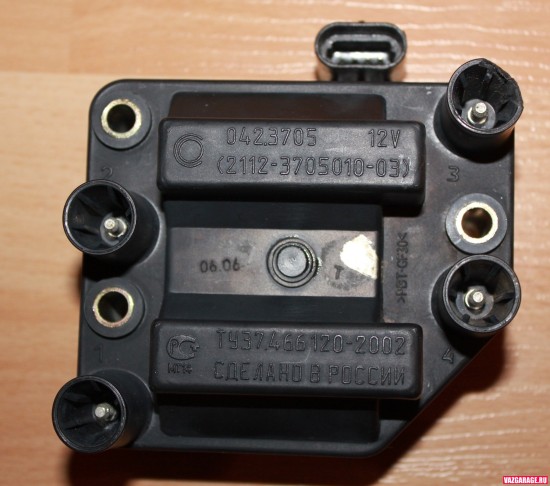
The composition of this device includes two coils that produce high voltage. A two-channel electronic switch helps them. All elements consist in a housing of durable plastic. The housing is located low-voltage connector for feeding control pulses and connecting the supply voltage. In addition, there are conclusions here to connect high-voltage wires, which are connected to the candles.
VAZ2114 ignition module, fault signs
You can meet such signs of the vehicle ignition module of the VAZ 2114 model:
- On one of the candles there is no spark.
- Strongly floats idle.
- Motor power decreased significantly.
- Drying disappeared, during a sharp pressing of gas pedal in the engine, there were failures.
Ignition module, can the module repair is possible
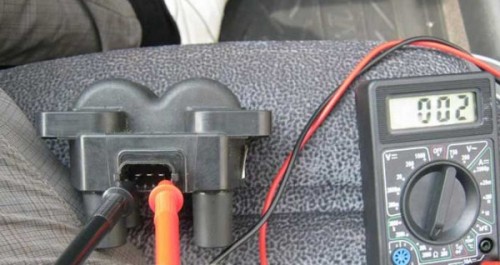
In fact, all breakdowns of this device lead to its replacement, but in some cases it is still possible to repair the ignition module. This is especially possible when changing the engine behavior during tapping or movement. You can repair the module yourself, if you can handle a multimeter and a soldering iron.
You need to remove the rear metal cover, under which the electrical elements of the ignition module are located. Gently get rid of silicone, find damaged or trim contacts and read them. Do not forget that in the block aluminum conductors, so the necessary special solder for their soldering.
After that, the back cover is closed and check the performance of the module. If the result is positive, open the lid again and fill the inside with silicone. With a negative result, replace the module. Although you can still try to replace electronic switches.
Checking system for performance
In any case, the check must be started with the candles, for which we carry them out of the nests. It is very simple to do it. It should be removed from them the tips of the armored wires and remove from the seats using a special key for turning.
Then you need to examine them, clean and check. They should have brown, without soot and nagar. If the nagar is, it is quite possible that the pistons and rings were worn out. In any case, candles should be cleaned, check and, if necessary, set a gap between the electrodes. Now check their performance. Special probes exist to check them. Some drivers are capable of making it with piezoshigali. If there is nothing like that, then check on the motor. With the health of the candles, you need to continue the search further.
Tools assistants
Replace the ignition module independently every driver can not need special equipment or special skills. All that will be required to motorist:
- Rag.
- Key to 13.
- New ignition unit.
Ignition module 2114, replacing the module with your own hands, step by step instructions
Such works can be performed on a flat site or in the garage.

- First you need to open the hood of the motor compartment and disconnect the terminals of the battery. It will be enough to remove only a minority terminal.
- Next from the installation places, take out high-voltage wires. It is important to remember their location. If you have doubts you can make tags. You can not change the wires in some places, since the new spare part may fail.
- Then you need to carefully disconnect the connector with cables from the module. We take the key to 13 and unscrew the three nuts fastening the device to the engine.
- After removing the nuts, the device is removed from the motor.
Now we take the rag and wipe the installation site and near it.

The new device should be carefully examined, after which it is necessary to start the installation that must be carried out in the reverse order.
Do not forget to install high-voltage wires correctly. If you are still confused, pay attention to the block on which the number of armored wires is indicated.
Tips of professionals
Even though electronic devices are quite reliable, there are still breakdowns. In some cases, they can be avoided, for which it is necessary to increase and maintain all the parts of the system sometimes:
- Watch that there is no confusion with high voltage cables - with a large internal resistance in them, can fail the coil.
- Between the electrodes of candles it is necessary to check the gap, because overly large spark gaps are negatively reflected on the device.
Related Materials
- Stove 2110, bad warm stove 2110, VAZ 2110 heating system, repairing the heating system VAZ 2110 with their own hands
- VAZ 2114 stove blows with cold air, stove 2114, bad warm stove VAZ 2114, device and repair of heating VAZ 2114 do-it-yourself, removing the stove VAZ 2114
- How to subdominize the car. How to put a jack. Types of jacks for cars.
- VAZ 2109 Fuse Block, VAZ 2109 Fuse Block Carburetor, VAZ 2109 Fuse Block Injector, Old VAZ 2109 Fuse Block, VAZ 2109 Fuse Block, VAZ Fuse Block 2109
- Car exhaust gas catalyst, faulty catalyst, pluses and cons of the catalyst, how to change the catalyst for the planeencitel
- Stove blowing cold air VAZ 2114, badly blowing the stove VAZ 2114, why badly blowing the stove VAZ 2114
- How to find out the owner of the car by the number of his car, check the car by the number of the traffic police machine, check the car by the state number of the car for free
- How to choose Used tires, Useful Tips
- Winter car road, pressure in passenger car tires in winter, good battery for the car in winter, whether to warm the car in winter
- In winter, the car is poorly started. How to make a car in winter, do you need to warm up the car in winter, useful tips
- Economy fuel consumption machines, the most economical car consumption
- Tires brands for passenger cars, labeling of car tire labeling, residual passenger car tire protector, how to pick a tire on a car brand, car tire tread pattern
- Working transmission operation, mechanical gearbox clutch work, driving with manual gearbox, useful tips
- Rear beam Peugeot 206 sedan, rear beam device Peugeot 206. Rear beam Peugeot 206 Malfunction, repair of the rear beam Peugeot 206
- Diesel fuel in winter, additive for diesel fuel in winter, how to choose the best diesel fuel
- Diesel winter does not start. How to start diesel in winter, heating diesel in winter.
- Japanese bridgestone tires, winter studded bridgestone tires, bridgestone tires brand
- Tire marking decoding for passenger cars, labeling wheels, how to choose the right tires on the disks
- Diesel engine in winter, launch of the diesel engine in winter, what oil to fill in a diesel engine in winter, useful tips
- LED backlight of the car, the backlight of the bottom of the car, the backlight of the legs in the car, the backlight in the door of the car, the backlight of the car is fine
- Recovered tires, bus tire, restored tire protector, can I use them
- Choose winter tires, which is a winter tires, which pressure in winter tires should be marked with winter tires, how to choose the right winter tires, the best winter tires 2019
- Steering rail rail, knock of steering rack, reasons for the knock and repair of the steering rack do it yourself
- Cameless car tires, a set for repair of tubeless tires, repair of the cannon-free tire do it yourself
- Russian tires, Russian tires Winter, Russian All-season tires, Voronezh AMTEL tires, Tires "Matador Omsk Tire", Kama-tires are world-class bus
- How to open a car without a key. Lost the key from the car what to do, the key from the car inside the car
- Silent tires, quiet winter tires, quiet studded bus, which tires to choose, overview tires
- Tires and safety, safety of the bus, why it is necessary to constantly monitor car tires
- Rules of safe driving of the car in the rain and slush, safe driving of the car for beginners
- Rust converter which is better for cars, rust converters to choose how to use rust transducer, professionals
- Polishing the body of the car do it yourself, how to choose a polishing paste, useful tips
- Engine durability, engine life, how to extend engine life
- Knock in the car. Knock when moving the car. What can knock in the car. How to determine the cause of the knock.
- ABS car, what is ABS car, ABS system malfunction, ABS diagnostics
- Overtaking a car when you can start overtaking a car, rules of traffic rules
- Fuel pump VAZ 2110, VAZ 2110 gas station scheme, VAZ 2110 fuel pump device, VAZ 2110 gas station repair,
- Automotive antennas for radio, automotive antenna device, car antenna do it yourself
- Front suspension Kalina, device front suspension Kalina, knock in front suspension Kalina, repair of front suspension Kalina
- Shock absorber Oil, best oil shock absorbers, pumping oil shock absorbers, how to properly pump oil shock absorber
- Clutch malfunctions, touches clutch, causes a clutch malfunction, how to eliminate


Comments