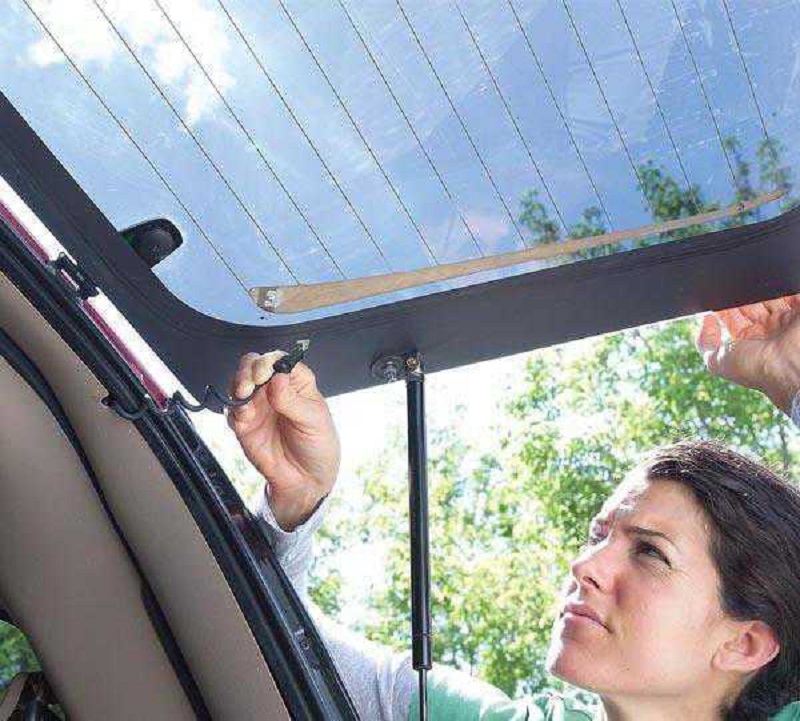
25 years ago, the heating of the rear window was considered some incredible technology, and its occurrence on the VAZ 2105 and VAZ 2107 in the export performance caused a frantic delight of the owners of domestic cars. Nowadays, only lazy manufacturers do not put on the rear window of the heating yarn, and this is no longer an option, but full-time equipment for all vehicles. Heating threads are located on the rear window of the car, some models have local heated windshield and rear side. The task of the device is to create a plus temperature on the glass surface, regardless of air temperature overboard, which makes it possible to get rid of icing and fogging, and also provides good visibility under all weather conditions.
Content
- How is the heating of the rear window?
- Causes of the heating of the rear window
- Diagnostics and detection of reasons for the failure of the rear window
- Tools, fixtures, consumables
- How to make rear window heating repair with your own hands with a thread break (step by step)
- What should be done if the contacts of the heating of the rear window (step-by-step) failed?
- How to eliminate the problem of the electrolyte in the heating of the circuit on the heating threads?
- Tips Prof.
How is the heating of the rear window?
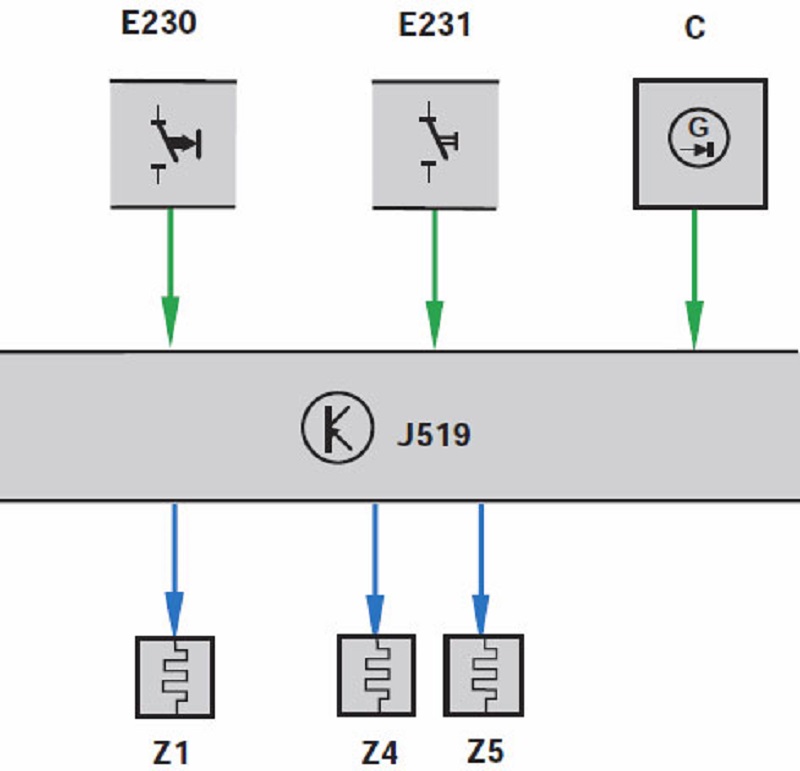
Structurally, the heating system of the rear window is not very complicated. In general terms, the electrical circuit can be depicted in this form:
- E230 is a circuit breaker of the OGS system.
- C - generator.
- Z1 is the heating component of the AGSC system.
- J519 is an onboard power grid control unit.
Although the heating systems of the rear window on different models of vehicles may have certain differences, one way or another, if we consider the scheme in detail, it includes such basic elements:
Mounting unit (1), ignition switch (2), rear window heating switch (3), check light signaling about the inclusion of OGSC (4), the heating element of the OGSC (5).
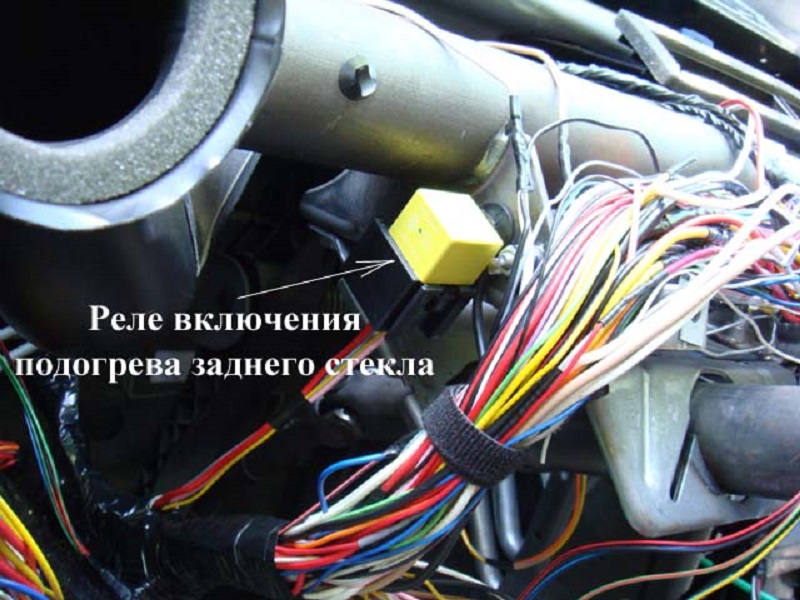
K6 is an additional relay, K7 is a relay switching on the heating of the rear window, and is a connection to power systems. In addition, in the system there are terminals, fuses and wires that connect all components into a single integer. Under the conditions of the rotated ignition key, the OGSC is included by pressing the button to which power is supplied through the K6 relay. At the same time, the K7 relay is activated, the heating element is connected and the control lamp sunbathing.
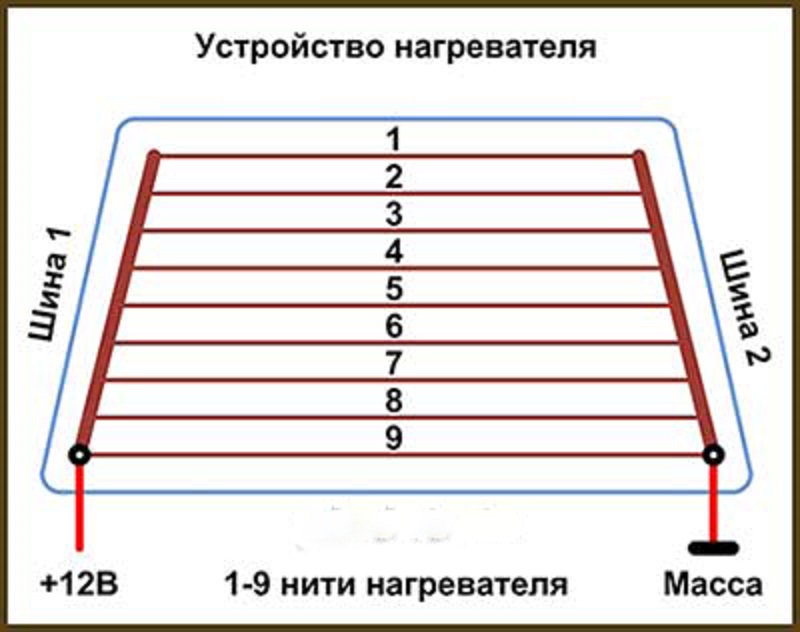
The device of the heating element of the rear window is also different. In the usual design, it is a mesh of thin nickel metal threads connected by two conductive tires that are from opposite sides. It is worth noting that on the one hand, the tire closes to the ground, and the current with a voltage of 12 V is supplied to it with a voltage of 12 V. Such devices are attached to the rear glass using a special glue.
For some cars, the heating element is applied using spraying, for example, aluminum. On top of this spraying with the help of conductive glue, a thin film is mounted, having good traffic frequency.
Causes of the heating of the rear window
Causes of OBSC faults:
- Iced glass, not working on the power button and the absence of a signal from the lamp on the instrument panel indicate a malfunction in the connection of the relay of the OZSC relay. The driver must check the mass, fuse, the power button and control voltage.
- If the heating is missing, but the power button is glowing, this suggests that there is no supply voltage. Check the operation of the contacts that can be oxidation, mass, fuse and voltage on the heating element.
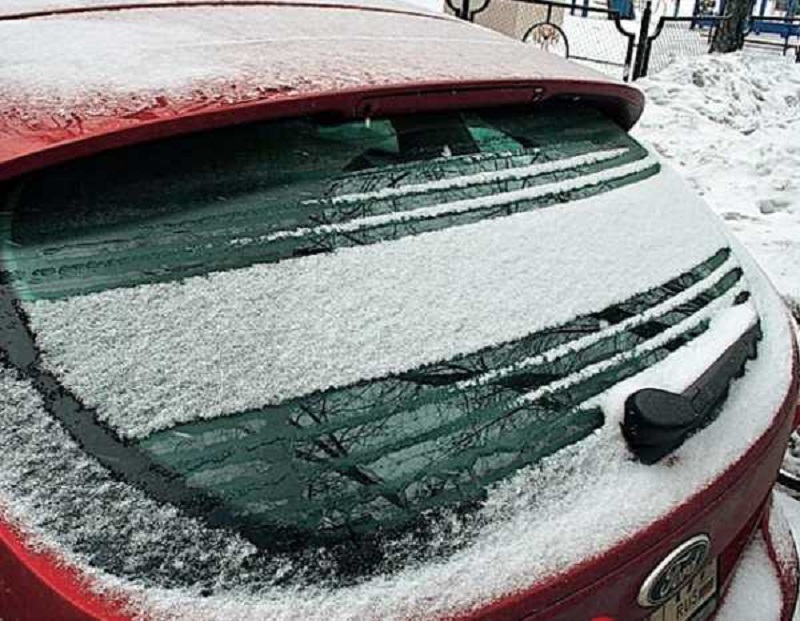
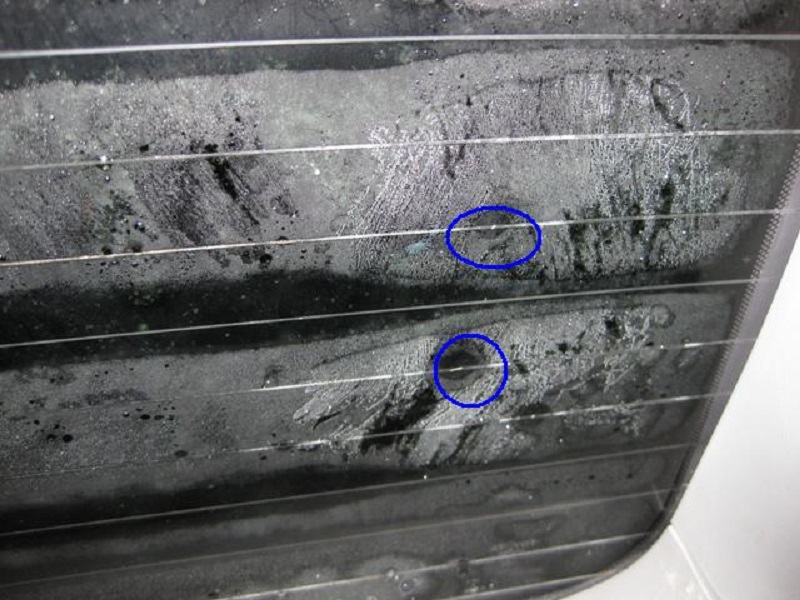
- If partial heating is observed, pay attention to the NAC threads. Their gap requires repair.
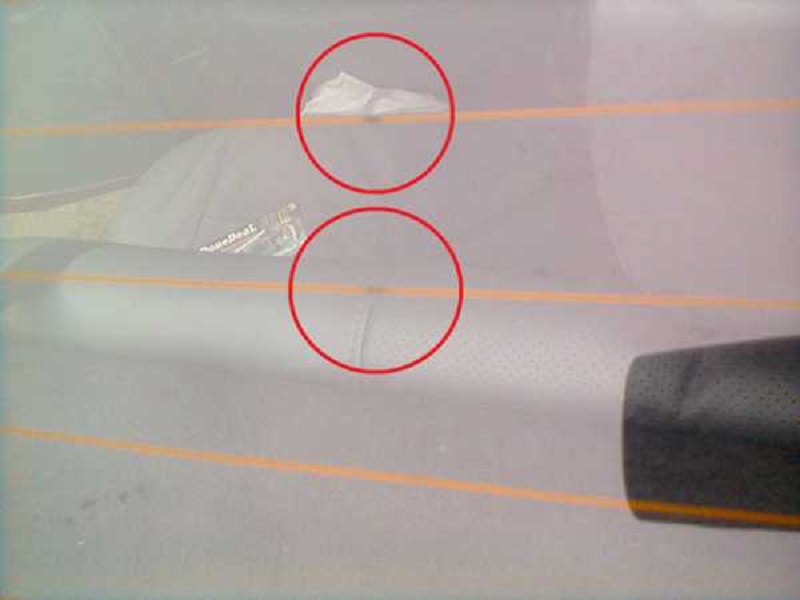
- Glass can freeze even if heating equipment is fully working. This sometimes happens with strong frosts. In order for the heating element to cope with its task, it is necessary to pre-clean the glass from the ice.
Diagnostics and detection of reasons for the failure of the rear window
If the rear window heating does not work, carefully check the entire power supply of the OGS system. The first thing to check is the serviceability of the fuses. So, for example, the "dozen" is fuses F4 and F7, located in the installation block of the car. Their breakdown may occur as a result of a short circuit, a factory defect or a voltage jump in the automotive onboard network. You need to replace the faulty fuse, for which remove it from the mounting unit.
Then check the terminal compounds of the OGS system. When operating a vehicle on all equipment, strong vibrations have their impact. As a result, contacts may be damaged or some terminal can loosen or disconnect.
It is required to check the relay of the OBSC. The relay can break during the wire cliff in the working coil of this part or as a result of the contact of the contacts, due to the short circuit or the factory defect. Remove the relay and check with the tester. If the item is faulty, replace it.
Also check the contact of the OGSC. In the rear window with the help of glue, a conductive element is attached, this is the contact to which the electrical current is supplied by the wiring. Through this contact, the current is transmitted to heating threads. In this place, the wiring may occur as a result of the fact that the glue was poor quality or due to the detachment of the contact element.
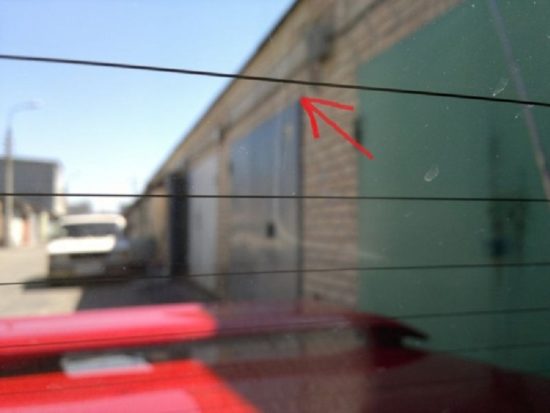
It is not rare to the output of the OBSC causes damage or breaking the threads in the heating element. This is detected by instrument analysis or visual inspection. We can visually detect only explicit damage to the thread.
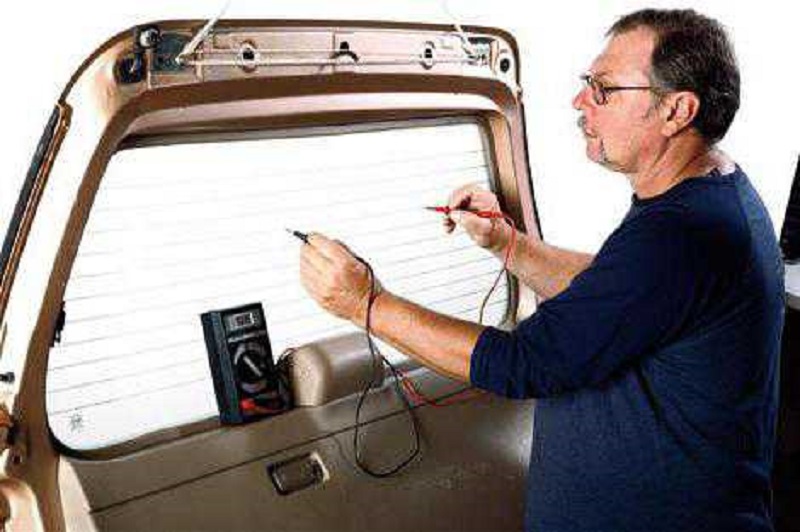
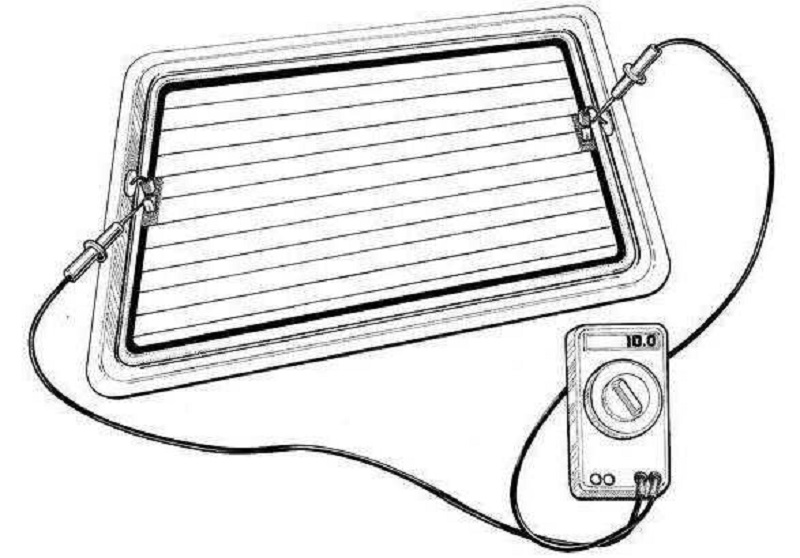
Perhaps with any repair works of the car, the surface of the glass was damaged on which the heating element is attached. But the main tools during the diagnosis - an ohmmeter or a voltmeter. They provide an opportunity with high accuracy to detect a plot with failed threads, even if this break is unable to detect visually.
Tools, fixtures, consumables
For the repair of the OGSC you will need materials and tools:
- Special Remkomplekt.

- Alcohol or alcohol solution.
- Napkins.
- Construction scotch or repair sticky tape.
- Conductive glue.
- Hairdryer.
- Tassel.
- Knife.
How to make rear window heating repair with your own hands with a thread break (step by step)
Order of work:
- In the rupture area, clean the plot of 6 mm long in each direction.
- Purified area wipe with a cloth or a napkin dipped in alcohol solution or alcohol.
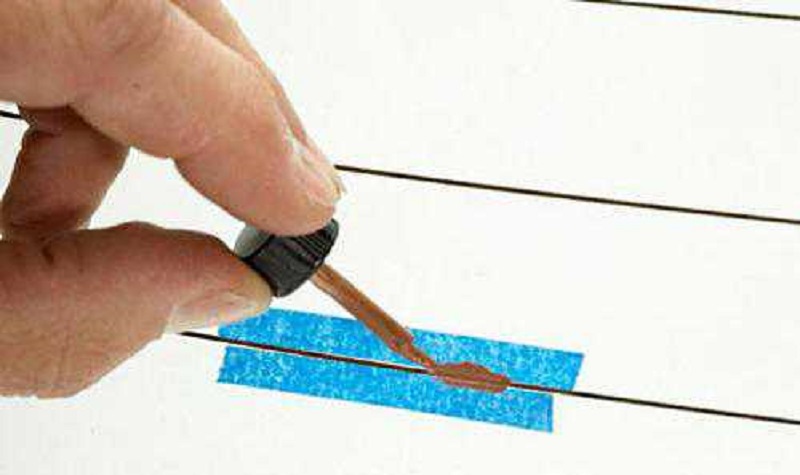
- On both sides of the thread, which is damaged, stir fine strips of construction tape or repair sticky tape. In order not to damage along the threads, do not allow sticky tape on them.
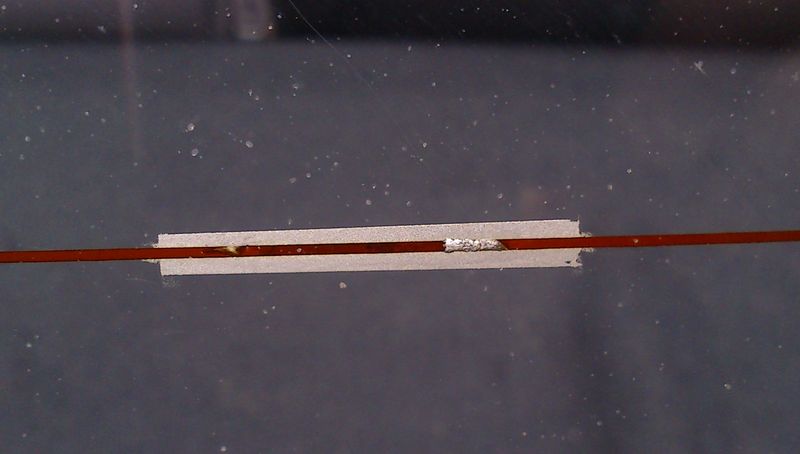
- In the presence of Repair Kit, mix the hardener with a silver composition, which will be after applying to perform the role of a conductive thread. After mixing, apply with a tassel or a wand. This composition is on a damaged place by closed the chain.

- In the absence of Repair Kit, the role of a special mixture can perform conductive glue. It must be applied with a brush.
- After eliminating damage, give time to a special mixture or glue. To speed up the process, use glue.

- After drying the band, remove the self-adhesive tape, for which it is better to cut it with a knife at the point of adjustment to the repaired thread.
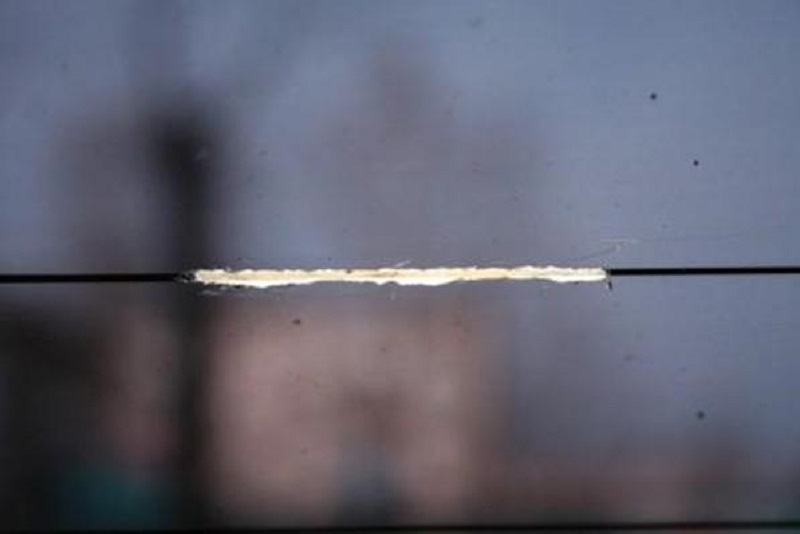
- After completed work, check the capabilities of the OGSC.
What should be done if the contacts of the heating of the rear window (step-by-step) failed?
If the contacts on the OGSC connectors are oxidized, it is necessary directly on the contact, glued to the glass, measure the supply wire voltage: if the voltage is less than 11 V, it is necessary to clean it. For this, a rust cleaner is suitable or a regular skin.
How to eliminate the problem of the electrolyte in the heating of the circuit on the heating threads?
From the reagents, copper sulfate (copper sulphate) is required, which is used in construction and crop production, and sulfuric acid (the electrolyte from the battery is suitable). From the tool - cut pipe cuts.
It is quite suitable for the segments of the copper wire, folded into a beam, a rod or tube with a diameter of 6-10 millimeters and a strip of tissue with a length of approximately halfter and width of 20-20 millimeters. At the end of the rod, wrap the strip of fabric half of its width - it turns out something like tastes. From above, impose a bandage from the thread.
Preparation of electrolyte: Pour a few teaspoons of copper sulfate, and stir up to dissolve. If not completely dissolved, nothing terrible. To the resulting solution, add 0.2-0.3% concentrated sulfuric acid or 0.5-1% of the electrolyte for the battery is about the floor of a teaspoon.
Well, the process itself. Two glass terminals are connected to the "mass" (if there is no need to do anything on the glass of Czek, you don't need to do anything), and connect the "plus" from the battery to the tube with a cloth.
Water in the solution a positive electrode, after which it is continuously and actively scroll the place of the thread cliff for 3-5 minutes. The current passes through the solution and transfers copper ions from the electrode to the heating thread. If the thread damage is small, the gap is delayed with copper completely, if the gap is large, deposited areas will lead the hot soldering iron and solder the jumper from the thin wire.
Tips Prof.
We recommend to see the following video:
Related Materials
- Stove 2110, bad warm stove 2110, VAZ 2110 heating system, repairing the heating system VAZ 2110 with their own hands
- VAZ 2114 stove blows with cold air, stove 2114, bad warm stove VAZ 2114, device and repair of heating VAZ 2114 do-it-yourself, removing the stove VAZ 2114
- How to subdominize the car. How to put a jack. Types of jacks for cars.
- VAZ 2109 Fuse Block, VAZ 2109 Fuse Block Carburetor, VAZ 2109 Fuse Block Injector, Old VAZ 2109 Fuse Block, VAZ 2109 Fuse Block, VAZ Fuse Block 2109
- Car exhaust gas catalyst, faulty catalyst, pluses and cons of the catalyst, how to change the catalyst for the planeencitel
- Stove blowing cold air VAZ 2114, badly blowing the stove VAZ 2114, why badly blowing the stove VAZ 2114
- How to find out the owner of the car by the number of his car, check the car by the number of the traffic police machine, check the car by the state number of the car for free
- How to choose Used tires, Useful Tips
- Winter car road, pressure in passenger car tires in winter, good battery for the car in winter, whether to warm the car in winter
- In winter, the car is poorly started. How to make a car in winter, do you need to warm up the car in winter, useful tips
- Economy fuel consumption machines, the most economical car consumption
- Tires brands for passenger cars, labeling of car tire labeling, residual passenger car tire protector, how to pick a tire on a car brand, car tire tread pattern
- Working transmission operation, mechanical gearbox clutch work, driving with manual gearbox, useful tips
- Rear beam Peugeot 206 sedan, rear beam device Peugeot 206. Rear beam Peugeot 206 Malfunction, repair of the rear beam Peugeot 206
- Diesel fuel in winter, additive for diesel fuel in winter, how to choose the best diesel fuel
- Diesel winter does not start. How to start diesel in winter, heating diesel in winter.
- Japanese bridgestone tires, winter studded bridgestone tires, bridgestone tires brand
- Tire marking decoding for passenger cars, labeling wheels, how to choose the right tires on the disks
- Diesel engine in winter, launch of the diesel engine in winter, what oil to fill in a diesel engine in winter, useful tips
- LED backlight of the car, the backlight of the bottom of the car, the backlight of the legs in the car, the backlight in the door of the car, the backlight of the car is fine
- Recovered tires, bus tire, restored tire protector, can I use them
- Choose winter tires, which is a winter tires, which pressure in winter tires should be marked with winter tires, how to choose the right winter tires, the best winter tires 2019
- Steering rail rail, knock of steering rack, reasons for the knock and repair of the steering rack do it yourself
- Cameless car tires, a set for repair of tubeless tires, repair of the cannon-free tire do it yourself
- Russian tires, Russian tires Winter, Russian All-season tires, Voronezh AMTEL tires, Tires "Matador Omsk Tire", Kama-tires are world-class bus
- How to open a car without a key. Lost the key from the car what to do, the key from the car inside the car
- Silent tires, quiet winter tires, quiet studded bus, which tires to choose, overview tires
- Tires and safety, safety of the bus, why it is necessary to constantly monitor car tires
- Rules of safe driving of the car in the rain and slush, safe driving of the car for beginners
- Rust converter which is better for cars, rust converters to choose how to use rust transducer, professionals
- Polishing the body of the car do it yourself, how to choose a polishing paste, useful tips
- Engine durability, engine life, how to extend engine life
- Knock in the car. Knock when moving a car. What can knock in the car. How to determine the cause of the knock.
- ABS car, what is ABS car, ABS system malfunction, ABS diagnostics
- Overtaking a car when you can start overtaking a car, rules of traffic rules
- Fuel pump VAZ 2110, VAZ 2110 gas station scheme, VAZ 2110 fuel pump device, VAZ 2110 gas station repair,
- Automotive antennas for radio, automotive antenna device, car antenna do it yourself
- Front suspension Kalina, device front suspension Kalina, knock in front suspension Kalina, repair of front suspension Kalina
- Shock absorber Oil, best oil shock absorbers, pumping oil shock absorbers, how to properly pump oil shock absorber
- Clutch malfunctions, touches clutch, causes a clutch malfunction, how to eliminate




Comments