Modern vehicle - a complex system of interrelated elements. However, even people fairly far from engineering, understand the purpose of cooling the radiator - it removes excess heat from the engine, thereby preventing it from possible overheating.
But, under the influence of time, cooling the radiator, as well as any other element of the vehicle may be damaged. In this case, there is a need for its replacement. You can do this in two ways - by resorting to professional help or on their own. Undoubtedly, the second option requires less financial costs, but much more time and patience. In any case - the choice is only yours. And if you decide to replace the heat sink on their own, read on the article detailed instructions.
Content
- radiator device
- The cooling system is not working properly, causes and remedies
- Instruments, tools, consumables replacement heatsink 2110
- Radiator 2110, which one to choose, aluminum or copper, a comparative analysis of
- Radiator, how to dismantle the old and install the new
- Tips pro why when choosing a new heat sink is necessary to know the old model
radiator device
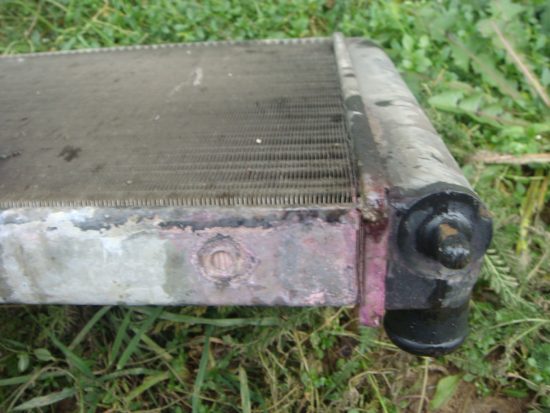
Any car radiator, regardless of brand, consists of:
- Core.
- Connections.
- Two halves (corpus).
- Drain cock in the lower housing section.
- Filler plug in the top of the radiator section, complete with valves - an outlet and an inlet.
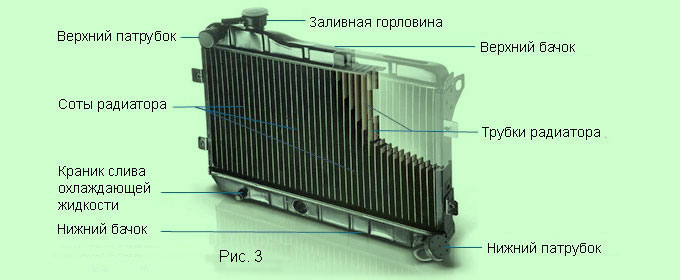
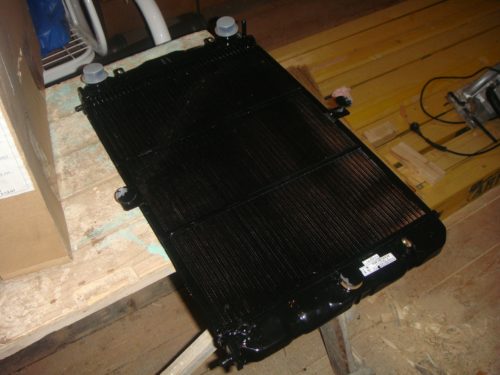
The body is made of aluminum or copper (most often from aluminum), consists of two tanks (from above and below) and the nozzles adjacent to them, according to which the coolant circulates. Inside the case there is a core - rows of brass tubes that are soldered with cooling edges. In the radiator, the cooling fluid falls through the bay stop, and by means of a drain crane, respectively, if necessary, merges.
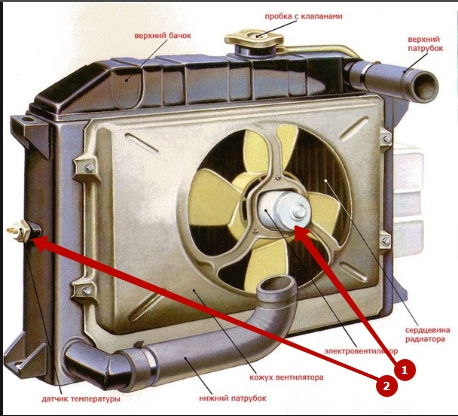
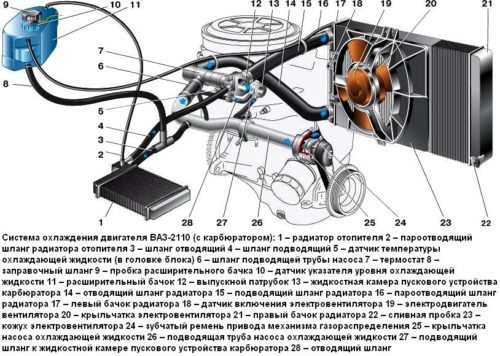
In addition, to maintain the temperature regime, the temperature aggregate includes a temperature sensor (2) and an electric fan (1).
Cooling system does not work well, causes and ways to eliminate
- Clogging of radiator nozzles. This phenomenon, today, occurs very rarely, and that - only when using poor-quality coolant. In this case, replace nozzles.
- Low coolant level as a result of cracking in nozzles or leakage in places of their attachment.
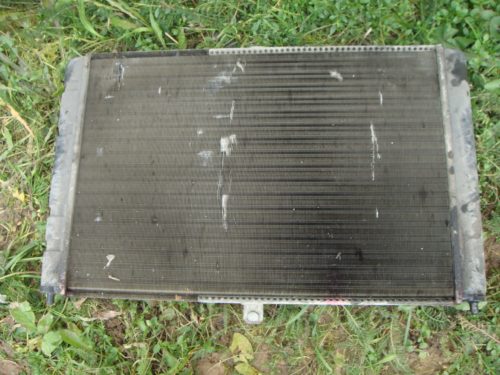
- Pollution of the case. Here it is necessary to take into account one small detail - for the whole car, the radiator - in particular, care is needed. Do not let it "figure out" with fallen leaves, mud and other garbage, as it significantly reduces the effectiveness of its work.
- There is another reason for the failure of the cooling system - the appearance of leaks in the radiator. Remove it so that in the place of the leak, its size and general wornity of the device, decide, is needed to replace it or repair.
Tools, fixtures, consumables for replacing radiator cooling VAZ 2110
- Flat screwdriver.
- The key to "10".
- New radiator.
- Antifreeze.
- Capacity for drain.
Cooling radiator VAZ 2110, what to choose, aluminum or copper, comparative analysis
Advantages and disadvantages of an aluminum radiator:

Relatively cheap, light, cost depends on the manufacturer:
- Pramo (2110-1301012) - about 1600 rubles.
- Luzar (2110-8101060) - approximately 1000 rubles.
It has a smaller thermal conductivity, less efficiently cools the motor, is subject to enough corrosion. To the aluminum radiator of the flow, you need much less time.
Advantages and disadvantages of the copper radiator:
It is heavier, more efficient on cooling characteristics, serves longer, since the copper case is less susceptible to corrosion. In order for the copper unit, the flows, as a rule, a mechanical impact is required (for example, a blow and so on).
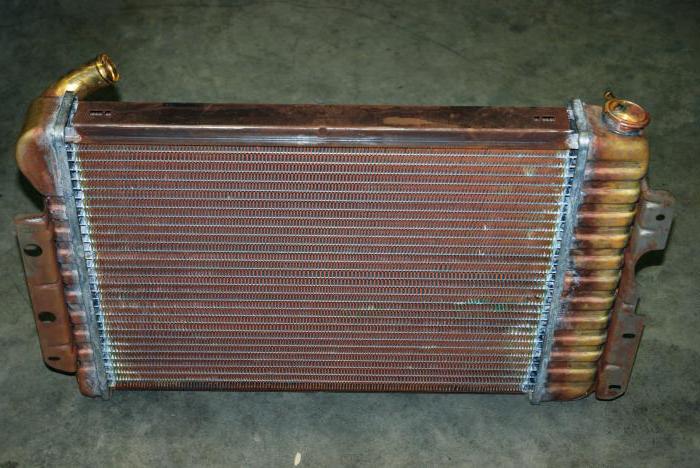
The disadvantage is a big value. For a double-row radiator with an increased efficiency, 40 percent will have to put 5,000 rubles.
Cooling radiator, how to dismantle the old and install a new
- Remove the battery so that it does not interfere with the dismantling.
- Next, remove the ignition module to merge the coolant.
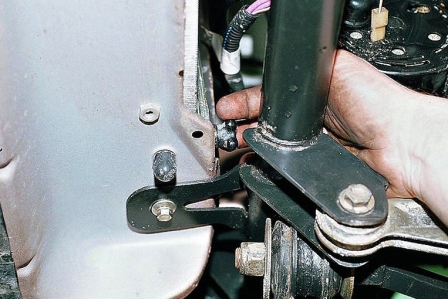
- We merge the cooling fluid in a pre-prepared canister.
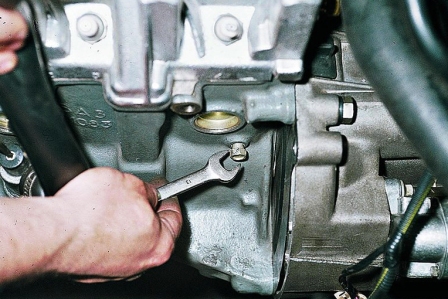
- If the car is equipped with an injection system, you must remove the air filter.
- Then we turn off the wires going to the fan, for which you should disconnect the branded block on the fan and cut the clamp that fixes the harness.

- Now you need to free the throttle of the throttle, which is fixed on the fan casing.
- Remove the nozzles of the cooling system from planting fittings of the thermostat, pre-weakening the clamp.

- Next, you need to disconnect the steaming nozzle, which leads to an expansion tank from the radiator. Remove the clamp.
- From the fixing clamps, we remove the vocabulary nozzle. These clamps are usually located at two points - on the water pump pipe and the expansion tank hose.

- Next, you need to disassemble the upper mount of the radiator to the car frame.
- Take out the radiator from the car.
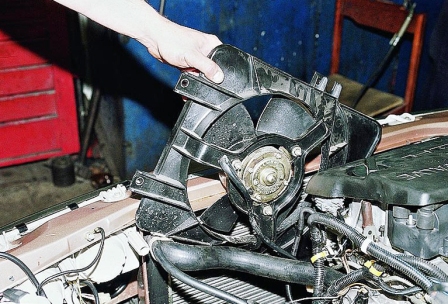
- Disconnect the fan from it and all the hoses (removing, applying and vapor), for which you should weaken the tightening of the clamps.
- Remove the landing pillows from the lower pins and we estimate their condition. In the presence of cracking or deformation - we produce their replacement.
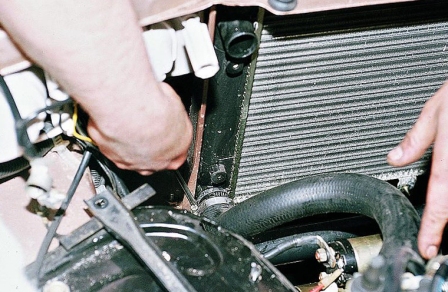
- To determine exactly where the radiator flows is supplied to the air pressure has no more and 0.2 MPa is immersed in water. However, it is better to entrust it to professionals.
- Before mounting a new or repaired radiator, check the state of the rubber sleeve on the upper mount. If she is worn - change it to a new one.
- We carry out the installation of the fan.
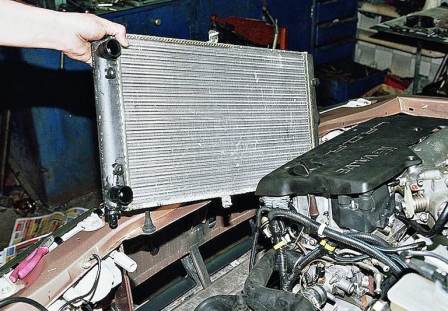
- Do not forget to wear lower mounting pillows on the pins of the radiator.
- The last stage is the fill of antifreeze into the system.
Profi advice, why when choosing a new radiator you need to know the model of the old
When buying a new radiator, be sure to check how your vehicle is equipped with your vehicle, since the radiator model, as a rule, depends on the volume of the power unit and there is both a new and old sample.
Related Materials
- Stove 2110, bad warm stove 2110, VAZ 2110 heating system, repairing the heating system VAZ 2110 with their own hands
- VAZ 2114 stove blows with cold air, stove 2114, bad warm stove VAZ 2114, device and repair of heating VAZ 2114 do-it-yourself, removing the stove VAZ 2114
- How to subdominize the car. How to put a jack. Types of jacks for cars.
- VAZ 2109 Fuse Block, VAZ 2109 Fuse Block Carburetor, VAZ 2109 Fuse Block Injector, Old VAZ 2109 Fuse Block, VAZ 2109 Fuse Block, VAZ Fuse Block 2109
- Car exhaust gas catalyst, faulty catalyst, pluses and cons of the catalyst, how to change the catalyst for the planeencitel
- Stove blowing cold air VAZ 2114, badly blowing the stove VAZ 2114, why badly blowing the stove VAZ 2114
- How to find out the owner of the car by the number of his car, check the car by the number of the traffic police machine, check the car by the state number of the car for free
- How to choose Used tires, Useful Tips
- Winter car road, pressure in passenger car tires in winter, good battery for the car in winter, whether to warm the car in winter
- In winter, the car is poorly started. How to make a car in winter, do you need to warm up the car in winter, useful tips
- Economy fuel consumption machines, the most economical car consumption
- Tires brands for passenger cars, labeling of car tire labeling, residual passenger car tire protector, how to pick a tire on a car brand, car tire tread pattern
- Working transmission operation, mechanical gearbox clutch work, driving with manual gearbox, useful tips
- Rear beam Peugeot 206 sedan, rear beam device Peugeot 206. Rear beam Peugeot 206 Malfunction, repair of the rear beam Peugeot 206
- Diesel fuel in winter, additive for diesel fuel in winter, how to choose the best diesel fuel
- Diesel winter does not start. How to start diesel in winter, heating diesel in winter.
- Japanese bridgestone tires, winter studded bridgestone tires, bridgestone tires brand
- Tire marking decoding for passenger cars, labeling wheels, how to choose the right tires on the disks
- Diesel engine in winter, launch of the diesel engine in winter, what oil to fill in a diesel engine in winter, useful tips
- LED backlight of the car, the backlight of the bottom of the car, the backlight of the legs in the car, the backlight in the door of the car, the backlight of the car is fine
- Recovered tires, bus tire, restored tire protector, can I use them
- Choose winter tires, which is a winter tires, which pressure in winter tires should be marked with winter tires, how to choose the right winter tires, the best winter tires 2019
- Steering rail rail, knock of steering rack, reasons for the knock and repair of the steering rack do it yourself
- Cameless car tires, a set for repair of tubeless tires, repair of the cannon-free tire do it yourself
- Russian tires, Russian tires Winter, Russian All-season tires, Voronezh AMTEL tires, Tires "Matador Omsk Tire", Kama-tires are world-class bus
- How to open a car without a key. Lost the key from the car what to do, the key from the car inside the car
- Silent tires, quiet winter tires, quiet studded bus, which tires to choose, overview tires
- Tires and safety, safety of the bus, why it is necessary to constantly monitor car tires
- Rules of safe driving of the car in the rain and slush, safe driving of the car for beginners
- Rust converter which is better for cars, rust converters to choose how to use rust transducer, professionals
- Polishing the body of the car do it yourself, how to choose a polishing paste, useful tips
- Engine durability, engine life, how to extend engine life
- Knock in the car. Knock when moving the car. What can knock in the car. How to determine the cause of the knock.
- ABS car, what is ABS car, ABS system malfunction, ABS diagnostics
- Overtaking a car when you can start overtaking a car, rules of traffic rules
- Fuel pump VAZ 2110, VAZ 2110 gas station scheme, VAZ 2110 fuel pump device, VAZ 2110 gas station repair,
- Automotive antennas for radio, automotive antenna device, car antenna do it yourself
- Front suspension Kalina, device front suspension Kalina, knock in front suspension Kalina, repair of front suspension Kalina
- Shock absorber Oil, best oil shock absorbers, pumping oil shock absorbers, how to properly pump oil shock absorber
- Clutch malfunctions, touches clutch, causes a clutch malfunction, how to eliminate
Comments