The well-known advantage of carburetor engines of VAZ cars is their high maintainability and simplicity in service. At the same time, carburetor "six", unlike injectors, from time to time require manual ignition. About this further in the article.
Content
- Ignition VAZ, which is included in the ignition system
- What does the right ignition mean, what does it affect
- Ignition Adjustment, Adjustment Methods
- Tools, fixtures, consumables
- Ignition moment, installation of tags on timing lid
- Tags on the timing cover, which is equal to the label, what is the top dead dot (NMT)
- Ignition adjustment 2106, how to make an ignition on the first cylinder, step-by-step instructions
- Tips Pros: How to check ignition, is it correctly exhibited
Ignition VAZ, which is included in the ignition system
In the Ignition system of the car of the VAZ family, it includes:
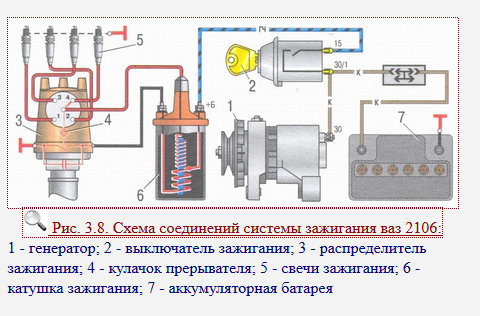
- Generator.
- Egnition lock.
- Distributor.
- Interrupter cam.
- Spark plug.
- Ignition coil.
- Accumulator battery.
- Low and high voltage wires.
What does the right ignition mean, what does it affect
Proper Ignition is the key to the correct operation of the motor and its correct launch. In addition to the other, the magnitude of the ignition affects the dynamic indicators of the car and fuel consumption.
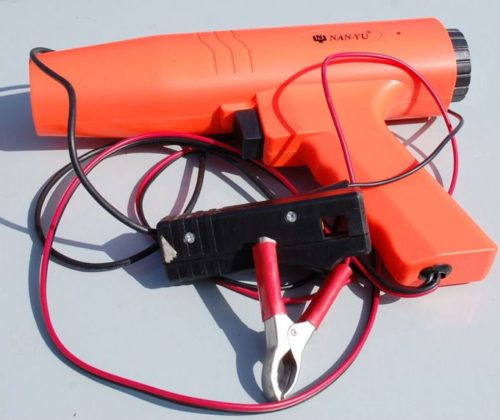
As a result of the wrong ignition, detonation may appear, which is able to lead to serious engine breakdowns and irreversible consequences. When setting the ignition, only a special device, called a stroboscope, can give the most accurate result. However, for the absence of a strobe, the system can be adjusted in garage conditions, relying on ordinary devices.
Ignition Adjustment, Adjustment Methods
- Ignition adjustment in the car service.
- Ignition adjustment using a strobe.
- Ignition adjustment by tags.
- Ignition adjustment "on rumor".
Tools, fixtures, consumables
Ignition moment, installation of tags on timing lid
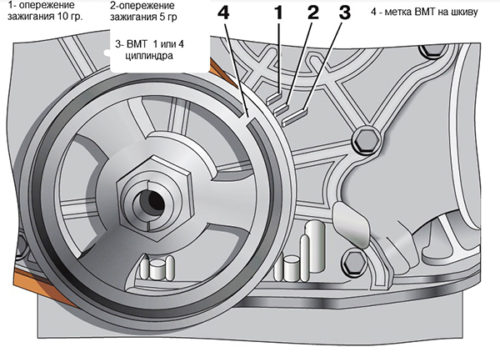
The ignition is exhibited on the fourth or first cylinder. In this article we will consider the last option. The moment of ignition on the VAZ is set in accordance with the labels on the timing cover. There are three labels here - long, medium and short.
Tags on the timing cover, which is equal to the label, what is the top dead dot (NMT)
- The long label corresponds to the angle of ahead of 0 °.
- Average - 5 °.
- Short - 10 °.
The upper dead point (NTC) is denoted by the rim of the pulley. At the hub pulley there is a special influx against this tag.
Ignition adjustment 2106, how to make an ignition on the first cylinder, step-by-step instructions
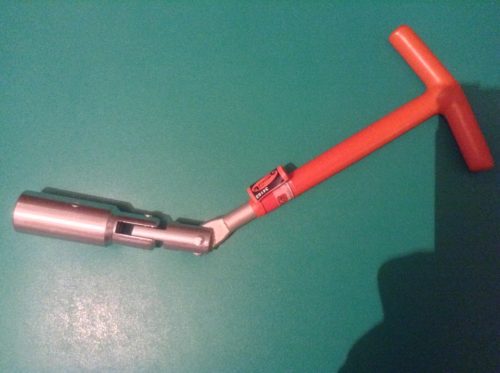
- First of all, you should unscrew the first cylinder candle.
- Then, using a rubber stopper or a finger, it is necessary to close the candle hole.
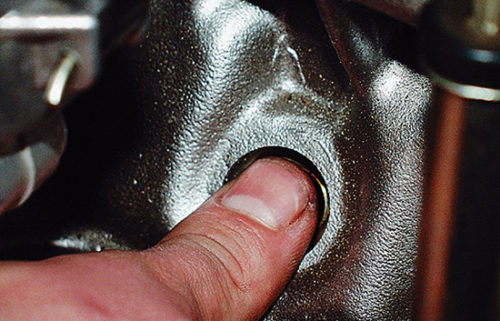
- Next, applying special, you need to turn the crankshaft until the piston in the first cylinder will start moving up (that is, compression tact). Learn it just - a rubber stopper will fly out of the hole, and if you closed the hole with your finger, then you will feel how it squeezes it.
- It follows to twist until the label on the timing cover does not coincide with the label on the crankshaft pulley. If you refuel your car "95" or "92" with gasoline, it is necessary to combine with an average mark. But if "72" either below must be combined with a long label corresponding to the "0" advance angle.
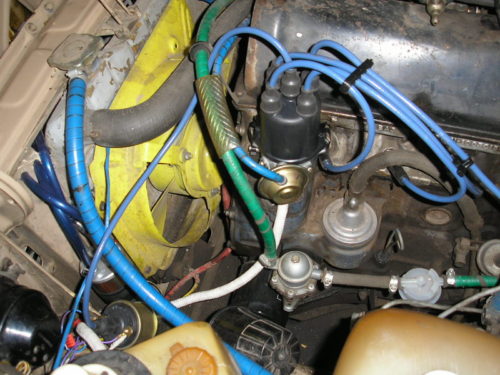
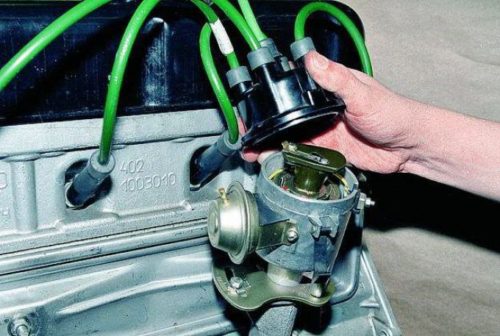
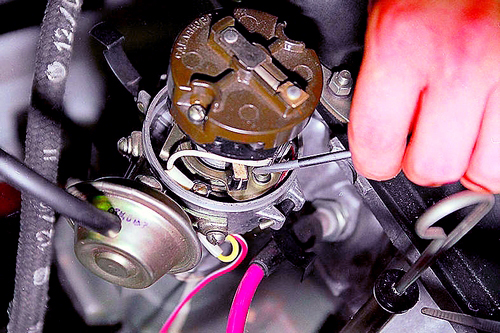
- Move the latch, after which we remove the ignition distributor cover.
- After turning the crankshaft, the rotor must turn into a position in which its outer contact will be directed towards the first cylinder on the distributor cover.
- After combining the labels, pay attention to the distributor, try to spend an imaginable line through the cover latches. It is necessary that it takes place parallel to the axis of the motor. If the line does not work, do the following:
- We unscrew the fastening nut of the distributor, then turn the rubber up.
- Rotating the axis of the rotor, it must be set parallel to the axis of the motor.
- Next, you need to put the distributor and tighten the fastening nut, but it is not necessary to tighten it to the end.
- Next, connect the "control" in this way - one end connect with the mass, and the other with the output of the ignition coil connected to the low-voltage wire of the distributor.
- Turn on the ignition. Do not rush to turn the distributor clockwise until the control lamp is walked.
- Next, rotate the distributor counterclockwise. When the test lamp lights up, fix the position of the distributor and tighten its mounting nut.
- Now turn off the ignition and put the lid of the traver.
Tips Pros: How to check ignition, is it correctly exhibited
To check whether the ignition is correct, we do the following:
- We start the motor and start moving.
- Next, we accelerate the car up to 45 kilometers per hour, after which we turn on the fourth gear and sharply press the "gas".
- Further, after about three seconds, detonation will arise (ringing "fingers", cotton), which will disappear as the car will accelerate.
- If detonation appeared and did not disappear as the vehicle accelerates, it can be assumed that the ignition is "Early". If the detonation did not appear at all, then the ignition "later". When the ignition is "early", turn clockwise distributor by 0.5-1 division. In case of late ignition, you must rotate the distributor at 0.5-1 division counterclockwise. After the adjustment is completed, mark on the dispenser housing using the paint position of the middle risk of the scale in relation to the block.
Related Materials
- Stove 2110, bad warm stove 2110, VAZ 2110 heating system, repairing the heating system VAZ 2110 with their own hands
- VAZ 2114 stove blows with cold air, stove 2114, bad warm stove VAZ 2114, device and repair of heating VAZ 2114 do-it-yourself, removing the stove VAZ 2114
- How to subdominize the car. How to put a jack. Types of jacks for cars.
- VAZ 2109 Fuse Block, VAZ 2109 Fuse Block Carburetor, VAZ 2109 Fuse Block Injector, Old VAZ 2109 Fuse Block, VAZ 2109 Fuse Block, VAZ Fuse Block 2109
- Car exhaust gas catalyst, faulty catalyst, pluses and cons of the catalyst, how to change the catalyst for the planeencitel
- Stove blowing cold air VAZ 2114, badly blowing the stove VAZ 2114, why badly blowing the stove VAZ 2114
- How to find out the owner of the car by the number of his car, check the car by the number of the traffic police machine, check the car by the state number of the car for free
- How to choose Used tires, Useful Tips
- Winter car road, pressure in passenger car tires in winter, good battery for the car in winter, whether to warm the car in winter
- In winter, the car is poorly started. How to make a car in winter, do you need to warm up the car in winter, useful tips
- Economy fuel consumption machines, the most economical car consumption
- Tires brands for passenger cars, labeling of car tire labeling, residual passenger car tire protector, how to pick a tire on a car brand, car tire tread pattern
- Working transmission operation, mechanical gearbox clutch work, driving with manual gearbox, useful tips
- Rear beam Peugeot 206 sedan, rear beam device Peugeot 206. Rear beam Peugeot 206 Malfunction, repair of the rear beam Peugeot 206
- Diesel fuel in winter, additive for diesel fuel in winter, how to choose the best diesel fuel
- Diesel winter does not start. How to start diesel in winter, heating diesel in winter.
- Japanese bridgestone tires, winter studded bridgestone tires, bridgestone tires brand
- Tire marking decoding for passenger cars, labeling wheels, how to choose the right tires on the disks
- Diesel engine in winter, launch of the diesel engine in winter, what oil to fill in a diesel engine in winter, useful tips
- LED backlight of the car, the backlight of the bottom of the car, the backlight of the legs in the car, the backlight in the door of the car, the backlight of the car is fine
- Recovered tires, bus tire, restored tire protector, can I use them
- Choose winter tires, which is a winter tires, which pressure in winter tires should be marked with winter tires, how to choose the right winter tires, the best winter tires 2019
- Steering rail rail, knock of steering rack, reasons for the knock and repair of the steering rack do it yourself
- Cameless car tires, a set for repair of tubeless tires, repair of the cannon-free tire do it yourself
- Russian tires, Russian tires Winter, Russian All-season tires, Voronezh AMTEL tires, Tires "Matador Omsk Tire", Kama-tires are world-class bus
- How to open a car without a key. Lost the key from the car what to do, the key from the car inside the car
- Silent tires, quiet winter tires, quiet studded bus, which tires to choose, overview tires
- Tires and safety, safety of the bus, why it is necessary to constantly monitor car tires
- Rules of safe driving of the car in the rain and slush, safe driving of the car for beginners
- Rust converter which is better for cars, rust converters to choose how to use rust transducer, professionals
- Polishing the body of the car do it yourself, how to choose a polishing paste, useful tips
- Engine durability, engine life, how to extend engine life
- Knock in the car. Knock when moving the car. What can knock in the car. How to determine the cause of the knock.
- ABS car, what is ABS car, ABS system malfunction, ABS diagnostics
- Overtaking a car when you can start overtaking a car, rules of traffic rules
- Fuel pump VAZ 2110, VAZ 2110 gas station scheme, VAZ 2110 fuel pump device, VAZ 2110 gas station repair,
- Automotive antennas for radio, automotive antenna device, car antenna do it yourself
- Front suspension Kalina, device front suspension Kalina, knock in front suspension Kalina, repair of front suspension Kalina
- Shock absorber Oil, best oil shock absorbers, pumping oil shock absorbers, how to properly pump oil shock absorber
- Clutch malfunctions, touches clutch, causes a clutch malfunction, how to eliminate


Comments