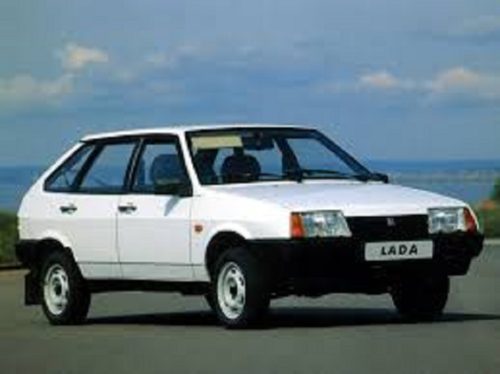
According to the types of repairs that the car owner is able to perform on their own, can be seen on his experience and expertise in the operation of the vehicle. If the owner of the vehicle 2109 replacing the crankshaft oil seal is not difficult, then, you are dealing with a trained motorists who will not appeal to the car wash on every trifling fault. About this later in the article.
Content
- Gland crankshaft 2109, device and mode of operation
- Crankshaft oil seal is worn, signs of wear
- Crankshaft oil seal in 2109 broke down the reasons why the oil seal can fail
- The choice of the workplace and the preparatory work for repair
- Instruments, tools, consumables for repairs
- Replacing front crankshaft oil seal 2109, step by step guide
- Replacement of a back epiploon of 2109, step by step guide
- Tip pro, why changing the front oil seal, it is necessary to change the rear and why buying seals is necessary to know the engine oil, which is used in car
Gland crankshaft 2109, device and mode of operation
All motor components in their work pretty well washed motor oil that lubricates the moving parts and reduces friction, thereby extending the life of the unit. However, what about the elements that go outside? An excellent example is the crankshaft, a portion of which is connected to the flywheel. After all, if such a display element outwardly, oil can flow through the holes of the rotating shaft.
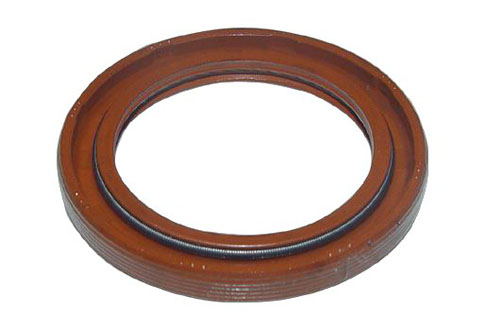
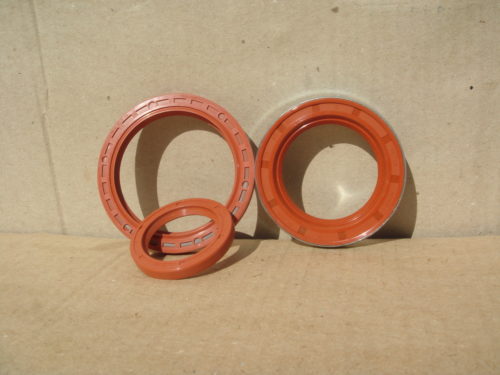
To avoid this, for the sealing of the openings provided by designers of sealing element material - a crankshaft oil seal is made of silicone rubber or fluororubber, and is an O-ring whose diameter is equal to the diameter crankshaft. These materials - thermally stable, which makes it possible to protect the oil seal from the harmful effects of heat, which is generated during friction.
Outside on the seal make special labels that say, as a rule, on the crankshaft rotation. These data make it possible to replace the oil seal when properly install it.
Oil seal is installed in the place where the crankshaft comes out. In VAZOVSKY cars, where gas distribution metallic chain drive is performed, and the motor is mounted along bonneted space gland mounted in the shield front crankshaft journal bearing. Forward drive motors or rubber timing belt device mounted in the block, as shields for them are not used. However, in any case, the purpose of the stuffing box - to prevent leakage of lubricant from the cylinder block.
The housing is formed of oil pressure, presses the sealing element to the gland. Thus, it provides a reliable and effective sealing of the motor against leakage of the lubricating fluid.
Crankshaft oil seal is worn, signs of wear
To diagnose the need of replacing the oil seal, pay attention to the point where they exit from the block, crankshaft.
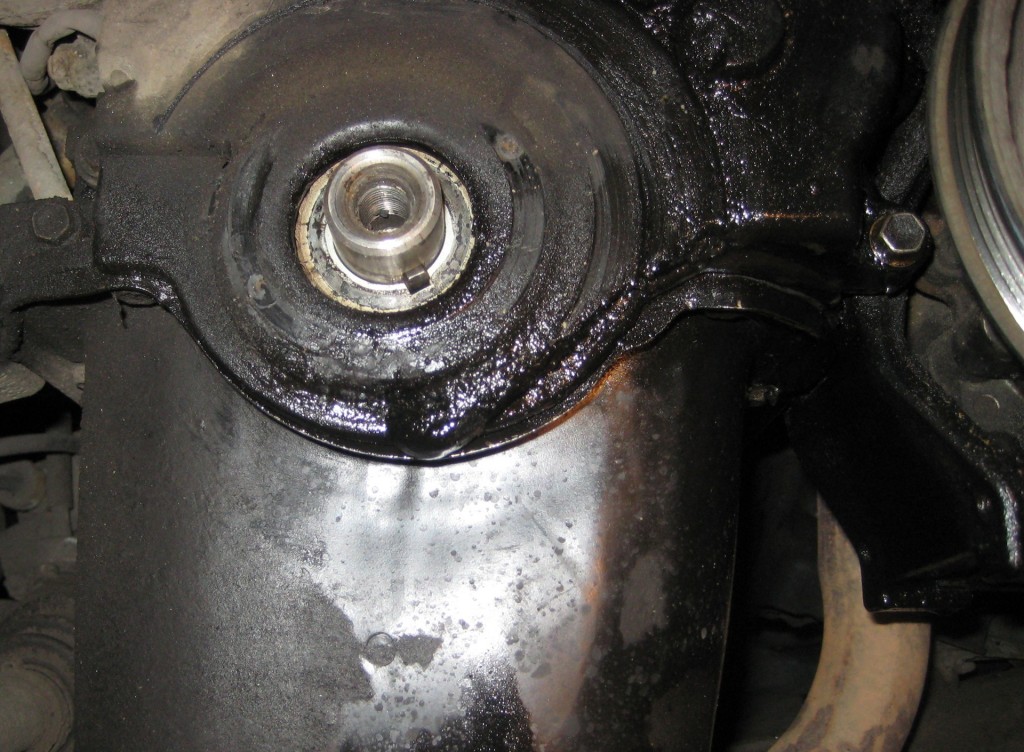
If there is, you will find traces of the leakage of the lubricant and the oil level at the same time significantly reduced, it is a clear sign that the gland kolevala worn and must be replaced.
Crankshaft oil seal in 2109 broke down the reasons why the oil seal can fail
Qualitative gland, which is made trusted manufacturer is able to ensure sealing unit for a long time - about 150 thousand kilometers.. But, there are several specific reasons, because of which there is a risk to bring an element of action much earlier:
- Engine overheating. If overheating of the motor, the crankshaft is able to be heated to temperatures at which it is not designed gland. Thus, the seal is melted, resulting in losing its properties.
- Oil filter and oil have become intimately replaced. This is due to the fact that when using spent oil, dirt and dust penetrates the place of installation of the gland. They scratch the surface that requires sealing. So, small scratches that occur during operation occur during rotation damage the edge of the gland, which prematurely displays it. Scratches may also appear with poor performance.
Choice of workplace and preparatory work for repair
Any repair work and maintenance of the car should begin with preparation consisting of three stages:
- Prepare the car and workplace.
- We select the required tools and fixtures.
- We acquire consumables and spare parts.
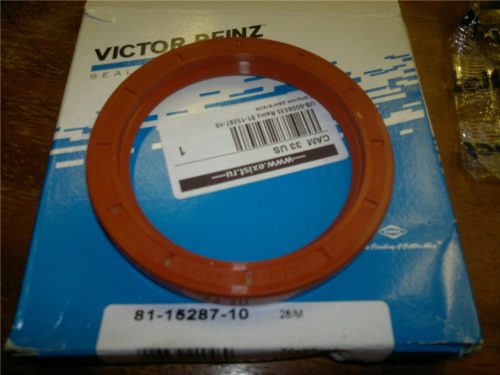
If the goal is set to replace old glands, take care of their acquisition in advance. Rear and front glands are completely different in design and sizes. You should also purchase new gaskets of the rear oil holder and the oil pump. The replacement of old gaskets must be made to the mandatory rule for any repair of nodes, where there are gaskets.
Be sure to wash the engine compartment before repair, especially the motor. Upon hand, you should always have a clean rag to delete contamination. Repairs should be carried out over the observation pit, since some manipulations are more convenient to produce, being under the car.
Tools, fixtures, consumables for repair
- Mandrels for mounting seals.
- Full set of keys.
- Hammers.
- Screwdrivers.
- Cut pipe or metal disk, the diameter of which is 90 millimeters.
Replacing the front seal of the crankshaft 2109, step by step instructions
Faster, more convenient and easier to change the front gland, which is located at the end of the crankshaft, having a gear drive of the gas distribution mechanism. To replace it, you need to fulfill such activities:
- Remove the protection of the motor and the belt cover of the gas distribution mechanism (timing).
- Next, we put the piston of the first cylinder into the upper dead point on the compression tact.
- Then weaken and remove the timing belt.
- Raise the jack and remove the right front wheel.
- We dismantle the pulley, after which we remove the generator drive belt.
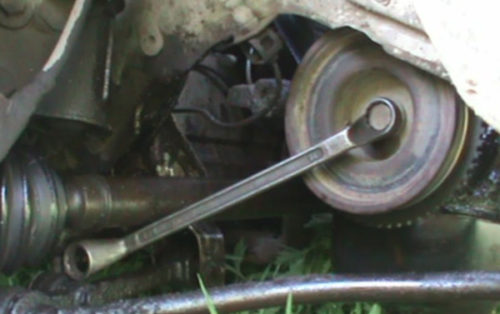
- With the help of two screwdrivers, dismantle the crankshaft pulley (immediately remove the key).
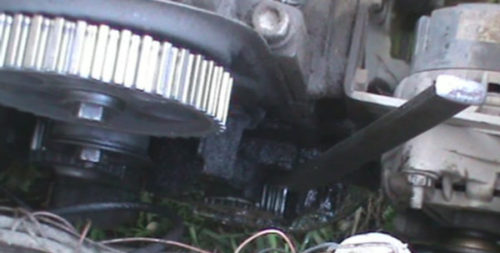
- We merge the engine oil.
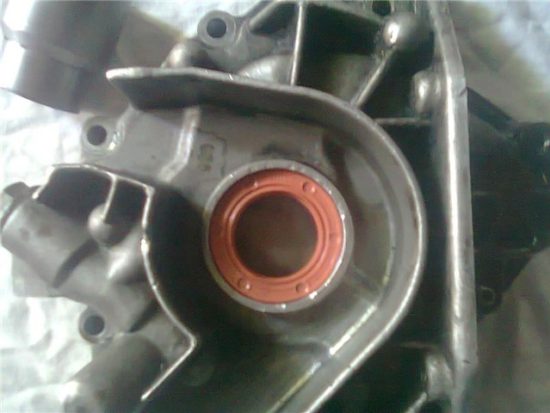
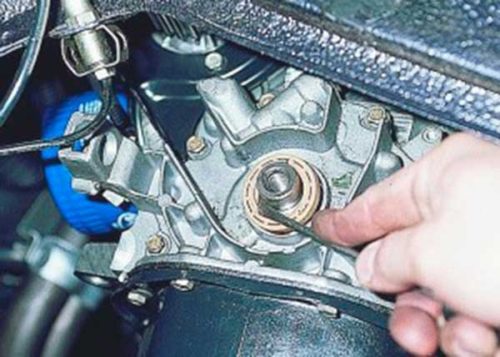
- We unscrew the oil pump where the gland is installed.
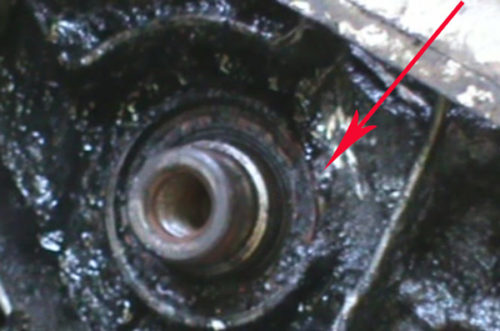
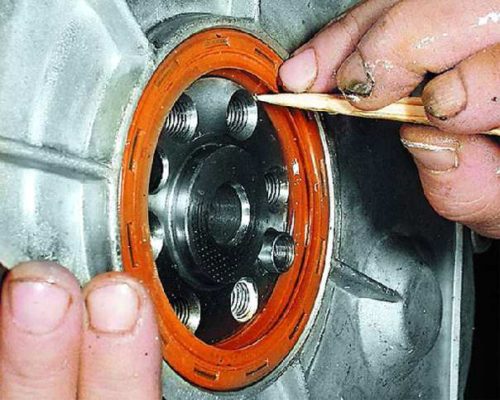
- With a screwdriver, remove the old gland.
- Next, on the workbench with the head on the "27" or nozzles, we mount a new gland.
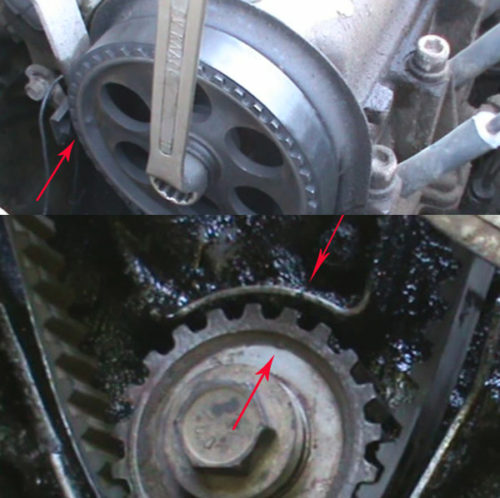
- We make an assembly in the reverse order.
Replacement rear seal 2109, step-by-step instruction
To replace the rear gland, you have to face longer because it hidden behind the clutch system. To carry out this event, enlist the support of an experienced car owner or an auto mechanic who has experience in such operations.
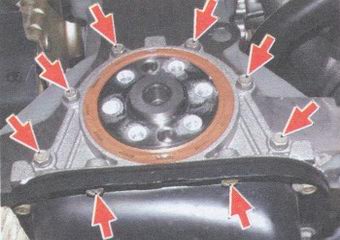
First of all, remove the flywheel and grip. The rear gland is mounted in its own housing, which is attached to eight bolts.
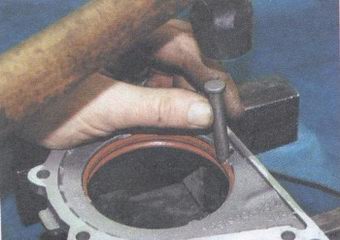
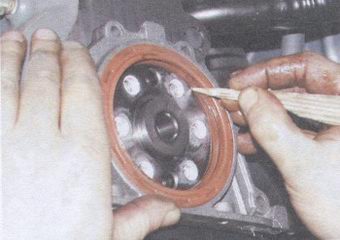
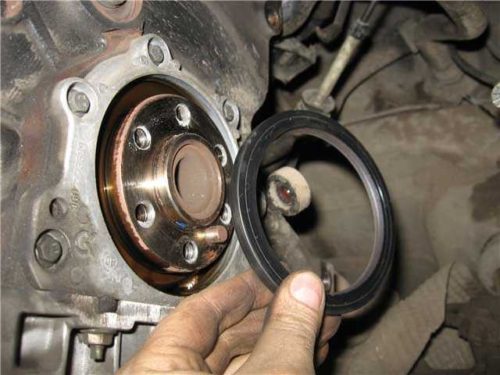
When the housing of the gland is in your hands, it can be removed and pressed a new one.
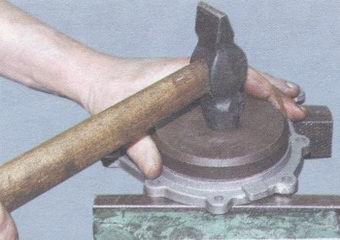
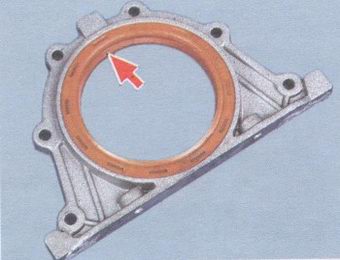
These elements are quite large and simple, so when replacing it should not be difficult.
The advice of the pros, why changing the front gland, you need to change the rear, why buying glands, you need to know the engine oil, which is used in the car
In addition to the correct implementation of the replacement, you need to know some rules regarding the issues of installation and selection of seals. The glands are made from different elasticity and composition of materials. This is done in order to select them based on the type of engine oil used. If the seals are built, which are intended for mineral oil, and the synthetic will be flooded with the system, the latter can simply dissolve.
When buying salon, it is necessary to take into account which engine oil is used. Before installing the gland in the clip, be sure to try it on the shaft. The surface of the closure, the gland and shaft before mounting, smear by engine oil. After installation, check the condition of the seals. When assembly works are finished, run the motor. If the leakage of the lubricant does not occur, it means that the replacement was carried out qualitatively. It is worth noting that experienced car mechanics advise to change both glands at the same time, in order to avoid problems.
Related Materials
- Stove 2110, bad warm stove 2110, VAZ 2110 heating system, repairing the heating system VAZ 2110 with their own hands
- VAZ 2114 stove blows with cold air, stove 2114, bad warm stove VAZ 2114, device and repair of heating VAZ 2114 do-it-yourself, removing the stove VAZ 2114
- How to subdominize the car. How to put a jack. Types of jacks for cars.
- VAZ 2109 Fuse Block, VAZ 2109 Fuse Block Carburetor, VAZ 2109 Fuse Block Injector, Old VAZ 2109 Fuse Block, VAZ 2109 Fuse Block, VAZ Fuse Block 2109
- Car exhaust gas catalyst, faulty catalyst, pluses and cons of the catalyst, how to change the catalyst on the planeencitel
- Stove blowing cold air VAZ 2114, badly blowing the stove VAZ 2114, why badly blowing the stove VAZ 2114
- How to find out the owner of the car by the number of his car, check the car by the number of the traffic police machine, check the car by the state number of the car for free
- How to choose Used tires, Useful Tips
- Winter car road, pressure in passenger car tires in winter, good battery for the car in winter, whether to warm the car in winter
- In winter, the car is poorly started. How to make a car in winter, do you need to warm up the car in winter, useful tips
- Economy fuel consumption machines, the most economical car consumption
- Tires brands for passenger cars, labeling of car tire labeling, residual passenger car tire protector, how to pick a tire on a car brand, car tire tread pattern
- Working transmission operation, mechanical gearbox clutch work, driving with manual gearbox, useful tips
- Rear beam Peugeot 206 sedan, rear beam device Peugeot 206. Rear beam Peugeot 206 Malfunction, repair of the rear beam Peugeot 206
- Diesel fuel in winter, additive for diesel fuel in winter, how to choose the best diesel fuel
- Diesel winter does not start. How to start diesel in winter, heating diesel in winter.
- Japanese bridgestone tires, winter studded bridgestone tires, bridgestone tires brand
- Tire marking decoding for passenger cars, labeling wheels, how to choose the right tires on the disks
- Diesel engine in winter, launch of the diesel engine in winter, what oil to fill in a diesel engine in winter, useful tips
- LED backlight of the car, the backlight of the bottom of the car, the backlight of the legs in the car, the backlight in the door of the car, the backlight of the car is fine
- Recovered tires, bus tire, restored tire protector, can I use them
- Choose winter tires, which is a winter tires, which pressure in winter tires should be marked with winter tires, how to choose the right winter tires, the best winter tires 2019
- Steering rail rail, knock of steering rack, reasons for the knock and repair of the steering rack do it yourself
- Cameless car tires, a set for repair of tubeless tires, repair of the cannon-free tire do it yourself
- Russian tires, Russian tires Winter, Russian All-season tires, Voronezh AMTEL tires, Tires "Matador Omsk Tire", Kama-tires are world-class bus
- How to open a car without a key. Lost the key from the car what to do, the key from the car inside the car
- Silent tires, quiet winter tires, quiet studded bus, which tires to choose, overview tires
- Tires and safety, safety of the bus, why it is necessary to constantly monitor car tires
- Rules of safe driving of the car in the rain and slush, safe driving of the car for beginners
- Rust converter which is better for cars, rust converters to choose how to use rust transducer, professionals
- Polishing the body of the car do it yourself, how to choose a polishing paste, useful tips
- Engine durability, engine life, how to extend engine life
- Knock in the car. Knock when moving the car. What can knock in the car. How to determine the cause of the knock.
- ABS car, what is ABS car, ABS system malfunction, ABS diagnostics
- Overtaking a car when you can start overtaking a car, rules of traffic rules
- Fuel pump VAZ 2110, VAZ 2110 gas station scheme, VAZ 2110 fuel pump device, VAZ 2110 gas station repair,
- Automotive antennas for radio, automotive antenna device, car antenna do it yourself
- Front suspension Kalina, device front suspension Kalina, knock in front suspension Kalina, repair of front suspension Kalina
- Shock absorber Oil, best oil shock absorbers, pumping oil shock absorbers, how to properly pump oil shock absorber
- Clutch malfunctions, touches clutch, causes a clutch malfunction, how to eliminate

Comments