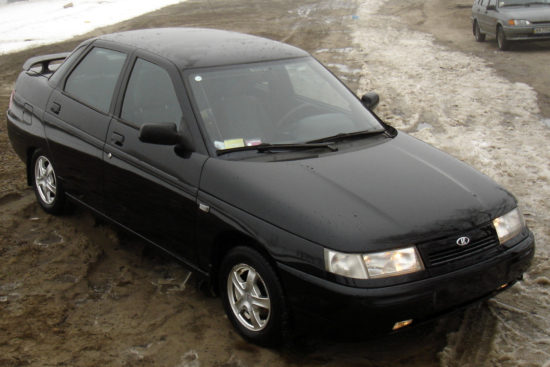
Even novice motorists understand that proper adjustment of headlamps directly affects the safety of the driver and its passengers, as well as other road users, in particular pedestrians. Over time, we see that optics ceases to provide the required visibility on the road - this also applies to the near, and far light. In this case, headlights are needed, which will provide an opportunity to improve their work, as well as provide the desired flow of light. The best way to set up the lighting system of the vehicle is to appeal to specialists of the service station, where there are necessary equipment. However, if there is no such possibility, the adjustment of the GAZ 2110 headlights can be carried out independently. About this further in the article.
Content
- Light VAZ2110, which lighting devices are installed on VAZ2110
- Headlight corrector 2110, check service
- Preparatory work (selection of space for adjustment, screen structure)
- Loading a car, as the car must be loaded when adjusting
- Headlight Adjustment Screen (Vertical and Horizontal Markup)
- Light 2110, adjustment, detailed course
- Kirzhach 2110, make the light brighter, how to improve Kirzhach headlights with your own hands (in detail)
- Electroscoper headlights, how to install it on VAZ2110 with your own hands step by step
- Tips Pros, pluses in the use of electrocode
Light VAZ2110, which lighting devices are installed on VAZ2110
These generation cars have such lighting devices:
- Parking lights.
- Fog lights. Such optics is only on cars VAZ 2110 last versions, however, the fog lights can be installed on their own.
- Turn signs.
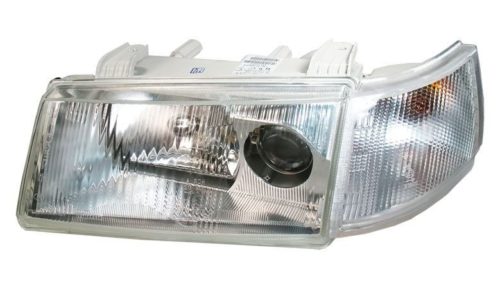
- Block headlights. Using control components on the instrument panel, you can switch between near and distant light.
Headlight corrector 2110, check service
Before adjusting the light adjustment, make sure that the electrical or hydrocormer is working properly. Otherwise, such a "setting" will only aggravate the situation. If all the devices are in order, you can start adjusting.
Preparatory work (selection of space for adjustment, screen structure)
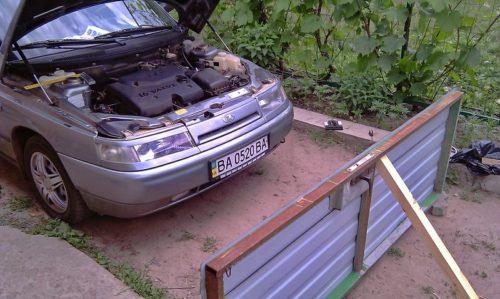
Choosing a fully flat site, install the vehicle. The playground must be checked to exclude a skew, otherwise the headlights cannot be adjusted correctly. You should also build a distance of five meters from the car the so-called shield screen, where you can draw. Very good, if you have a flat playground in front of the garage gate. It is unlikely that they will suffer greatly from the chalk.
Loading a car, as the car must be loaded when adjusting
The machine that is regulated must be "in complete equipment" - with optimal pressure in tires, refilled, and on the driver's seat it is necessary to put the cargo by weight of the driver or put a person of approximately the same weight.
Headlight Adjustment Screen (Vertical and Horizontal Markup)
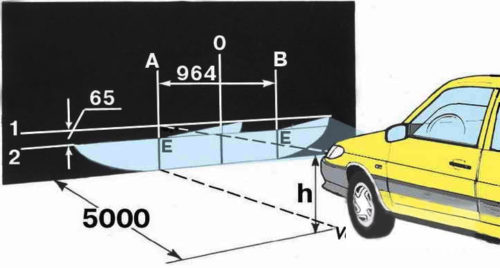
Vertical markup. On the garage gates, the wall or screen, draw 3 vertical lines, after which it is: "O" - the line in the middle of the car (this place is usually indicated by the sign of the vehicle, in this case it is a familiar vase sign). "P" denotes the center of the right headlight, "L" - left.
Horizontal markup. Through the headlight centers need to hold a horizontal line. Indicate its letter "N". By 65 millimeters below from it, one more line should be held. It should be labeled "P". After that, you can move to the light adjustment.
Light 2110, adjustment, detailed course
- We close the right headlight using cardboard or other material that does not miss the light.
- Next, turn in the first position of the hydro director (I).
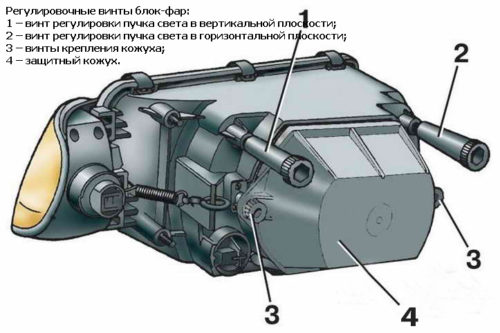
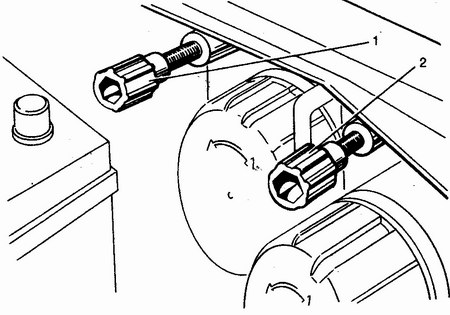
- Then we open the hood and find the screws, with which the adjustment is carried out, then turn them. If the left headlight is configured, it will be true if its light from below will reach the line line, and from above - N.
- Adjusting the left headlight, proceed to adjust the right, closing the previous one.
If the headlights are shining too low, they must be raised, otherwise it can lead to the fact that you will not notice a pedestrian in a timely manner, especially if it is in dark clothes, but in the street sludge. If the light, on the contrary, is given high, you will make the drivers of counter cars. Therefore, self-adjustment should be done very carefully.
Kirzhach 2110, make the light brighter, how to improve Kirzhach headlights with your own hands (in detail)
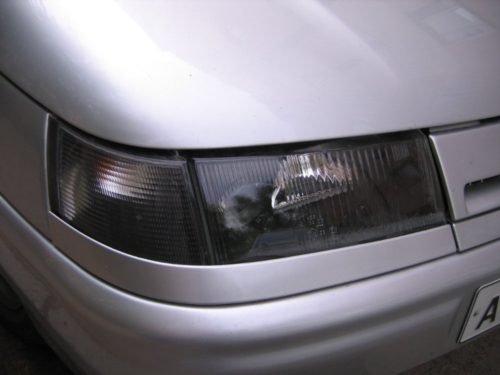
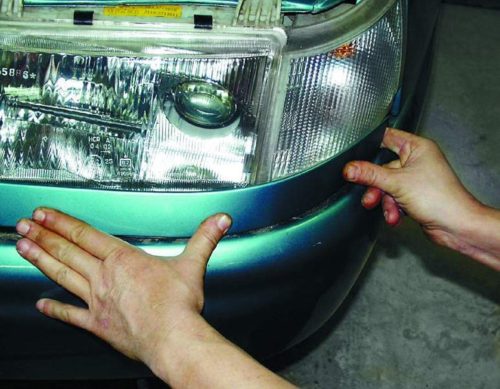
Initially, you should remove the Faro, after which it is possible to disassemble it in the following sequence:
- With a hair dryer, you must remove the glass with Kirzhach. They need to warm up the sealant, after which we separate the glass with a sharp knife.
- Remove the reflecting gasket.
- Improvement will be subject to only near light blocks. They need to be unscrewed.
- Now you have a choice. You can make a shorter modular ring, yelling it, or shift the lens for ten millimeters toward the reflector, which will improve the light flux of Kirzhach, raise it and makes wider.
Electroscoper headlights, how to install it on VAZ2110 with your own hands step by step
Even if independent adjustment was successful, with a change in the load of the car VAZ 2110, the angle of inclination of the light flux should be changed, for which the hydrocormer is invented. It is worth noting that it is inseparable and not regulated. Consequently, when breakdown, it is simply changed to a new one. The most common cause of the exit of the hydrocorographic director is the leakage of fluid or the "wedge" of the piston.
If the need has arisen, it makes sense to replace it with a higher-tech and modern device - electrocorrector.
To install the latter, you must do the following:
- Remove the "minus" output of the battery.
- Click on the retainer, turn the hydroger to yourself and take it out.
- In the headlight housing, we remove the sealing ring and set a new one. It is necessary to insert the electrocorrector.
- The same makes the same with another headlight.
- In the cabin, you should disconnect the switch to which the hydrocorrector is connected.
- Next with the help of wires we attach the electrocorrector.
Tips Pros, pluses in the use of electrocode
The electro-corrector more clearly performs its immediate duties in comparison with the hydrocorrector. The main advantage of this device is reliability. By installing the electrocorrector, you can forget about the breakdowns of this component.
Related Materials
- Stove 2110, bad warm stove 2110, VAZ 2110 heating system, repairing the heating system VAZ 2110 with their own hands
- VAZ 2114 stove blows with cold air, stove 2114, bad warm stove VAZ 2114, device and repair of heating VAZ 2114 do-it-yourself, removing the stove VAZ 2114
- How to subdominize the car. How to put a jack. Types of jacks for cars.
- VAZ 2109 Fuse Block, VAZ 2109 Fuse Block Carburetor, VAZ 2109 Fuse Block Injector, Old VAZ 2109 Fuse Block, VAZ 2109 Fuse Block, VAZ Fuse Block 2109
- Car exhaust gas catalyst, faulty catalyst, pluses and cons of the catalyst, how to change the catalyst for the planeencitel
- Stove blowing cold air VAZ 2114, badly blowing the stove VAZ 2114, why badly blowing the stove VAZ 2114
- How to find out the owner of the car by the number of his car, check the car by the number of the traffic police machine, check the car by the state number of the car for free
- How to choose Used tires, Useful Tips
- Winter car road, pressure in passenger car tires in winter, good battery for the car in winter, whether to warm the car in winter
- In winter, the car is poorly started. How to make a car in winter, do you need to warm up the car in winter, useful tips
- Economy fuel consumption machines, the most economical car consumption
- Tires brands for passenger cars, labeling of car tire labeling, residual passenger car tire protector, how to pick a tire on a car brand, car tire tread pattern
- Working transmission operation, mechanical gearbox clutch work, driving with manual gearbox, useful tips
- Rear beam Peugeot 206 sedan, rear beam device Peugeot 206. Rear beam Peugeot 206 Malfunction, repair of the rear beam Peugeot 206
- Diesel fuel in winter, additive for diesel fuel in winter, how to choose the best diesel fuel
- Diesel winter does not start. How to start diesel in winter, heating diesel in winter.
- Japanese bridgestone tires, winter studded bridgestone tires, bridgestone tires brand
- Tire marking decoding for passenger cars, labeling wheels, how to choose the right tires on the disks
- Diesel engine in winter, launch of the diesel engine in winter, what oil to fill in a diesel engine in winter, useful tips
- LED backlight of the car, the backlight of the bottom of the car, the backlight of the legs in the car, the backlight in the door of the car, the backlight of the car is fine
- Recovered tires, bus tire, restored tire protector, can I use them
- Choose winter tires, which is a winter tires, which pressure in winter tires should be marked with winter tires, how to choose the right winter tires, the best winter tires 2019
- Steering rail rail, knock of steering rack, reasons for the knock and repair of the steering rack do it yourself
- Cameless car tires, a set for repair of tubeless tires, repair of the cannon-free tire do it yourself
- Russian tires, Russian tires Winter, Russian All-season tires, Voronezh AMTEL tires, Tires "Matador Omsk Tire", Kama-tires are world-class bus
- How to open a car without a key. Lost the key from the car what to do, the key from the car inside the car
- Silent tires, quiet winter tires, quiet studded bus, which tires to choose, overview tires
- Tires and safety, safety of the bus, why it is necessary to constantly monitor car tires
- Rules of safe driving of the car in the rain and slush, safe driving of the car for beginners
- Rust converter which is better for cars, rust converters to choose how to use rust transducer, professionals
- Polishing the body of the car do it yourself, how to choose a polishing paste, useful tips
- Engine durability, engine life, how to extend engine life
- Knock in the car. Knock when moving the car. What can knock in the car. How to determine the cause of the knock.
- ABS car, what is ABS car, ABS system malfunction, ABS diagnostics
- Overtaking a car when you can start overtaking a car, rules of traffic rules
- Fuel pump VAZ 2110, VAZ 2110 gas station scheme, VAZ 2110 fuel pump device, VAZ 2110 gas station repair,
- Automotive antennas for radio, automotive antenna device, car antenna do it yourself
- Front suspension Kalina, device front suspension Kalina, knock in front suspension Kalina, repair of front suspension Kalina
- Shock absorber Oil, best oil shock absorbers, pumping oil shock absorbers, how to properly pump oil shock absorber
- Clutch malfunctions, touches clutch, causes a clutch malfunction, how to eliminate
Comments