The car for men is an expensive, beautiful toy. And you want to decorate your favorite toy. Therefore, tuning is produced. And Toning Fat, is one of the popular tuning phenomena among our car enthusiasts. Moreover, the toned headlights are not only stylish and beautiful, but also toning can protect the car from scratches, chips and other damage - and this is important, given the high cost of spare parts. Total Toning FAT is a wonderful thing, but this action costs a lot of money. Therefore, if you want to save, you have to make tinting headlights with your own hands.
Content
Headlight tint what to consider when choosing a tone
Car enthusiasts should understand that headlight tinting is an important process, since your safety and safety of the oncoming machines depends on the depth of dim or toning.
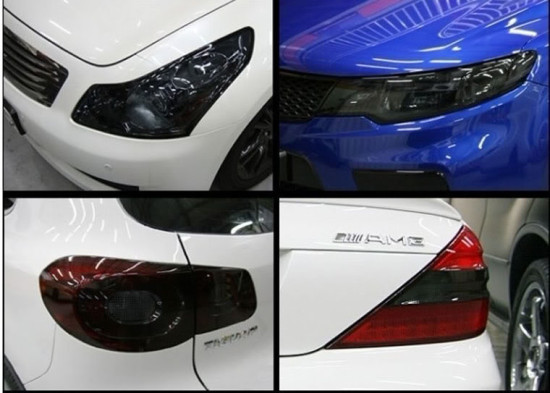
Fully black lights look stylish and luxurious, especially if they are on a white or black car.
But, before you should be the goal not only to decorate the car, but also prevent the hazard when driving a car in the dark, since a significant dimming car headlight reduces the brightness of the headlight and increases the likelihood of entering the traffic accident in the dark.
In addition to the inconvenience of the car enthusiast, the traffic police may be fined for incorrect tinting of automotive headlights.
Based on the above, do not chase black headlights, and pay attention to the headlights, which toned a separate area.
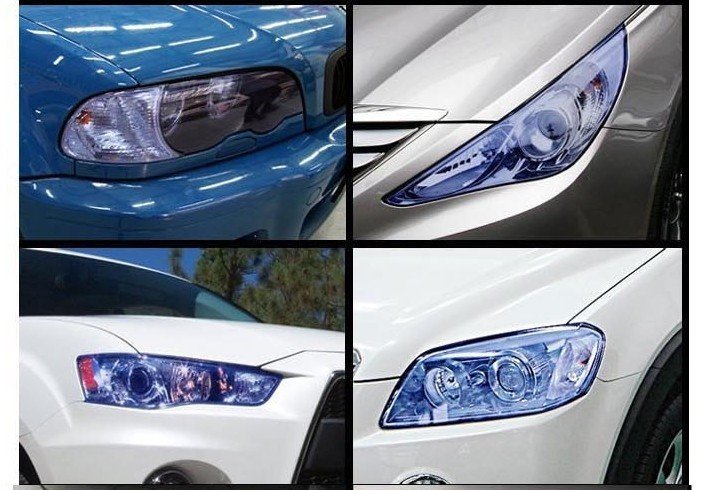
If you produce tuning the upper headlight line, which is located along the hood cut, you will get very stylish narrowed lights.
And you can offer a variant of the full light tinting of the headlights, such headlights look very well and their light light ability is reduced slightly.
Headlight tint what methods can be toned with their own hands
In practice there are two popular methods of tinting headlights.
Toning headlights can be done using a special film. Toning using a special film is the most economical way.
In addition to the relatively low price, the advantage of such a method can be attributed to the rapid and easy removal, if necessary, the applied film from the FAT surface.

The second method of tinting headlights - tinting using aerosol varnish.
This method will be able to provide even, reliable, for a long time tinting.
But if you need to remove the tint, it will be very difficult to remove it, since the paint can hold out to 7 years.
Therefore, if you want to tint headlights for a long time, we recommend using this option, and if you are not sure, take advantage of the tinting of the headlights with the film.
Tinting headlights using a film, step-by-step instruction
Any work requires preparatory stages.
When toning headlamps, you need to purchase a car film in a specialized car store and prepare tools:
- comfortable knife, with a sharp thin blade;
- a couple of pieces of soft, clean vet;
- means for degreasing and cleaning the surface of the headlights;
- industrial dryer.
Having come to the store of auto parts, you must pick up a film that will suit you in color, in thickness, the percentage of stretching.
Thickness and the percentage of film stretching determines the quality.
A more dense film is able to securely protect your headlights from the emission of dirt and stones from under the wheels.

The film can have a red, blue and yellow shade.
But the most popular is a black matte film.
The red film gives the light headlights with a red shade, and this is fraught with a fine of the employees of the auto inspection.
Choosing a suitable film and prepare the necessary tool, proceed to work.
If you do anything slow and carefully, get a good result.
- The first step is to dismantle headlights. Headlights need to dismantle carefully to damage anything, if you can not, attract the helper. Many professionals do without dismantling headlights
- The second step is to clean the headlights. Using a special solution or alcohol, carefully clean the headlights from dust and dirty layers. Wipe dry all clean piece of fabric. Give the time to Farm to dry completely.
- The third step is to close the headlights that you will not be toned. The pasting can be carried out with a dry or wet, a soap solution is used when wet.Professionals are recommended to make a sticker with a dry way. Dry method allows you to make pasting better. But the wet method is easier.If you decide to glue with a wet method, use a weak soap and water solution.
- The fourth stage is the task of giving the form by the automotive film. Heated car film with an industrial hair dryer, you make it more elastic and able to take the shape of the car headlight.Preheat elastic film attach to the surface of the headlight and smooth it with a soft dry cloth.
If your car has a flat headlight, working on flat surfaces is more simpler, smoothing the film on flat headlights, can be a simple plastic card.

Community advice:
- the work room should be well lit;
- all excess pieces of film, clean with a sharp thin blade;
- if the surface is convex or concave, make a subtle, sharp impact blade and remove the excessive film Do not create folds on the film;
- if you used the wet method - at the end of the work, the film should dry the hour 2-3.
When headlight toning work will be completed, install headlights in place.
Headlight tint how to tint with an aerosol cartridge
Aerosol varnish for tinting headlights is quite expensive.
But you can save, uniting with any other car enthusiast, as the varnish is enough for headlight processing of two or three cars.

The advantage of tinting headlights by aerosol varnishes is concluded in ease of work and in time saving, and efforts.
You do not even need to dismantle the headlights.
The original task is yours - thoroughly flushing the surface of the headlight glass and remove fat from the surface with alcohol.
The next step is to cover the body elements, it is best to close with a cellophane film with a painting tape. Varnish is applied in several layers, not allowing outers.
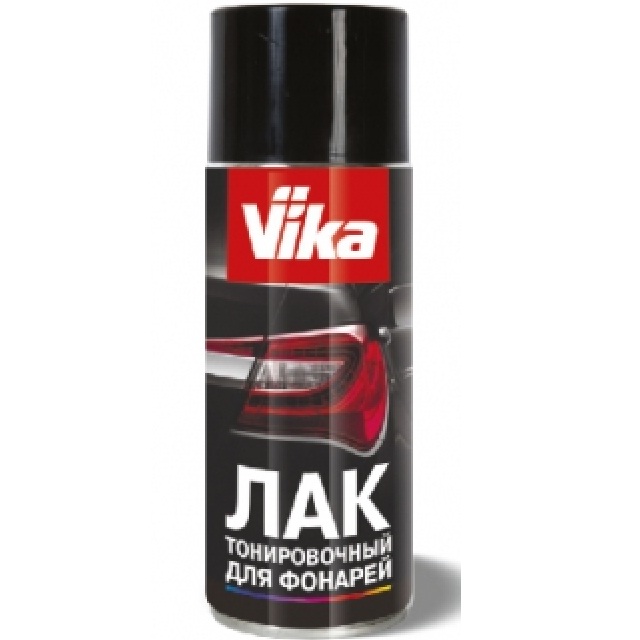
So you will achieve the desired dimming. Instructions are attached to the lacquer package and the instructions are advised how many layers need to be applied.
But professionals are advised to apply one layer more, thereby achieving tinting accuracy, but do not forget that multi-layered leads to a decrease in the light headlights.
Professional advice:
- applying the first layer, squeeze all hard-to-reach places;
- distribute varnish uniformly;
- give each layer of varnish to dry for a few minutes;
- practice on a small piece of glass and you will understand how many layers of varnish is necessary to achieve the desired darkening depth. Training on the glass will help not spoil you lacquer headlights;
- permissible loss of light lights from 7% to 15%, if you exceed, you will have problems with the traffic police.
Related Materials
- Stove 2110, bad warm stove 2110, VAZ 2110 heating system, repairing the heating system VAZ 2110 with their own hands
- VAZ 2114 stove blows with cold air, stove 2114, bad warm stove VAZ 2114, device and repair of heating VAZ 2114 do-it-yourself, removing the stove VAZ 2114
- How to subdominize the car. How to put a jack. Types of jacks for cars.
- VAZ 2109 Fuse Block, VAZ 2109 Fuse Block Carburetor, VAZ 2109 Fuse Block Injector, Old VAZ 2109 Fuse Block, VAZ 2109 Fuse Block, VAZ Fuse Block 2109
- Car exhaust gas catalyst, faulty catalyst, pluses and cons of the catalyst, how to change the catalyst for the planeencitel
- Stove blowing cold air VAZ 2114, badly blowing the stove VAZ 2114, why badly blowing the stove VAZ 2114
- How to find out the owner of the car by the number of his car, check the car by the number of the traffic police machine, check the car by the state number of the car for free
- How to choose Used tires, Useful Tips
- Winter car road, pressure in passenger car tires in winter, good battery for the car in winter, whether to warm the car in winter
- In winter, the car is poorly started. How to make a car in winter, do you need to warm up the car in winter, useful tips
- Economy fuel consumption machines, the most economical car consumption
- Tires brands for passenger cars, labeling of car tire labeling, residual passenger car tire protector, how to pick a tire on a car brand, car tire tread pattern
- Working transmission operation, mechanical gearbox clutch work, driving with manual gearbox, useful tips
- Rear beam Peugeot 206 sedan, rear beam device Peugeot 206. Rear beam Peugeot 206 Malfunction, repair of the rear beam Peugeot 206
- Diesel fuel in winter, additive for diesel fuel in winter, how to choose the best diesel fuel
- Diesel winter does not start. How to start diesel in winter, heating diesel in winter.
- Japanese bridgestone tires, winter studded bridgestone tires, bridgestone tires brand
- Tire marking decoding for passenger cars, labeling wheels, how to choose the right tires on the disks
- Diesel engine in winter, launch of the diesel engine in winter, what oil to fill in a diesel engine in winter, useful tips
- LED backlight of the car, the backlight of the bottom of the car, the backlight of the legs in the car, the backlight in the door of the car, the backlight of the car is fine
- Recovered tires, bus tire, restored tire protector, can I use them
- Choose winter tires, which is a winter tires, which pressure in winter tires should be marked with winter tires, how to choose the right winter tires, the best winter tires 2019
- Steering rail rail, knock of steering rack, reasons for the knock and repair of the steering rack do it yourself
- Cameless car tires, a set for repair of tubeless tires, repair of the cannon-free tire do it yourself
- Russian tires, Russian tires Winter, Russian All-season tires, Voronezh AMTEL tires, Tires "Matador Omsk Tire", Kama-tires are world-class bus
- How to open a car without a key. Lost the key from the car what to do, the key from the car inside the car
- Silent tires, quiet winter tires, quiet studded bus, which tires to choose, overview tires
- Rules of safe driving of the car in the rain and slush, safe driving of the car for beginners
- Rust converter which is better for cars, rust converters to choose how to use rust transducer, professionals
- Polishing the body of the car do it yourself, how to choose a polishing paste, useful tips
- Engine durability, engine life, how to extend engine life
- Knock in the car. Knock when moving a car. What can knock in the car. How to determine the cause of the knock.
- ABS car, what is ABS car, ABS system malfunction, ABS diagnostics
- Overtaking a car when you can start overtaking a car, rules of traffic rules
- Fuel pump VAZ 2110, VAZ 2110 gas station scheme, VAZ 2110 fuel pump device, VAZ 2110 gas station repair,
- Automotive antennas for radio, automotive antenna device, car antenna do it yourself
- Front suspension Kalina, device front suspension Kalina, knock in front suspension Kalina, repair of front suspension Kalina
- Shock absorber Oil, best oil shock absorbers, pumping oil shock absorbers, how to properly pump oil shock absorber
- Clutch malfunctions, touches clutch, causes a clutch malfunction, how to eliminate
- Viscounts of the fan, work uniforms of the fan, malfunction of the ventilator fan, repair of the ventilator fan


Comments