Many motorists consider the hood of their vehicle by his "business card", which creates the first impression from the car, as well as from its owner. It is for this reason that the hood should look like "all one hundred" - on its surface there should be no different divorces from self-painting, sublishes, dust, chips, and, of course, corrosion. Nevertheless, there are a large number of factors that are able to damage the "face" of your car. Undoubtedly, professionals may take care of the impeccable appearance of your hood, however, for such services will have to pay considerable money. On this, most drivers constantly pay attention to this detail and are increasingly interested in information, how to independently replace the hood in the car.
Content
- The correct hood is good noise insulation, heat resistance and aerodynamics
- Hood change professionals
- Change your own hood
- Tools assistants
- Dismantling hood
- How to remove the mechanical lock
- How to remove the electronic hood lock
- Installation of the hood with your own hands, the course of work is styled
- Cable hood torn, how to open the hood
The correct hood is good noise insulation, heat resistance and aerodynamics
The car hood is a vehicle body element that protects the motor and other parts of the motor compartment from the negative effects of the aggressive environment. If we speak in other words, the hood is called the motor compartment cover of the vehicle. Basically, the hood is designed to absorb the noise of the motor, increase the aerodynamic properties of the machine and protect the motor.
To date, car hoods are made from various materials, in particular, from aluminum, steel, carbon fiber (wet or dry) and fiberglass.
As you already understood, the hood performs quite important functions. That is why it should be reliable and resilient to the effects of both low and high temperatures. In fact, the engine operating temperature is very high, which involuntarily can lead to the exit of this part. According to this, more producers of cars prefer to make hoods from high quality steel.
The hood in the car consists of a large-size exterior panel that closes the engine compartment and is a removable detail. In order to give it more rigidity and securely attach to the body, a variety of amplifiers are used. They hang the hood in the front of the body on two hinges, which are located inside, and the back will fix the lock at one point. Such a mechanism for opening the hood much simplifies access to the engine compartment, as well as is the most secure. In addition, rubber buffers are inserted on the front of the front wings between the adjacent body parts and the hood, which would be located in the correct position with uniform gaps.
With the help of fastening bolts that are screwed into floating plates, you can adjust the position of the hood loops, as well as, if necessary, take it, for which the loops need to be completely turned out.
Hood change professionals
To date, most drivers prefer to trust their car to professionals than to repair themselves. However, if you still decided to use the services of masters, it will not be superfluous to ask them a long-term guarantee for an elevated spare part. Usually, in the auto repair shop, the hood consists of three stages:
1.Specialists assess the status of the element, its safe dismantling, evaluate the nodes and elements of the motor compartment, which may also have damage.
2. Using special equipment, remove the hood from the vehicle.
3. Install a new spare part and customize it under a certain car.
Change your own hood
In fact, independent installation of the hood, not such an easy process, as it may seem at first glance. To date, the automotive market represents a large number of new and used hooks of various modifications. And at least, they look like, not a disassembled driver will be very difficult to acquire a suitable detail. According to this, when buying a hood, you should consult with experts in this area. In addition, I immediately want to say that when the hood is self-replaced, you will not be able to do without an assistant and the necessary toolkit.
Tools assistants
1. Retained.
2. Wrench keys.
3. Cleaning agent.
4. Not a very rigid brush.
Dismantling hood
1. We blow the engine and put the vehicle on the parking brake.
2. Then, take the keys from the ignition lock, we climb under the hood and disconnect the minus terminal from the car battery. It will help you avoid short circuit.
3. Using a cleaning agent and semi-rigid brush, clean the loop. In addition, it is necessary to choose such a cleaning agent that it is not possible to circulate paint by car.
4. Disconnect the hood lock.
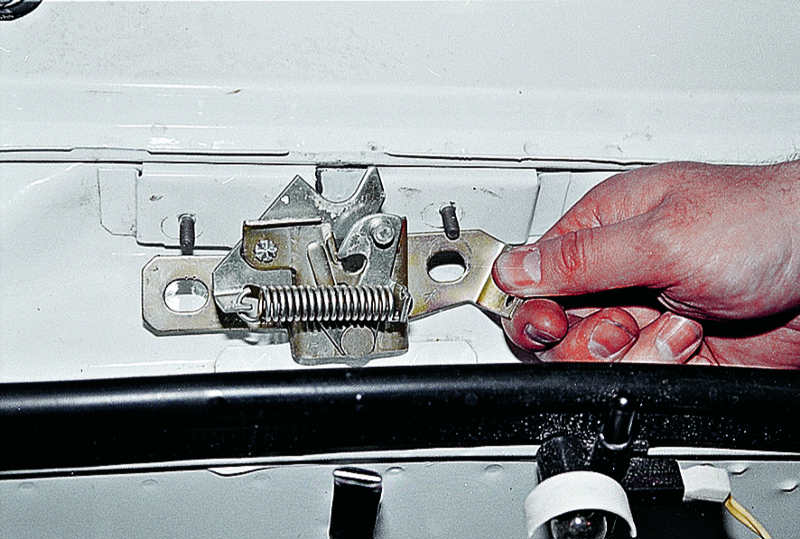
5. If, when removing and replacing the hood, the configuration of the front of the car remains unchanged, before removing the hood, it is necessary to circulate on the inner side of the hood by a marker along the loop contour, which will help in the correct position to build a new spare part in the correct position.
6. Install this item to the desired position can also be another method. In the inner panel of the hood and each loop, you need to drill small holes. Thus, during installation and tightening the fastening bolts, the hood will be kept in the desired position. Then, remove the screws and close the hood, he must lie in place correctly.
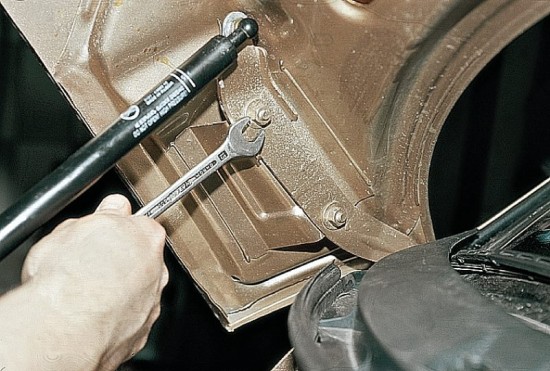
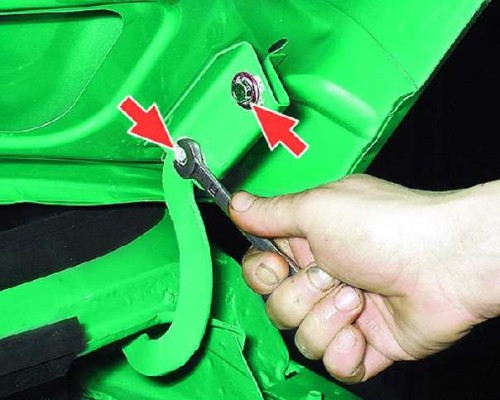
7. First, it is necessary to unscrew the front bolts, and only then the rear, as if you do differently, the hood will turn on the front bolts and fall forward. Because of what both hinges and the hood will be damaged.
8. When the bolts are removed, raise the hood.
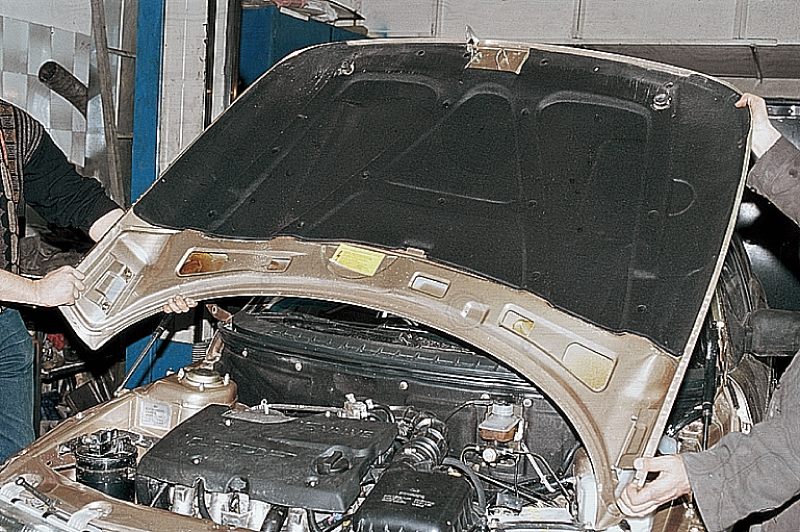
9. Places where fasteners are located, it is necessary to process and repass. A degreasing substance and primer should be applied. After that - to paint them with the desired color.
How to remove the mechanical lock
If you have a mechanical lock on the hood, then it is simply removed enough.
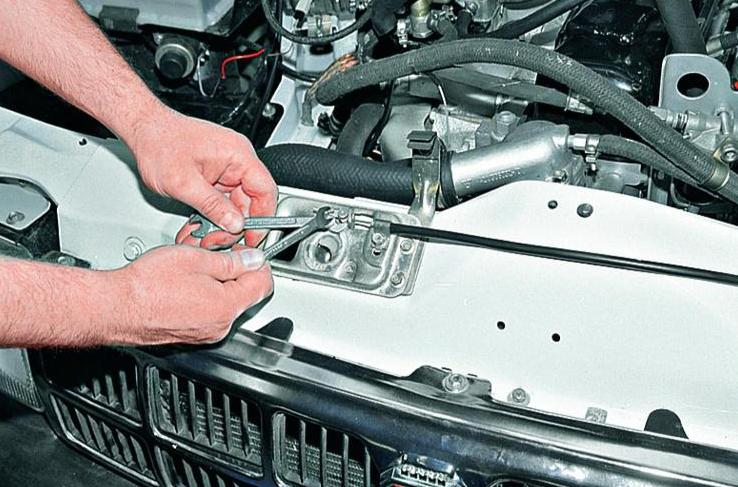
For this, you just need to unscrew several screws.
How to remove the electronic hood lock
To disconnect the part of the electronic lock, which is located on the lid, you need to remove its tongue, unscrew the screws and disconnect the wiring.
Installation of the hood with your own hands, the course of work is styled
1. Installing a new hood is made in the same way as its dismantling, only in reverse order.
2. Before installing a new spare part, you must attach a mechanical or electronic lock back (depending on which of them is installed in your car).
3. Next, you should combine looped and body holes and screw the bolts in them.
4. We connect the battery terminal.
Cable hood torn, how to open the hood
It also happens that the hood cable directly is rotable. In this case, the compartment with the motor of the vehicle is impossible to open. There are two places where he can break - under the hood itself and near the handle. In the second case, to open the hood, it is necessary to pull the passage for the end of the old cable. However, if the cable broke under the hood itself, you will have to go a little. In order to solve the problem, you should call on the pit and remove the lid under the hood. In both the first and second case, the cable can be replaced. Such a procedure is performed quickly and simply and does not require special knowledge and skills.
At the end itself, I would like to say that the replacement of the hood is an extreme measure, as, today, most damage can be renovated and fixed. However, if damage is too strong, it is possible to replace the hood on your own on the instructions described above. Without resorting to the help of professionals, you although you spend your time, but save a considerable souma of money.
In addition, with self-replacement of the hood, it is very important to properly adjust the gaps between the front wings, the headlights and the hood. In any case, if it is properly and regularly to care for the elements of the vehicle, as well as, in a timely manner, a technical inspection, the probability of breakdown and damage will significantly decrease, which will allow you to avoid subsequent repairs.
Related Materials
- Stove 2110, bad warm stove 2110, VAZ 2110 heating system, repairing the heating system VAZ 2110 with their own hands
- VAZ 2114 stove blows with cold air, stove 2114, bad warm stove VAZ 2114, device and repair of heating VAZ 2114 do-it-yourself, removing the stove VAZ 2114
- How to subdominize the car. How to put a jack. Types of jacks for cars.
- VAZ 2109 Fuse Block, VAZ 2109 Fuse Block Carburetor, VAZ 2109 Fuse Block Injector, Old VAZ 2109 Fuse Block, VAZ 2109 Fuse Block, VAZ Fuse Block 2109
- Car exhaust gas catalyst, faulty catalyst, pluses and cons of the catalyst, how to change the catalyst on the planeencitel
- Stove blowing cold air VAZ 2114, badly blowing the stove VAZ 2114, why badly blowing the stove VAZ 2114
- How to find out the owner of the car by the number of his car, check the car by the number of the traffic police machine, check the car by the state number of the car for free
- How to choose Used tires, Useful Tips
- Winter car road, pressure in passenger car tires in winter, good battery for the car in winter, whether to warm the car in winter
- In winter, the car is poorly started. How to make a car in winter, do you need to warm up the car in winter, useful tips
- Economy fuel consumption machines, the most economical car consumption
- Tires brands for passenger cars, labeling of car tire labeling, residual passenger car tire protector, how to pick a tire on a car brand, car tire tread pattern
- Working transmission operation, mechanical gearbox clutch work, driving with manual gearbox, useful tips
- Rear beam Peugeot 206 sedan, rear beam device Peugeot 206. Rear beam Peugeot 206 Malfunction, repair of the rear beam Peugeot 206
- Diesel fuel in winter, additive for diesel fuel in winter, how to choose the best diesel fuel
- Diesel winter does not start. How to start diesel in winter, heating diesel in winter.
- Japanese bridgestone tires, winter studded bridgestone tires, bridgestone tires brand
- Tire marking decoding for passenger cars, labeling wheels, how to choose the right tires on the disks
- Diesel engine in winter, launch of the diesel engine in winter, what oil to fill in a diesel engine in winter, useful tips
- LED backlight of the car, the backlight of the bottom of the car, the backlight of the legs in the car, the backlight in the door of the car, the backlight of the car is fine
- Recovered tires, bus tire, restored tire protector, can I use them
- Choose winter tires, which is a winter tires, which pressure in winter tires should be marked with winter tires, how to choose the right winter tires, the best winter tires 2019
- Steering rail rail, knock of steering rack, reasons for the knock and repair of the steering rack do it yourself
- Cameless car tires, a set for repair of tubeless tires, repair of the cannon-free tire do it yourself
- Russian tires, Russian tires Winter, Russian All-season tires, Voronezh AMTEL tires, Tires "Matador Omsk Tire", Kama-tires are world-class bus
- How to open a car without a key. Lost the key from the car what to do, the key from the car inside the car
- Silent tires, quiet winter tires, quiet studded bus, which tires to choose, overview tires
- Tires and safety, safety of the bus, why it is necessary to constantly monitor car tires
- Rules of safe driving of the car in the rain and slush, safe driving of the car for beginners
- Rust converter which is better for cars, rust converters to choose how to use rust transducer, professionals
- Polishing the body of the car do it yourself, how to choose a polishing paste, useful tips
- Engine durability, engine life, how to extend engine life
- Knock in the car. Knock when moving the car. What can knock in the car. How to determine the cause of the knock.
- ABS car, what is ABS car, ABS system malfunction, ABS diagnostics
- Overtaking a car when you can start overtaking a car, rules of traffic rules
- Fuel pump VAZ 2110, VAZ 2110 gas station scheme, VAZ 2110 fuel pump device, VAZ 2110 gas station repair,
- Automotive antennas for radio, automotive antenna device, car antenna do it yourself
- Front suspension Kalina, device front suspension Kalina, knock in front suspension Kalina, repair of front suspension Kalina
- Shock absorber Oil, best oil shock absorbers, pumping oil shock absorbers, how to properly pump oil shock absorber
- Clutch malfunctions, touches clutch, causes a clutch malfunction, how to eliminate

Comments