Vacuum brake amplifier is a fairly important detail of the brake system and imagine without it an effective and high-quality operation of the pedal is unrealistic. According to this, information on independent verification of the brake vacuum pump, all motorists must be interested. It is about this that we will negone in our article.
Content
- Brake amplifier from which it consists
- Principles of Vacuum Amplifier
- Breakdown of vacuum brake amplifier
- How to check the quality of repair of the brake amplifier after work on a hundred
- Assistant tools for repair do it yourself
- Repair of the vacuum brake amplifier with your own hands, the course of work is styled
Brake amplifier from which it consists
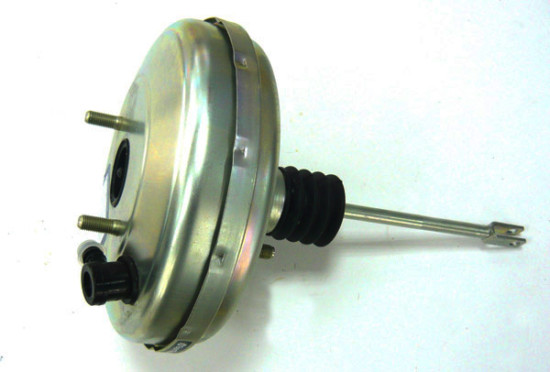
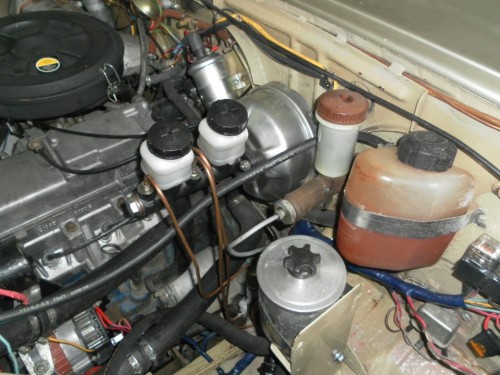
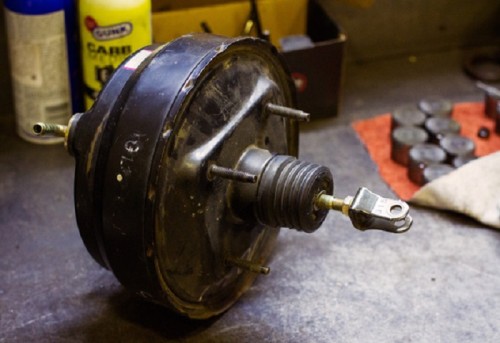
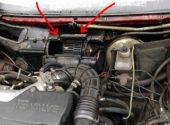
I doubt that among readers there is such a driver who has no problems with a vacuum amplifier. If, when you click on the brake pedal, you feel that you need to make a maximum of effort, it means that the vacuum room has failed. This item is located under the hood, and the main cylinder is connected to it.
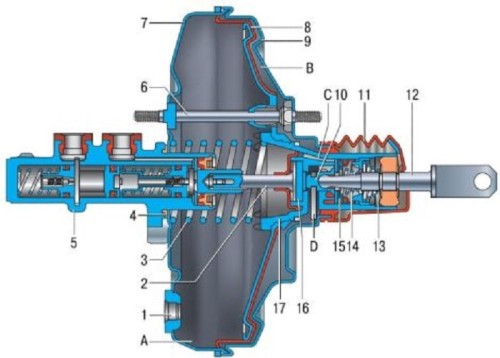
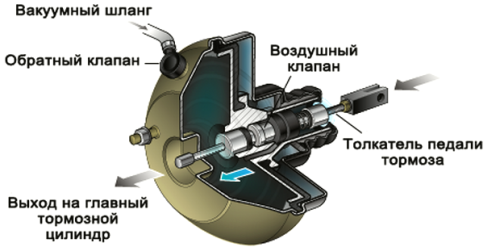
The design of the mechanism is not complicated. This detail includes a hull, which is divided into atmospheric and vacuum niche. The first of them is located closer to the brake pedal.
Also, the vacuum amplifier is distinguished by the presence of a chamber connected to it by means of a check valve and an intake manifold.
Principles of Vacuum Amplifier
In the event of problems with this element, a direct impact on the management of the vehicle arises. The motorist no longer feels the hasive comfort, which sometimes leads to the deposits.
For this reason, all motorists should know how to properly check the mechanism after it is replaced, as well as, be able to understand in a timely manner, what is the problem. To determine the breakdown is necessary on a fixed car.
To check the vacuum amplifier after it is replaced, it takes a slightly brake pedal with subsequent fixation in the middle. Then you need to start the motor. When the pedal is descended independently, it means that the device is in order.
On cars that have a diesel engine, also applied, also vacuum electric pump that constantly ensures the operation of the amplifier. When the motor is stopped, using the check valve, the collector and the amplifier are disconnected, because the vacuum amplifier is capable of functioning only when the engine is running. If the vacuum is out of order, separation will also happen.
In addition, the vacuum amplifier is able to turn on the pusher and the return spring. It is worth saying that in the EPS design, an active brake amplifier is used, designed to prevent the machine's coups at a strong movement speed.
Breakdown of vacuum brake amplifier
Now you should pay attention to the malfunctions of this part, if the brake booster vacuum is restored. The breakdown of this element is able to lead to sad results, however, cannot fail the entire system. In this case, the management of the vehicle is essential and it is necessary to apply additional efforts when indulging the brake pedal. The most frequently vacuum brake pump is faulty for the following reasons:
1. If the hose was cut off, which connects this element with a collector of the device, while you can hear how the vacuum hooks.
2. When breaking the diaphragm in the middle of the case.
3. If the tires of the valves failed.
How to check the quality of repair of the brake amplifier after work on a hundred
In fact, check this element after repair in the workshop or its replacement, it is not at all difficult. In the case of depressurization, the air will begin to flow into the intake manifold, which will lead to rapid depletion of the fuel substance. I think everyone is understandable what happens next.
There are several effective methods for checking the vacuum brake amplifier:
1. To check the quality of repair, you need to squeeze the brake pedal several times when the motor does not work. Then, it is necessary to squeeze the pedal one more time, however, in the middle of the move to stop it and put the start of the motor. If the pedal fails during the procedure, it will mean the normal functioning of the vacuum amplifier. Otherwise, the repair will have to repeat.
2. It is necessary to drown out the engine and run it again in a few minutes. Next, we press the brake pedal several times, applying, while the usual efforts. If the amplifier is working, the pedal should be distilled until it stops when pressed. The system should work, and the vacuum is attracted to the diaphragm, helping the piston of the main brake cylinder through the rod. After that, with the valve, the pressure in the chamber comes with atmospheric. With the second and the next pressing of the pedal, the discharge will not come from where the pedal will make more and less. In case there is no difference between the first and other presses, it means that this device does not provide additional efforts in the main brake cylinder.
3. In addition, professionals are verified by the method of visual inspection, paying reinforced attention on the sublifting, which are formed on the surface of the vacuum-amplifier body and, based on this, make appropriate conclusions about the malfunction of this part.
Assistant tools for repair do it yourself
In order to repair the brake amplifier, you will need the following toolkit:
1.Close screwdriver.
2. Extension.
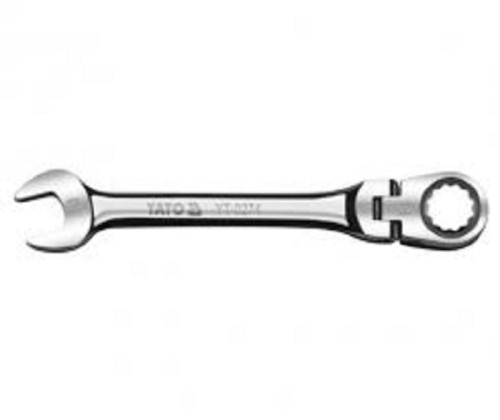
3. A key-ratchet for thirteen.
Repair of the vacuum brake amplifier with your own hands, the course of work is styled
1. For a start, it is necessary to dismantle the main brake cylinder.
2. After that, we go to the salon, where you need to find and unscrew four nuts near the brake pedal.
3. Next, you need to take a flat screwdriver and remove the bracket that fixes the pedal.
4. The next step will be indulging in the stem with a screwdriver aside into which it is removed.
5. Now you can get out of the cabin and remove the vacuum amplifier, because it does not hold anything anymore.
Next, it is necessary to predict the extracted element and, if possible, repair, however, it is better to provide this work to professionals, since only they are able to do it right. Often, the vacuum brake amplifier is changed to a new one.
If the cuff came out of the order, which happens quite often, it is necessary to replace it. It can be bought with a new vacuum. Replace the cuff without removing the vacuum amplifier from the vehicle.
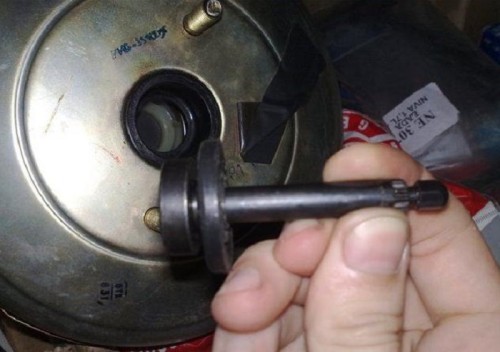
To start work, we need to fray the axis and disconnect the pusher plug from the pedal. You can get acquainted with the details of this process a little higher. After, you need to remove the protective case and remove the clamping sleeve from the pusher support. Remove, also need an air filter. Now we take the usual knitting needles and remove the cuff and lock washer. It is required to inspect and make a decision. In case the item is too worn, it must be replaced with a new one. The cuff must be lubricated with lithol and make a reverse assembly in the same order.
Now it is required to extort the length of the rod of the plug. For cars that have a left-hand drive steering wheel, the strap length should leave 160 millimeters, and for machines with right-hand drive steering - 120 millimeters. If the length did not come up, the amplifier will have to be replaced.
To begin, it is necessary to install an item, but the pusher should not be fixed. After that, you need to tighten two bolts on which the brake amplifier is mounted and install the main brake cylinder. Then the two mounting nuts in the brake cylinder should be fixed and check if it is secured. Also, you need to make sure the strut holder is located where it should be. Next, you need to mount the pusher into the vacuine and click on the pedal for connecting the pusher and the amplifier.
When you change the vacuum amplifier, it is important not to forget to attract the required amount of brake fluid into the tank if its low level.
Related Materials
- Stove 2110, bad warm stove 2110, VAZ 2110 heating system, repairing the heating system VAZ 2110 with their own hands
- VAZ 2114 stove blows with cold air, stove 2114, bad warm stove VAZ 2114, device and repair of heating VAZ 2114 do-it-yourself, removing the stove VAZ 2114
- How to subdominize the car. How to put a jack. Types of jacks for cars.
- VAZ 2109 Fuse Block, VAZ 2109 Fuse Block Carburetor, VAZ 2109 Fuse Block Injector, Old VAZ 2109 Fuse Block, VAZ 2109 Fuse Block, VAZ Fuse Block 2109
- Car exhaust gas catalyst, faulty catalyst, pluses and cons of the catalyst, how to change the catalyst for the planeencitel
- Stove blowing cold air VAZ 2114, badly blowing the stove VAZ 2114, why badly blowing the stove VAZ 2114
- How to find out the owner of the car by the number of his car, check the car by the number of the traffic police machine, check the car by the state number of the car for free
- How to choose Used tires, Useful Tips
- Winter car road, pressure in passenger car tires in winter, good battery for the car in winter, whether to warm the car in winter
- In winter, the car is poorly started. How to make a car in winter, do you need to warm up the car in winter, useful tips
- Economy fuel consumption machines, the most economical car consumption
- Tires brands for passenger cars, labeling of car tire labeling, residual passenger car tire protector, how to pick a tire on a car brand, car tire tread pattern
- Working transmission operation, mechanical gearbox clutch work, driving with manual gearbox, useful tips
- Rear beam Peugeot 206 sedan, rear beam device Peugeot 206. Rear beam Peugeot 206 Malfunction, repair of the rear beam Peugeot 206
- Diesel fuel in winter, additive for diesel fuel in winter, how to choose the best diesel fuel
- Diesel winter does not start. How to start diesel in winter, heating diesel in winter.
- Japanese bridgestone tires, winter studded bridgestone tires, bridgestone tires brand
- Tire marking decoding for passenger cars, labeling wheels, how to choose the right tires on the disks
- Diesel engine in winter, launch of the diesel engine in winter, what oil to fill in a diesel engine in winter, useful tips
- LED backlight of the car, the backlight of the bottom of the car, the backlight of the legs in the car, the backlight in the door of the car, the backlight of the car is fine
- Recovered tires, bus tire, restored tire protector, can I use them
- Choose winter tires, which is a winter tires, which pressure in winter tires should be marked with winter tires, how to choose the right winter tires, the best winter tires 2019
- Steering rail rail, knock of steering rack, reasons for the knock and repair of the steering rack do it yourself
- Cameless car tires, a set for repair of tubeless tires, repair of the cannon-free tire do it yourself
- Russian tires, Russian tires Winter, Russian All-season tires, Voronezh AMTEL tires, Tires "Matador Omsk Tire", Kama-tires are world-class bus
- How to open a car without a key. Lost the key from the car what to do, the key from the car inside the car
- Silent tires, quiet winter tires, quiet studded bus, which tires to choose, overview tires
- Rules of safe driving of the car in the rain and slush, safe driving of the car for beginners
- Rust converter which is better for cars, rust converters to choose how to use rust transducer, professionals
- Polishing the body of the car do it yourself, how to choose a polishing paste, useful tips
- Engine durability, engine life, how to extend engine life
- Knock in the car. Knock when moving the car. What can knock in the car. How to determine the cause of the knock.
- ABS car, what is ABS car, ABS system malfunction, ABS diagnostics
- Overtaking a car when you can start overtaking a car, rules of traffic rules
- Fuel pump VAZ 2110, VAZ 2110 gas station scheme, VAZ 2110 fuel pump device, VAZ 2110 gas station repair,
- Automotive antennas for radio, automotive antenna device, car antenna do it yourself
- Front suspension Kalina, device front suspension Kalina, knock in front suspension Kalina, repair of front suspension Kalina
- Shock absorber Oil, best oil shock absorbers, pumping oil shock absorbers, how to properly pump oil shock absorber
- Clutch malfunctions, touches clutch, causes a clutch malfunction, how to eliminate
- Viscounts of the fan, work uniforms of the fan, malfunction of the ventilator fan, repair of the ventilator fan

Comments