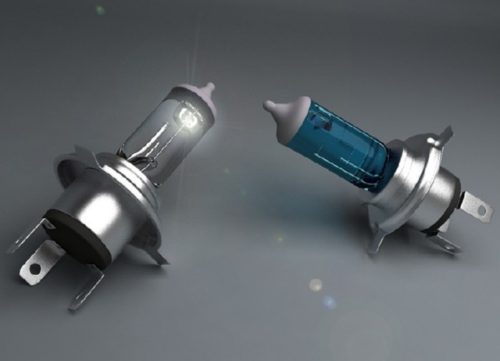
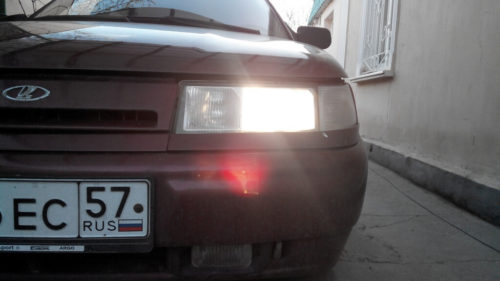
With the need for replacement of lamps on the VAZ 2110 car, many car owners are facing. Over time, factory components wear out. Some initially do not satisfy the needs of the driver. In particular, this applies to Middle Lights, which may well do not meet the demands of motorists for the following reasons:
- Fast failure.
- Too dim lighting of roadbed.
- An inappropriate shade of light (for example, for driving under difficult weather conditions, the headlights with a bluish and white glow) are excellent.
Since the driver should drive both in the night and during the daytime, the lamps in the system quickly come into disrepair. In addition, for riding at night without headlamps, our country's legislation provides for penalties, therefore, with insufficient lighting, it is necessary to replace the lamp urgently. In addition, such a ride is unsafe for both you and other road users. About this further in the article.
Content
- Middle Light 2110, device, principle of operation
- Causes of faults, possible options
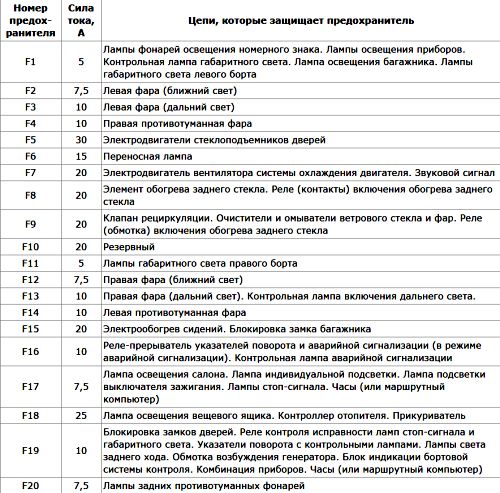
- Fuses 2110, where are located, how to check the health of the fuses of the Middle Light
- Safety when working with car lighting electrical system
- Tools assistants and devices when working on replacing Middle Lights
- How to change the muzzle light bulb (simple light bulb) step by step
- Lighting relays checking contacts, correctness of the relay themselves
- Connection reliability: in headlight pads, fastening the mass of headlight wires
- How to replace a light bulb of the near light if you need to disassemble the headlight block, step by step instructions
- How to replace, in the way, a lamp of dance light and dimensions
- Adjustment of headlights 2110 (step-by-step instruction)
- Tips Prof.
Middle Light 2110, device, principle of operation
To replace Middle Light lamps, it is necessary to know how the electric circuit of the car VAZ 2110 functions.
Components are connected to it:
- The external light switch located on the front panel of the car.
- The headlamp mode switch is located on the steering column.
- Switching relays between Middle Light Bulbs.
- Signal lamp notifying the driver on the functioning of long-distance lights.
- Four fuses that provide optimal operation of the electrical circuit and are in the mounting block.
VAZ 2110 cars by the manufacturer are mounted block structures of headlights, inside which there are turn signals and lamps that are responsible for near and distant lights. Electrical wiring that suits these blocks has two variations of plugs that are responsible for the power of long-distance lamps.
Causes of faults, possible options
Quite often, the perpetrators are two relays that are responsible for the headlights. In this case, it is enough to clean the contacts so that the relay began to work again.
Another possible breakdown is online. It is necessary to check the contacts of the wires that go to the block headlights, the backlight of the instruments and the "fog".
If it does not help, remove the headlights regulator and the external light controller, then check their contacts.
Fuses 2110, where are located, how to check the health of the fuses of the Middle Light
The inclusion of headlamps must be accompanied by the lighting with the four filaments of the heating, located in the lights, which are responsible for outdoor lighting.
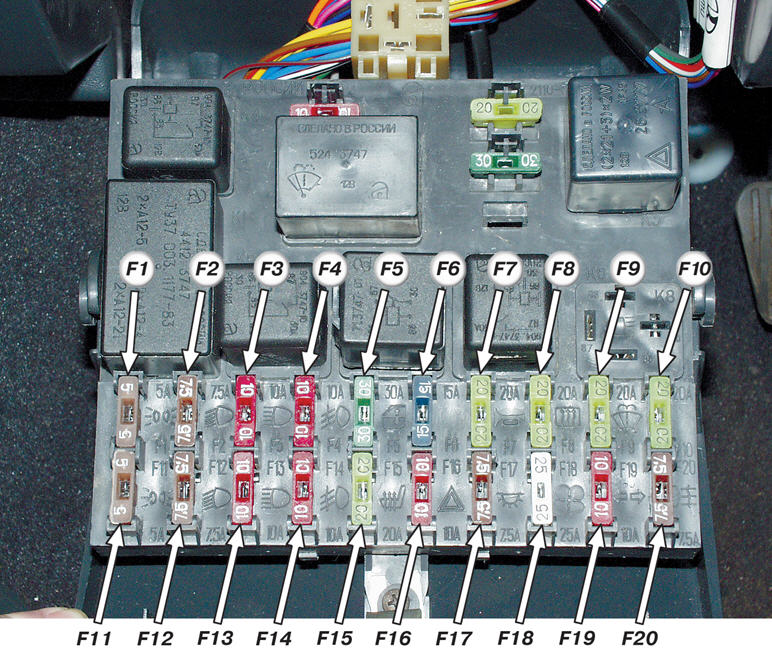
If one of the lamps stopped burning, first of all, check the condition of the fuses that are in the mounting block. This event is carried out from the car's salon.
Safety when working with car lighting electrical system
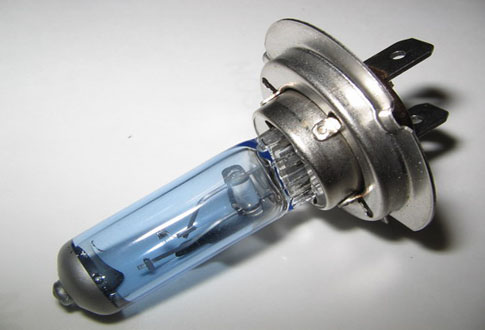
It is forbidden to touch your fingers to the flask of halogen lamps. It follows in pure cotton gloves that do not have rubber spraying. Remember, fat traces from the fingers who will remain on the flask lamps are able to reduce its service life several times. Therefore, after a random touch of a bulb flask, wipe it with a clean napkin, pre-dipped with alcohol.
Tools assistants and devices when working on replacing Middle Lights
- Gloves.
- Screwdriver.
- The key is 10.
How to change the muzzle light bulb (simple light bulb) step by step
- Open the hood of the car.
- We dismantle the rear casing.
- Disconnect pads with wires.
- We remove the spring that is responsible for fastening the lamp.
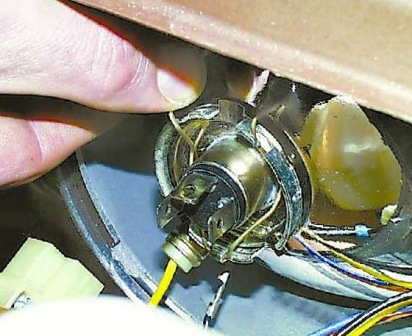
- We turn the lamp holder and pull it out.
- Then change the lamp to the new one.
Lighting relays checking contacts, correctness of the relay themselves
The most common cause that causes the relay faults is the oxidation of contacts. As a rule, the lamp, while blinking, and does not burn smoothly. To work properly, you must clean the contacts. If the reason in the brave or failure, the relay should be replaced with a new one.
Connection reliability: in headlight pads, fastening the mass of headlight wires
Checking the relay, you should pay attention to the connections in the pads that are included in the main lighting power supply. In addition, check for the mass of headlights. The first such fastener is located on the left side, near the battery, on one mount with the air intake. The other is located on the right, near the adsorber.
How to replace a light bulb of the near light if you need to disassemble the headlight block, step by step instructions
To replace Middle Lights, it is necessary to dismantle the block design of the headlight, for which a little loosen the fastening of the front bumper VAZ 2110. Then follow the following instructions:
- Remove from the battery "minus" terminal.
- Disconnect the electrical connectors block headlights.
- From the side of the bumper, we unscrew the subsidence, which, as a rule, is fixed on three screws.
- Next, we unscrew two bolts that keep the headlight.
- We unscrew two bolts fixing the decorative radiator grille.
- Then the two latches located near the decorative lattice should be folded.
- We dismantle the grid.
- We unscrew the mounting bolts from the bottom from the headlight.
- Then weaken the two bolts of the upper fastening of the headlight.
- Tighten the screwdriver decorative lining from the headlight block.
- Further, through the gap formed, you need to get to the tongue involved with the wing.
- Capture it.
- We dismantle the decorative lining by shifting it towards the center.
- We unscrew the nut that crepts to the Bracket Block Far.
- Get the block fair.
- Capture the cylinder lock of the hydrocorrector, after which we dismantle it from the car body, taking it.
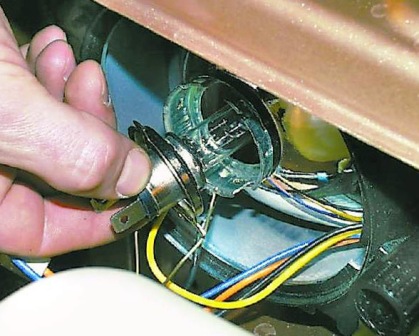
- Turn the cartridge of the turntable lamp counterclockwise and take it out.
- Carefully press the lamp inside and take it out of the cartridge.
- Next, turn the cover of the fixture block counterclockwise and remove it.
- Disconnect the electric wire from the near light lamp.
- Scroll down the spring lock and display the mustache from the grooves of this item.
- We assign a spring retainer towards the upwards and dismantle the near light lamp.
- Install a new serviceable lamp.
How to replace, in the way, a lamp of dance light and dimensions
- We unscrew the second headlight cover.
- We disconnect the electrical wire from the long-air lamp.
- Next you need to withdraw from the grooves of the spring retainer.
- We dismantle a long-mounted lamp.
- Disconnect the electrical wire from the light bulb of the oven light and pull out the cartridge with the lamp.
- Remove the defective lamp from the cartridge and change it to the new one.
- We collect everything back.
Adjustment of headlights 2110 (step-by-step instruction)
- We find a flat pad and install the screen in front of the car (five meters from the car).
- Sadim on the front seat of the assistant or put the cargo on it - its approximate weight should be 75 kilograms.
- We hold two lines on the screen. One of them should be at the level of 600 millimeters, and the other is 75 millimeters below the first.
- Next, we apply another three lines on the screen, one of which should be axial and spaced between the headlights strictly in the center. The other two must be in the headlight center, and the distance to the axial line from them should be 554 millimeters.
- Move the handle of the hydrocorrector to the minimum load position.
- Blank one headlight with cardboard.
- Turn on the Middle Light.
- Then we adjust the light beam lights for the open headlight.
- We do the same for another headlight.
Tips Prof.
Setting the direction of light beams is carried out by screws with plastic heads placed on the rear wall of the headlight block. The bottom line must coincide with the upper facet of the light spot, and the intersection point of the horizontal and vertical section of the light beam should coincide with the vertical line of the center of the headlight block.
Related Materials
- Stove 2110, bad warm stove 2110, VAZ 2110 heating system, repairing the heating system VAZ 2110 with their own hands
- VAZ 2114 stove blows with cold air, stove 2114, bad warm stove VAZ 2114, device and repair of heating VAZ 2114 do-it-yourself, removing the stove VAZ 2114
- How to subdominize the car. How to put a jack. Types of jacks for cars.
- VAZ 2109 Fuse Block, VAZ 2109 Fuse Block Carburetor, VAZ 2109 Fuse Block Injector, Old VAZ 2109 Fuse Block, VAZ 2109 Fuse Block, VAZ Fuse Block 2109
- Car exhaust gas catalyst, faulty catalyst, pluses and cons of the catalyst, how to change the catalyst on the planeencitel
- Stove blowing cold air VAZ 2114, badly blowing the stove VAZ 2114, why badly blowing the stove VAZ 2114
- How to find out the owner of the car by the number of his car, check the car by the number of the traffic police machine, check the car by the state number of the car for free
- How to choose Used tires, Useful Tips
- Winter car road, pressure in passenger car tires in winter, good battery for the car in winter, whether to warm the car in winter
- In winter, the car is poorly started. How to make a car in winter, do you need to warm up the car in winter, useful tips
- Economy fuel consumption machines, the most economical car consumption
- Tires brands for passenger cars, labeling of car tire labeling, residual passenger car tire protector, how to pick a tire on a car brand, car tire tread pattern
- Working transmission operation, mechanical gearbox clutch work, driving with manual gearbox, useful tips
- Rear beam Peugeot 206 sedan, rear beam device Peugeot 206. Rear beam Peugeot 206 Malfunction, repair of the rear beam Peugeot 206
- Diesel fuel in winter, additive for diesel fuel in winter, how to choose the best diesel fuel
- Diesel winter does not start. How to start diesel in winter, heating diesel in winter.
- Japanese bridgestone tires, winter studded bridgestone tires, bridgestone tires brand
- Tire marking decoding for passenger cars, labeling wheels, how to choose the right tires on the disks
- Diesel engine in winter, launch of the diesel engine in winter, what oil to fill in a diesel engine in winter, useful tips
- LED backlight of the car, the backlight of the bottom of the car, the backlight of the legs in the car, the backlight in the door of the car, the backlight of the car is fine
- Recovered tires, bus tire, restored tire protector, can I use them
- Choose winter tires, which is a winter tires, which pressure in winter tires should be marked with winter tires, how to choose the right winter tires, the best winter tires 2019
- Steering rail rail, knock of steering rack, reasons for the knock and repair of the steering rack do it yourself
- Cameless car tires, a set for repair of tubeless tires, repair of the cannon-free tire do it yourself
- Russian tires, Russian tires Winter, Russian All-season tires, Voronezh AMTEL tires, Tires "Matador Omsk Tire", Kama-tires are world-class bus
- How to open a car without a key. Lost the key from the car what to do, the key from the car inside the car
- Silent tires, quiet winter tires, quiet studded bus, which tires to choose, overview tires
- Tires and safety, safety of the bus, why it is necessary to constantly monitor car tires
- Rules of safe driving of the car in the rain and slush, safe driving of the car for beginners
- Rust converter which is better for cars, rust converters to choose how to use rust transducer, professionals
- Polishing the body of the car do it yourself, how to choose a polishing paste, useful tips
- Engine durability, engine life, how to extend engine life
- Knock in the car. Knock when moving the car. What can knock in the car. How to determine the cause of the knock.
- ABS car, what is ABS car, ABS system malfunction, ABS diagnostics
- Overtaking a car when you can start overtaking a car, rules of traffic rules
- Fuel pump VAZ 2110, VAZ 2110 gas station scheme, VAZ 2110 fuel pump device, VAZ 2110 gas station repair,
- Automotive antennas for radio, automotive antenna device, car antenna do it yourself
- Front suspension Kalina, device front suspension Kalina, knock in front suspension Kalina, repair of front suspension Kalina
- Shock absorber Oil, best oil shock absorbers, pumping oil shock absorbers, how to properly pump oil shock absorber
- Clutch malfunctions, touches clutch, causes a clutch malfunction, how to eliminate



Comments