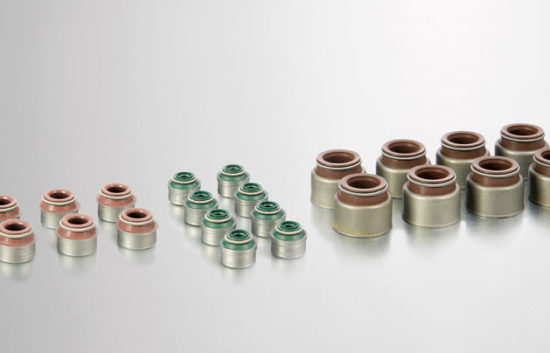
Outlooking caps (that is, valve seals) perform a fairly important function in the gas distribution mechanism of the car. They remove excess lubricant from the valve rods in the process of their movement, and also do not allow foreign substances into the combustion chamber. If the oil slimming caps wear out, it is extremely important to replace them in a timely manner, in order to avoid increased oil consumption, as well as the appearance of Nagara on the mechanisms and parts of the vehicle. About this further in the article.
Content
- Masciling caps, device, principle of operation, purpose
- Occupal caps, signs of wear
- Choosing a workplace
- Tools, fixtures, consumables
- Replacing the oilmaging caps with their own hands without removing the head of the cylinders (step by step instruction)
- Tips Profi: Do I need to use chemical additives to restore seals
- How to find the aliexpress and order the necessary auto parts at a reasonable price with free shipping
Masciling caps, device, principle of operation, purpose
The non-stop work of the mechanisms in the process of movement of the vehicle implies the presence of a sufficient amount of lubricant in the mechanism of gas distribution, which must mitigate the friction of parts, however, along with it, should not penetrate the combustion chamber. For this, it is necessary for the scale caps that remove excess oil when the valves are operated, and also serve as a flap, which prevents the ingress of the lubricant inside the chamber.
The oil surcharge caps consist of three components:
- The reinforced steel sleeve, serving the base of the cap and gives it strength.
- Rubber cap shooting oil surplus from valve rod.
- Spender spring, providing a dense adjoining of the rubber cap to the rod.
In contrast to the oil-saw caps of an old sample made from a sprocket, to date, the rubber part of the oil surcharge cap is produced from the secondary or acrylate rubber. The use of modern materials has significantly extended the life of these items, but still sometimes they may come into disrepair and demand replacement.
Occupal caps, signs of wear
An experienced auto owner may assume aging or wear of oil surcharge caps in the event of the following signs:
- Increase oil consumption.
- The appearance of nagar on the ignition candlelight.
- The appearance of blue or sizogo smoke from the exhaust pipe.
Noticing such alarming signs, the car enthusiast should inspect the gas distribution mechanism, the oil-free caps and valves, and if its speculation was justified, immediately replaced the damaged parts, without waiting for more serious consequences.
To the serious consequences of lubrication intake, combustion chamber include:
- Reducing the power of the power unit.
- Bad closing valves.
- Fall compression.
- The appearance of nagar in cylinders and pistons.
- Idling car starts to getting up.
Nagar on aggregates and vehicle mechanisms accelerates their wear, which can entail a premature major overhaul of the engine, so do not pull with the replacement of oil-challenged caps, if they wear out.
Choosing a workplace
Replacing the oil-free cap - a simple event, quite feasible in the garage conditions or outdoors. In this case, you will not need an overpass or observation pit.
Tools, fixtures, consumables
To independently replacing the oil-challenge caps, it will take such equipment and tools:
- Canguing clamp for dismantling caps.
- A set of precipitated and horn keys.
- Heads with gate and extension cords.
- Hammer.
- Ribbing for podressing caps.
- Tweezers.
- Exhaust valve.
- Silicone sealant or new gas distribution mechanism cover.
Replacing the oilmaging caps with their own hands without removing the head of the cylinders (step by step instruction)
The replacement of spoiled caps can be made or dismantling the head of the cylinder block, or without dismantling. As a rule, the replacement of the oil-free cap without disassembling the head is made when the wear of the elements was detected in a timely manner, and at the valves and pistons did not have time to form a decent nagar. Otherwise, you have to remove the GBC, clean the nap and customize the operation of the gas distribution mechanism.
removing the exhausted oiling cap
- First, remove the lid of the gas distribution mechanism.
- Next, exhibit distribution and crankshafts by tags. We put on the elements the appropriate marks so that after the repair does not arise difficulties with their exhibition. Record the location of dismantled nozzles and connectors.

- Removing the camshaft, it is necessary to loosen the tensioner of its drive.
- In case the drive is the chain, you need to unscrew the drive gear and remove it from the camshaft. It is advisable to remove the key from the shaft groove and remove it to not lose. If the drive belt, it is easier to dismantle the belt from the gear.

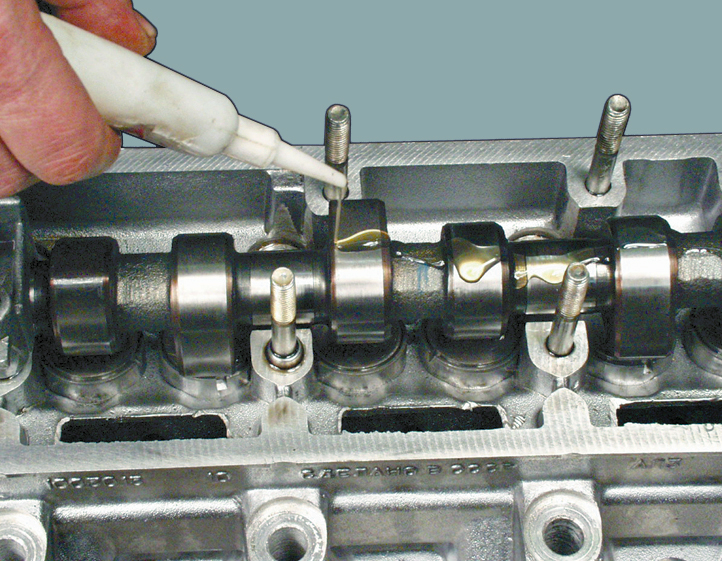
- Then we turn the fastening bed of the camshaft and remove it from the head. While the camshaft is removed, check it on cams and shekes.

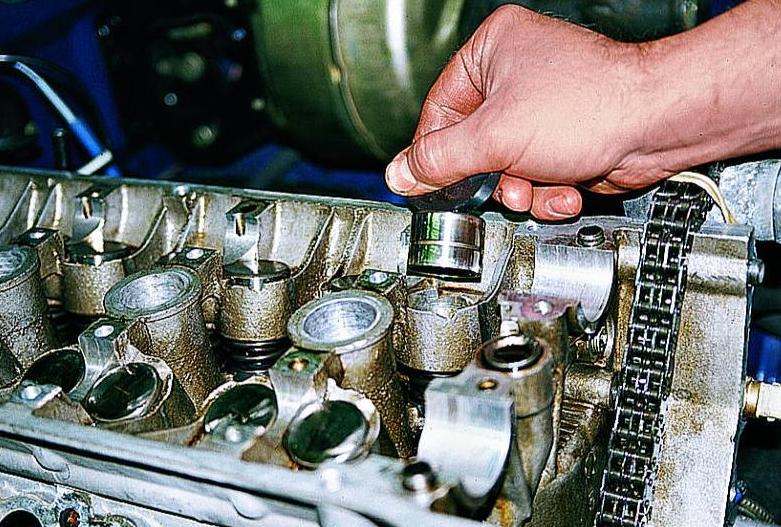
- Remove the valve pushers - depending on the design, you need to dismiss the rocker or remove the glasses with hydrocomathers.

- Since the pistons of the first and fourth cylinders are already standing in the upper dead point, it is better to start a replacement from the edges, because it is necessary to dry out the valve so that he rests on something. In this case, this is the bottom of the piston.

- In some models of car, the intake manifold interferes so much that it is necessary to shorten the calcifier, as it is easier to do it, rather dismantle the collector.

- Take the dismissaler. His bracket, which is attached closer to the end of the lever, it is necessary to fix the bed on the fastening stiletto, and the one that is attached closer to the middle, you need to put the ring on a plate that covers the valve springs. Next with one hand click on the dismumbering lever to compress the valve springs and omitting the plate down in the rod, the second hand takes the tweezers and take off the crackers from the plate.

- We remove to the side of the silent, after which we remove the plate and both springs from the stock.
- Next you need to fix on the caps of the capture cramp. Having moved the ship to the puller rod up, you need to hit them along the top up - dismantling of the unsuccessful cap is made.

- While the valve is free, it is necessary to check the wear of its guide and rod. To do this, you need to take the top of the rod with your fingers and try to shake it. In case of insignificant wear, it will not be possible for you because the backlash will be absent.

installing a new oilmaging cap
- Remove the springs from the glands.

- We insert the gland and drip on the valve rod of the oil.

- After that, on the valve stem, we put a gland with a mandrel and shift it down at least before the direction of the guide. Then you do not hear the hammer on the mandrel than we press the gland on the landing place.

- Before assembly, do not forget to put on the springs on the hosted caps.

- Next, install the components of the valves and drummer the method used to dismantle the crackers.

- We repeat this sequence as much time as it is necessary.

- Collect disassembled nodes in reverse sequence. If the hydraulic components in your engine do not apply, adjust the valve.
Tips Profi: Do I need to use chemical additives to restore seals
As you know, in our time there are quite a few additives for the restoration of the seals. If you have a temptation to take advantage of them instead of replacing the cap, remember that the miracles in the work of the power unit does not happen. Stop natural wear item is impossible. Such additives are able to soften hardened rubber, which would seem to restore the properties of the glands. But, as experience shows, they or in no way affect the rubber, or soften it very much, from which the size of the working edge increases and the oil consumption increases significantly. So it is better to replace the oil-giving caps. The cost of this event will depend on the type of motor. However, you will know exactly what they perform their functions. Additives, alas, will not be able to guarantee such an effect. Therefore, you should not try such additives on your car.
How to find the aliexpress and order the necessary auto parts at a reasonable price with free shipping
Recently, Russian motorists are increasingly ordered in order to save car spare parts through the Internet. However, at the same time, it is necessary to be extremely attentive, especially buying details from little-known suppliers, because, as you know, the acquisition through the Internet does not bear special responsibility from the seller than some unscrupulous individuals enjoy. Concerning Aliexpress, the developers of this site are trying to maximize buyers from unsuccessful purchases, so many car owners prefer to order auto parts here.

- To order the details on AliexpressFirst of all, you should register. If you already have your own profile, simply log in to the site using your login and password.

- On the left, near the column "Categories", click on the inscription "Watch all", after which you will open such a picture.

- Under the category "Cars and Motorcycles", choose the required field "Car Spare Parts".

- After that you will see a huge selection of automotive spare parts. Configure a filter for yourself and enter the name of the required part.

- You can search for parts by car brand, which is quite convenient. Since we need a product with free shipping, we definitely choose this item. In addition, you can choose the desired price range, which will allow us to be too expensive or too cheap items.

- If you know a specific audit name, you can use the search bar immediately from the main page, for which you need to enter the desired name in the search string.

- To order the selected item, click on the "Buy Now" icon, after which you will need to fill in the shipping address and choose the payment method.
Related Materials
- Stove 2110, bad warm stove 2110, VAZ 2110 heating system, repairing the heating system VAZ 2110 with their own hands
- VAZ 2114 stove blows with cold air, stove 2114, bad warm stove VAZ 2114, device and repair of heating VAZ 2114 do-it-yourself, removing the stove VAZ 2114
- How to subdominize the car. How to put a jack. Types of jacks for cars.
- VAZ 2109 Fuse Block, VAZ 2109 Fuse Block Carburetor, VAZ 2109 Fuse Block Injector, Old VAZ 2109 Fuse Block, VAZ 2109 Fuse Block, VAZ Fuse Block 2109
- Car exhaust gas catalyst, faulty catalyst, pluses and cons of the catalyst, how to change the catalyst on the planeencitel
- Stove blowing cold air VAZ 2114, badly blowing the stove VAZ 2114, why badly blowing the stove VAZ 2114
- How to find out the owner of the car by the number of his car, check the car by the number of the traffic police machine, check the car by the state number of the car for free
- How to choose Used tires, Useful Tips
- Winter car road, pressure in passenger car tires in winter, good battery for the car in winter, whether to warm the car in winter
- In winter, the car is poorly started. How to make a car in winter, do you need to warm up the car in winter, useful tips
- Economy fuel consumption machines, the most economical car consumption
- Tires brands for passenger cars, labeling of car tire labeling, residual passenger car tire protector, how to pick a tire on a car brand, car tire tread pattern
- Working transmission operation, mechanical gearbox clutch work, driving with manual gearbox, useful tips
- Rear beam Peugeot 206 sedan, rear beam device Peugeot 206. Rear beam Peugeot 206 Malfunction, repair of the rear beam Peugeot 206
- Diesel fuel in winter, additive for diesel fuel in winter, how to choose the best diesel fuel
- Diesel winter does not start. How to start diesel in winter, heating diesel in winter.
- Japanese bridgestone tires, winter studded bridgestone tires, bridgestone tires brand
- Tire marking decoding for passenger cars, labeling wheels, how to choose the right tires on the disks
- Diesel engine in winter, launch of the diesel engine in winter, what oil to fill in a diesel engine in winter, useful tips
- LED backlight of the car, the backlight of the bottom of the car, the backlight of the legs in the car, the backlight in the door of the car, the backlight of the car is fine
- Recovered tires, bus tire, restored tire protector, can I use them
- Choose winter tires, which is a winter tires, which pressure in winter tires should be marked with winter tires, how to choose the right winter tires, the best winter tires 2019
- Steering rail rail, knock of steering rack, reasons for the knock and repair of the steering rack do it yourself
- Cameless car tires, a set for repair of tubeless tires, repair of the cannon-free tire do it yourself
- Russian tires, Russian tires Winter, Russian All-season tires, Voronezh AMTEL tires, Tires "Matador Omsk Tire", Kama-tires are world-class bus
- How to open a car without a key. Lost the key from the car what to do, the key from the car inside the car
- Silent tires, quiet winter tires, quiet studded bus, which tires to choose, overview tires
- Tires and safety, safety of the bus, why it is necessary to constantly monitor car tires
- Rules of safe driving of the car in the rain and slush, safe driving of the car for beginners
- Rust converter which is better for cars, rust converters to choose how to use rust transducer, professionals
- Polishing the body of the car do it yourself, how to choose a polishing paste, useful tips
- Engine durability, engine life, how to extend engine life
- Knock in the car. Knock when moving the car. What can knock in the car. How to determine the cause of the knock.
- ABS car, what is ABS car, ABS system malfunction, ABS diagnostics
- Overtaking a car when you can start overtaking a car, rules of traffic rules
- Fuel pump VAZ 2110, VAZ 2110 gas station scheme, VAZ 2110 fuel pump device, VAZ 2110 gas station repair,
- Automotive antennas for radio, automotive antenna device, car antenna do it yourself
- Front suspension Kalina, device front suspension Kalina, knock in front suspension Kalina, repair of front suspension Kalina
- Shock absorber Oil, best oil shock absorbers, pumping oil shock absorbers, how to properly pump oil shock absorber
- Clutch malfunctions, touches clutch, causes a clutch malfunction, how to eliminate






Comments