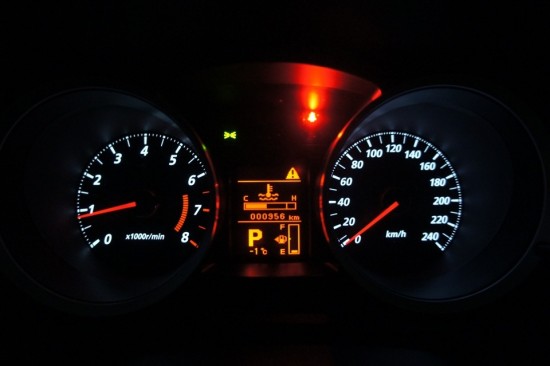
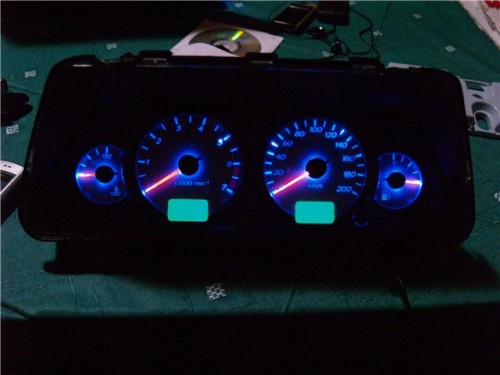
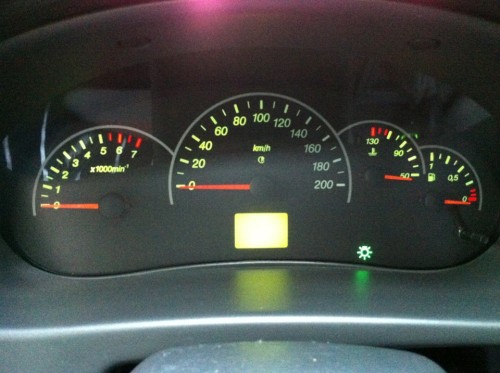
Most of the owners of domestic vehicles dream of a dashboard with multi-colored backlit. But not all drivers know that from time to time the bulbs in it are able to stop. Such a problem can be solved on your own or go to the car service. In any case, if the dashboard in your car is equipped with backlight, the lamp replacement is inevitable. And only the owner of the vehicle to decide - contact specialists and spend money or spend your time and replace the lamps of the instrument panel with your own hands. Moreover, what to do it is very simple. We will talk about this in this article.
If you decide to change the dashboard completely, it is desirable to immediately choose the option that is equipped with a backlight, which will allow you to make you most clearly control the information of the instruments at any time of the day.
Content
- Devices panel with color illumination, pluses and cons of such panel
- The backlight of the panel was extinct, what tools and spare parts need to replace the dashboard backlight
- How to remove the dashboard with your own hands, the course of work in stages
- How to replace the burnt light bulb dashboard with your own hands
Devices panel with color illumination, pluses and cons of such panel
Multicolored backlight dashboard has its advantages and disadvantages. Although the benefits are more.
The advantages include the following parameters:
1. Panel of instruments has a significantly better appearance.
2. The driver can accurately monitor the testimony of devices in the dark, which significantly reduces the likelihood of entering accidents.
As for minuses, there are several of them:
1. The instrument panels are capable of being able to be able to completely be able to replace them often.
2. Too bright colors or lighting distracts the motorist from the road, which can lead to an emergency.
The backlight of the panel was extinct, what tools and spare parts need to replace the dashboard backlight
A dashboard gives a motorist a lot of useful information, in particular, it allows you to reveal the breakdowns in a timely manner and repair them, as well as to control the driving process.
If the backlight of the panel is suddenly extinct, it suggests that the dashboard backlight lamp overcoats. To replace them, you will need the following tools:
1. Shutter screwdriver.
2. Cross screwdriver.
3. Special key to loosen the battery nut.
4. The key is 24.
5. Flashlight.
6. Pen and notepad.
7. Well, of course, new light bulbs.
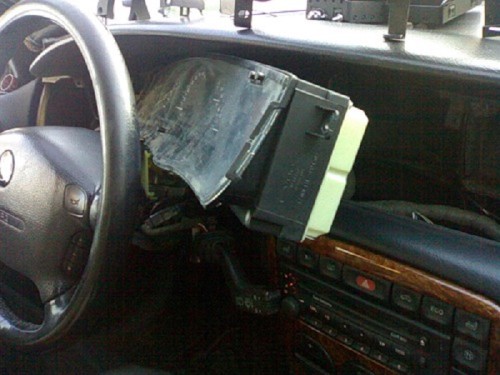
How to remove the dashboard with your own hands, the course of work in stages
To replace the bulb or directly the dashboard, you must first remove the old one.
To do this, perform a number of following non-hard action:
1. In the first place you need to de-energize the vehicle - we remove the minus battery wire, for which you need to weaken the nut with the help of a special key.
2. Whatever it is more convenient to work, you should remove the steering wheel. To do this, deduct the signal clips from four sides and remove it to the side. Then, you need to unscrew the steering rut bolt with a key on 24. What to fix it, take the key from the ignition and turn the steering wheel - it will face the block. Before carrying out such works, you should put the steering wheel in such a position in which the wheels will be directly standing. It is necessary that at the end of the work the steering wheel has become exactly smooth.
3. Now we exempt the heater control levers - small plastic handles on the switch that will not allow the panel to be removed. To do this, we take a slotted screwdriver, which we carefully use the handles and remove them.
4. Next, you need to pull the handle that is responsible for throwing out the daily running data of the counter. To do this, unscrew the nut of its fastening and remove it. The handle itself is pushing out for the dashboard.
5. Remove the decorative plug from the self-press, which fixes the instrument panel. This device is located to the right of the ventilation control levers and the heating system.
6. Now it will not hurt anything to remove the panel - we take a crusade screwdriver, turn away the self-tapping screw and put it aside. Before removing the dashboard, it is advisable to put a small box or a bright rag on the seat. Here it is necessary to fold the screws and all the plastic components that they would not lose on the salon.
7. Whatever freely remove the dashboard, you should gently insert a flat screwdriver on the right side, pry and unscrew the edge, so that it could be hooed with his hand. Since the clamps will not allow it freely, you need to pull the panel to the passenger seat area, whatever the clamps. Do it extremely carefully, you need to disconnect several more items.
8. After freeing the shield, we wake a hand to the panel and turn the corrugated round nut from the speedometer cable. We unscrew it, pull out and remove to the side.
9. Disconnect the discharge hose on the left side. It must be just pulled - it is easily removed, as it is not fixed. What would be seen better, you can use a flashlight.
10. The last and rather responsible part is the disconnection of the wires. To do this, you will need a notepad and handle that, pulling out the terminals, record where the terminal was located and what color. This will allow you not to confuse everything when reverse assembly.
Now you can safely remove the panel and carry out any repair work.
How to replace the burnt light bulb dashboard with your own hands
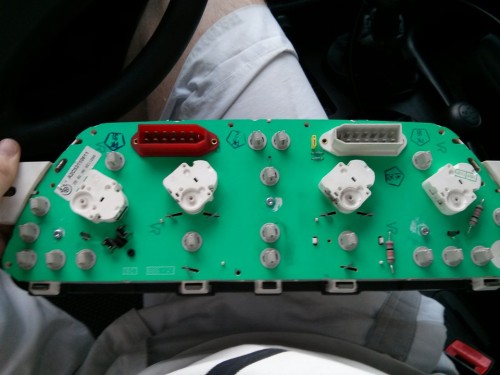
The replacement of the dashboard lamps lies in the removal of the burned and winding new ones. Cartridges are located right in the dashboard. It is advisable to replace all the lamps at once, so that you would not remove the dashboard every time, since if one lamp burned out, it is quite possible that the rest burned behind it.
On the opposite side of the instrument panel there are cartridges to remove them, you need to turn them counterclockwise with a neat movement. Lamps that stopped burning, change to new, wrap them and mount the entire design back.
If the standard backlight of the dashboard for some reasons you do not suit you, you can also replace it. To replace the highlighting device on the instrument panel, it is necessary to arm the following materials and tools:
1.German.
2. Set of screwdrivers.
3. Hair dryer, preferably building option.
4. New light bulbs.
5. Soldering iron.
After the panel is removed, carefully inspect the old light bulbs. Light bulbs are desirable to mark with a marker. Now you need to disappear old diodes and solder new ones. As a rule, when replacing the backlight, it is necessary to remove the glass. For its further functioning, the old sealant should be removed from it. Then, degrease the surface and apply a new sealant to the edge of the glass.
If you wish, you can change the color of the arrows. To do this, they need to be cleaned with a solvent and paint in the desired color. To test the new backlight for performance, the terminal must be connected to the battery.
In addition, you can improve the appearance of the arrows backlight dashboard - LED lamps are attached to the plexiglass. If the power is to spend from the red pad, the backlight of the shooter will be separately from the entire detail. With such a connection, the arrows will light up during the ignition start. If the LED is set next to the arrow, the color of the arrow may vary in the process of increasing the revolutions of the vehicle.
All the above operations are not difficult to perform with their own hands, but it is necessary to follow a specific instruction. Undoubtedly, this process is quite time-consuming, long and requiring attention and patience. But then you can proudly enjoy the work done. But if for some reason you do not want to do this yourself, professionals will be happy for it, of course, for a modest fee. The factory design panel design parameters do not always fit into the vehicle salon. The backlight of the instrument panel will make your car not only more original, but also convenient to use.
Related Materials
- Stove 2110, bad warm stove 2110, VAZ 2110 heating system, repairing the heating system VAZ 2110 with their own hands
- VAZ 2114 stove blows with cold air, stove 2114, bad warm stove VAZ 2114, device and repair of heating VAZ 2114 do-it-yourself, removing the stove VAZ 2114
- How to subdominize the car. How to put a jack. Types of jacks for cars.
- VAZ 2109 Fuse Block, VAZ 2109 Fuse Block Carburetor, VAZ 2109 Fuse Block Injector, Old VAZ 2109 Fuse Block, VAZ 2109 Fuse Block, VAZ Fuse Block 2109
- Car exhaust gas catalyst, faulty catalyst, pluses and cons of the catalyst, how to change the catalyst for the planeencitel
- Stove blowing cold air VAZ 2114, badly blowing the stove VAZ 2114, why badly blowing the stove VAZ 2114
- How to find out the owner of the car by the number of his car, check the car by the number of the traffic police machine, check the car by the state number of the car for free
- How to choose Used tires, Useful Tips
- Winter car road, pressure in passenger car tires in winter, good battery for the car in winter, whether to warm the car in winter
- In winter, the car is poorly started. How to make a car in winter, do you need to warm up the car in winter, useful tips
- Economy fuel consumption machines, the most economical car consumption
- Tires brands for passenger cars, labeling of car tire labeling, residual passenger car tire protector, how to pick a tire on a car brand, car tire tread pattern
- Working transmission operation, mechanical gearbox clutch work, driving with manual gearbox, useful tips
- Rear beam Peugeot 206 sedan, rear beam device Peugeot 206. Rear beam Peugeot 206 Malfunction, repair of the rear beam Peugeot 206
- Diesel fuel in winter, additive for diesel fuel in winter, how to choose the best diesel fuel
- Diesel winter does not start. How to start diesel in winter, heating diesel in winter.
- Japanese bridgestone tires, winter studded bridgestone tires, bridgestone tires brand
- Tire marking decoding for passenger cars, labeling wheels, how to choose the right tires on the disks
- Diesel engine in winter, launch of the diesel engine in winter, what oil to fill in a diesel engine in winter, useful tips
- LED backlight of the car, the backlight of the bottom of the car, the backlight of the legs in the car, the backlight in the door of the car, the backlight of the car is fine
- Recovered tires, bus tire, restored tire protector, can I use them
- Choose winter tires, which is a winter tires, which pressure in winter tires should be marked with winter tires, how to choose the right winter tires, the best winter tires 2019
- Steering rail rail, knock of steering rack, reasons for the knock and repair of the steering rack do it yourself
- Cameless car tires, a set for repair of tubeless tires, repair of the cannon-free tire do it yourself
- Russian tires, Russian tires Winter, Russian All-season tires, Voronezh AMTEL tires, Tires "Matador Omsk Tire", Kama-tires are world-class bus
- How to open a car without a key. Lost the key from the car what to do, the key from the car inside the car
- Silent tires, quiet winter tires, quiet studded bus, which tires to choose, overview tires
- Tires and safety, safety of the bus, why it is necessary to constantly monitor car tires
- Rules of safe driving of the car in the rain and slush, safe driving of the car for beginners
- Rust converter which is better for cars, rust converters to choose how to use rust transducer, professionals
- Polishing the body of the car do it yourself, how to choose a polishing paste, useful tips
- Engine durability, engine life, how to extend engine life
- Knock in the car. Knock when moving the car. What can knock in the car. How to determine the cause of the knock.
- ABS car, what is ABS car, ABS system malfunction, ABS diagnostics
- Overtaking a car when you can start overtaking a car, rules of traffic rules
- Fuel pump VAZ 2110, VAZ 2110 gas station scheme, VAZ 2110 fuel pump device, VAZ 2110 gas station repair,
- Automotive antennas for radio, automotive antenna device, car antenna do it yourself
- Front suspension Kalina, device front suspension Kalina, knock in front suspension Kalina, repair of front suspension Kalina
- Shock absorber Oil, best oil shock absorbers, pumping oil shock absorbers, how to properly pump oil shock absorber
- Clutch malfunctions, touches clutch, causes a clutch malfunction, how to eliminate
Comments