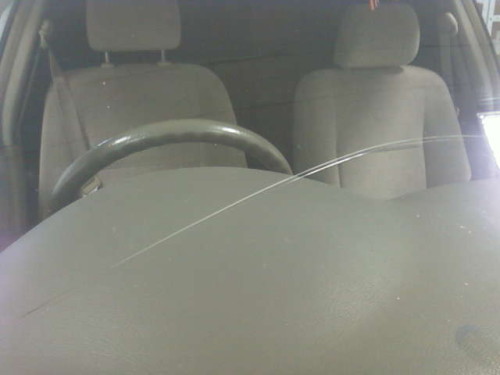
It is the windshield that is most often susceptible to the appearance of chips and all sorts of cracks. The main reason for this serves gravel, caring from under the wheels in front of the car. When cracks appear on the windshield, it is necessary to take measures to eliminate them in urgency, in the other case, it threatens them with an increase.
Content
Causes of windshield damage
There are four main factor, due to which cracks and chips appear on the windshield:
- Gravel or other foreign objects drowning in the windshield (in 90% of cases damage to the windshield occurs for this reason);
- Structural flaws of the manufacturer of the car or body damage (blows from the uneven road surface are transmitted to the windshield);
- In winter, when moisture in the microcrack of glass;
- Poor-quality windshield.
Eliminate damage on the windshield with their own hands or contact the car repair shop
To date, there is such a situation with the auto repair shops that, as a rule, they are not taken for repairing windshields, and they are simply replaced by a new one. This is due to the fact that the price of this type of work is low, and the time spent quite significant on it. So auto repair shop is easier to propose to replace your windshield and contemporary the amount with you, instead of getting with small cracks for a penny.
Important! In fairness, still it should be said that there is a car repair shop, which are engaged in the repair of damaged automotive glasses, but they are a bit.
Repair of cracks and chips on the windshield of the car are a rather time-consuming process and takes a significant amount of time, but if desired, refund damage on the windshield with your own hands is possible. Everything you need for this procedure are publicly available and sold in auto stores.
Tools, materials and equipment for work
And so, deciding to repair chips and cracks on the windshield with their own hands, we need to prepare certain equipment and materials.
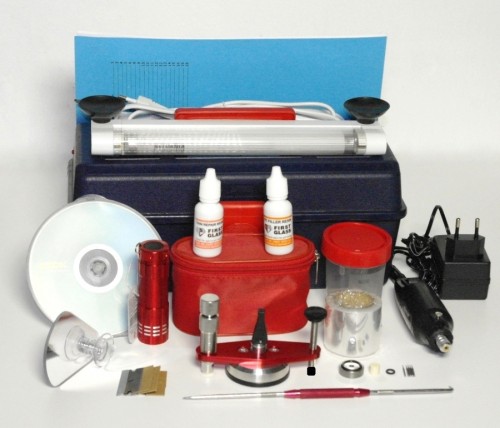
To repair cracks and chips on the windshield, you will need:
- Special optical polymer ( the polymer specially designed To eliminate cracks and chips in windshields, selected in terms of transparency individually for your windshield);
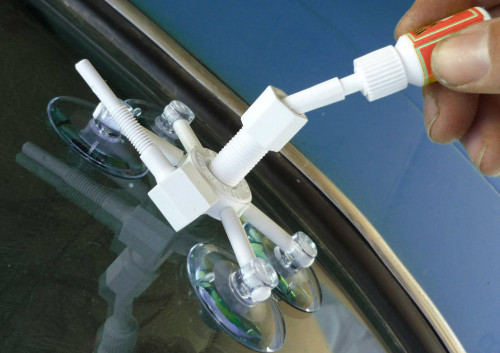
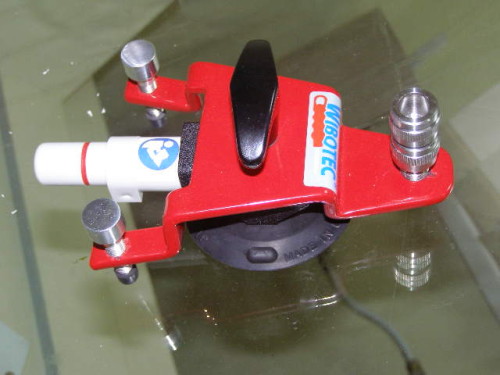
- Injector and bridge (are intended for the introduction of a special polymer into windshield damage, there are disposable from plastic and metal for reusable);
- Purifier for glasses (liquid type, it is desirable with a pulverizer for convenience);
- Napkins (absorbing moisture);
- Scraiber (for stripping a damaged area);
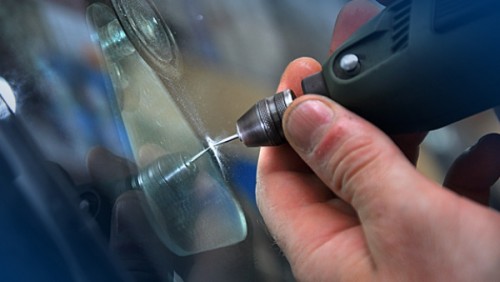
- The electric drill (for drilling holes throughout the end of the crack, removes stresses from the windshield and prevents further cracking);
- Diamond drill, small diameter (so as not to crush and not increase cracks on the windshield);
- Pump (need to remove air from cracks and chips);
- Electrically flashlight (it makes it possible to more accurate the edges of the cracks, and see the air in the mass of the applied glue);
- Ultraviolet lamp (optional, speeds up the process of drying the polymer).
Interesting! There are special sets designed to repair the windows of the car. In such sets there is a whole necessary tool that is characterized by a decent level. As a rule, repair produced by set is characterized by higher quality. The price for the sets for repairing windows of the car leaves much to be desired. It starts from 8 thousand rubles and can achieve in some cases 60 thousand rubles.
Removing damage on the windshield
Prepare all the necessary tools and materials can be processed to the repair of windshield. Repaired damage to windshield, there are 3 species, namely:
- Skol with a loss of a small piece of glass;
- Simple crack;
- Branched crack.
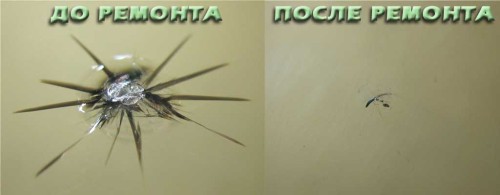
We will analyze in detail how to repair every type of damage data on the windshield:
skoli on the windshield, how to eliminate with your own hands
Under the scrolness is meant, losing a small amount of glass from its surface. The scan repair procedure is performed in the following sequence:
- Blow the bulk pump to remove dirt and sand from it;
- The place of the chip and the plot adjacent to it, we carefully clean with a special liquid and napkins;
- Let dry (you can use the pump, it will speed up the drying process);
- We attach a bridge with an injector to the place of the chip (it is necessary to install it so that the hussak is directly above the Square place);
- Into the an aqueous hole of the injector, slowly and evenly squeeze the special optical polymer;
- We connect the pump to the injector and insert the pressure to them so that the optical polymer split throughout damage (if necessary, repeat 5 and 6 step until the damage fails to completely);
- Fully filling the chip-polymer. We remove the bridge, and the injector from the windshield;
- We turn on the ultraviolet lamp and send it to damage. This will significantly accelerate the drying process (more than 3 times);
- We will wait for the time specified in the instructions attached to the optical polymer (usually 2-3 hours);
- When the polymer is dry, grind the surface of the windshield.
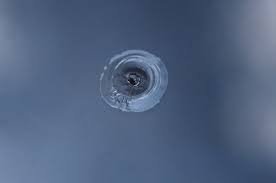
crack on the windshield, how to eliminate with your own hands, step by step instructions
As paradoxically, it would not sound, but the repair of a simple crack takes more time and forces than the repair of the chip on the windshield. The procedure for repairing a simple crack is performed in the following sequence:
- Light electric flashlight on a crack and determine exactly its edges;
- Using an electric drill with a small diameter diameter drill drill on both edges of the crack, retreating 1-2 mm from the edge of the crack so that it does not grow up;
- Lavigated both holes, we slightly pressing the cracked hands into place so that it goes up to the holes;
- Blow the fracture pump to remove dirt and sand from it;
- The location of the crack and the plot adjacent to it, we carefully clean with a special liquid and napkins;
- Let dry (you can use the pump, it will speed up the drying process);
- We attach the cracked bridge with an injector to the place (it is necessary to install it so that the hussak is directly above the cracker);
- Into the an aqueous hole of the injector, slowly and evenly squeeze the special optical polymer;
- We connect the pump to the injector and insert the pressure to them so that the optical polymer spread over all damage (if necessary, repeat steps 8 and 9, while the damage does not completely disappear);
- Fully filling with a crack with a polymer. We remove the bridge, and the injector from the windshield;
- We turn on the ultraviolet lamp and send it to damage. This will significantly accelerate the drying process (more than 3 times);
- We will wait for the time specified in the instructions attached to the optical polymer (usually 2-3 hours);
- When the polymer is dry, grind the surface of the windshield.
branched crack, how to eliminate with your own hands, step by step instructions
Unlike chipping and simple cracks, a branched crack is quite serious damage to the windshield, with which it is not always possible to cope. The procedure for repairing a branched crack is performed in the following sequence:
- Light electric flashlight on a crack and determine the amount of branches and the exact position of the edges of the branched crack;
- Using an electric drill with a small diameter diameter drill drill, drill holes over all the detected edges of the crack, retreating 1-2 mm from the edges of the crack so that it does not grow;
- Arrowded all the holes, we slightly pressing the cracked hands to the place of the cracked, so that it goes around until the holes;
- Blow the fracture pump to remove dirt and sand from it;
- The place of branched crack and the plot adjacent to it, we carefully clean with a special liquid and napkins;
- Let dry (you can use the pump, it will speed up the drying process);
- We attach the bridge with an injector to the place of the branched crack (it is necessary to install it so that the hussak is directly above the cracker);
- Into the an aqueous hole of the injector, slowly and evenly squeeze the special optical polymer;
- We connect the pump to the injector and insert the pressure to them so that the optical polymer spread over all damage (if necessary, repeat steps 8 and 9, while the damage does not completely disappear);
- Fully filling out all the branches of the crack of the polymer. We remove the bridge, and the injector from the windshield;
- We turn on the ultraviolet lamp and send it to cracks. This will significantly accelerate the drying process (more than 3 times);
- We will wait for the time specified in the instructions attached to the optical polymer (usually 2-3 hours);
- When the polymer is dry, grind the surface of the windshield.
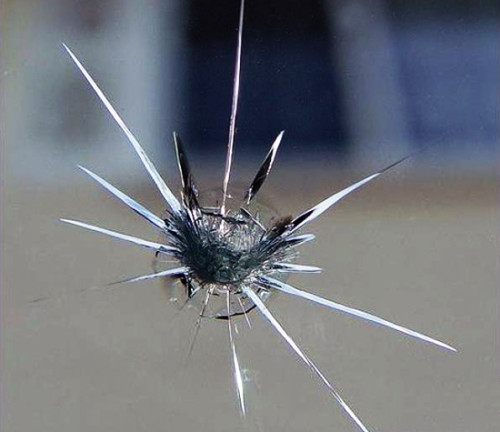
Tips of professionals
- In case of damage to the windshield, the car is recommended how to take it with a transparent scotch, which will not limit visibility. This needs to be done to prevent all sorts of dust and dirt in the crack, which, as a result, will greatly facilitate the repair of this damage.
- If there is no damage to the windshield, it is recommended to postpone with its washing with a variety of chemicals. Since it is quite often, when some chemicals for car wash are in the fracture in the further interfere with the optical glue polymerization process.
- Lob's glass polishing prevents diverse cracks and chips.
- In the cold season, you should not shake the wipers, knock them on the windshield of the car.
- In no case, you should not dry the optical polymer under direct solar rays or a close incandescent lamp. When dried in this way, the polymer becomes muddy and distorts visibility.
- Upon completion of work on eliminating damage on the windshield, it is necessary to produce glass polishing. How to properly polish the windshield of the car, as well as all its features, can be read on our website in the article "Scratches on the windshield, polishing windshield".
Related Materials
- Stove 2110, bad warm stove 2110, VAZ 2110 heating system, repairing the heating system VAZ 2110 with their own hands
- VAZ 2114 stove blows with cold air, stove 2114, bad warm stove VAZ 2114, device and repair of heating VAZ 2114 do-it-yourself, removing the stove VAZ 2114
- How to subdominize the car. How to put a jack. Types of jacks for cars.
- VAZ 2109 Fuse Block, VAZ 2109 Fuse Block Carburetor, VAZ 2109 Fuse Block Injector, Old VAZ 2109 Fuse Block, VAZ 2109 Fuse Block, VAZ Fuse Block 2109
- Car exhaust gas catalyst, faulty catalyst, pluses and cons of the catalyst, how to change the catalyst for the planeencitel
- Stove blowing cold air VAZ 2114, badly blowing the stove VAZ 2114, why badly blowing the stove VAZ 2114
- How to find out the owner of the car by the number of his car, check the car by the number of the traffic police machine, check the car by the state number of the car for free
- How to choose Used tires, Useful Tips
- Winter car road, pressure in passenger car tires in winter, good battery for the car in winter, whether to warm the car in winter
- In winter, the car is poorly started. How to make a car in winter, do you need to warm up the car in winter, useful tips
- Economy fuel consumption machines, the most economical car consumption
- Tires brands for passenger cars, labeling of car tire labeling, residual passenger car tire protector, how to pick a tire on a car brand, car tire tread pattern
- Working transmission operation, mechanical gearbox clutch work, driving with manual gearbox, useful tips
- Rear beam Peugeot 206 sedan, rear beam device Peugeot 206. Rear beam Peugeot 206 Malfunction, repair of the rear beam Peugeot 206
- Diesel fuel in winter, additive for diesel fuel in winter, how to choose the best diesel fuel
- Diesel winter does not start. How to start diesel in winter, heating diesel in winter.
- Tire marking decoding for passenger cars, labeling wheels, how to choose the right tires on the disks
- Diesel engine in winter, launch of the diesel engine in winter, what oil to fill in a diesel engine in winter, useful tips
- LED backlight of the car, the backlight of the bottom of the car, the backlight of the legs in the car, the backlight in the door of the car, the backlight of the car is fine
- Recovered tires, bus tire, restored tire protector, can I use them
- Choose winter tires, which is a winter tires, which pressure in winter tires should be marked with winter tires, how to choose the right winter tires, the best winter tires 2019
- Steering rail rail, knock of steering rack, reasons for the knock and repair of the steering rack do it yourself
- Cameless car tires, a set for repair of tubeless tires, repair of the cannon-free tire do it yourself
- Russian tires, Russian tires Winter, Russian All-season tires, Voronezh AMTEL tires, Tires "Matador Omsk Tire", Kama-tires are world-class bus
- How to open a car without a key. Lost the key from the car what to do, the key from the car inside the car
- Silent tires, quiet winter tires, quiet studded bus, which tires to choose, overview tires
- Tires and safety, safety of the bus, why it is necessary to constantly monitor car tires
- Rust converter which is better for cars, rust converters to choose how to use rust transducer, professionals
- Polishing the body of the car do it yourself, how to choose a polishing paste, useful tips
- Engine durability, engine life, how to extend engine life
- Knock in the car. Knock when moving the car. What can knock in the car. How to determine the cause of the knock.
- ABS car, what is ABS car, ABS system malfunction, ABS diagnostics
- Overtaking a car when you can start overtaking a car, rules of traffic rules
- Fuel pump VAZ 2110, VAZ 2110 gas station scheme, VAZ 2110 fuel pump device, VAZ 2110 gas station repair,
- Automotive antennas for radio, automotive antenna device, car antenna do it yourself
- Front suspension Kalina, device front suspension Kalina, knock in front suspension Kalina, repair of front suspension Kalina
- Shock absorber Oil, best oil shock absorbers, pumping oil shock absorbers, how to properly pump oil shock absorber
- Clutch malfunctions, touches clutch, causes a clutch malfunction, how to eliminate
- Viscounts of the fan, work uniforms of the fan, malfunction of the ventilator fan, repair of the ventilator fan
- Corrosion of car thresholds, film on car thresholds, how to stick a film on the thresholds of the car
Comments