Parktronic is a useful device that significantly simplifies the car parking procedure in difficult conditions. This applies mostly large cities. But, I must say that in reality most drivers do not consider it necessary to install this adaptation, referring to it skeptical. This attitude is not entirely correct, because drivers with a parking radar use it with pleasure.
Content
What we can?
The fact that parking sensors are needed undoubtedly.
But then a logical question arises: how to correct it correctly?
And what is better to choose to do this: Mount Parktronic with your own hands or contact the car service?
Automakers are not advised to independently install this kind of fixtures.
The reason is that different patterns of parking sensors have separate features.
And only a specialist in this area can know about them.
The above remark is justified only when you start the installation process without even the slightest knowledge.
Therefore, it is worth considering this question in detail and explain the highlights associated with the ParkTronics personnel installation.
Principles of operation and packtening equipment
principle of action Parktronic
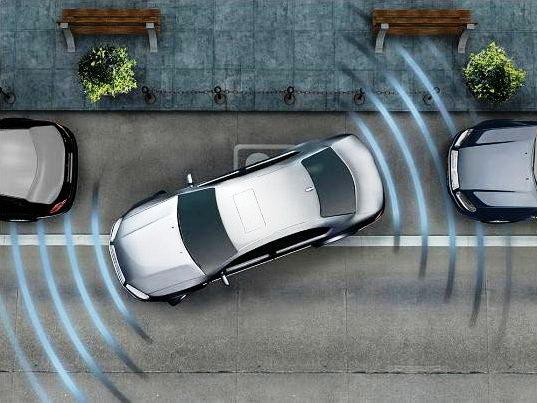
The main purpose of Parktronic is to give a warning to the driver that the so-called "dead zone" contains obstacles.

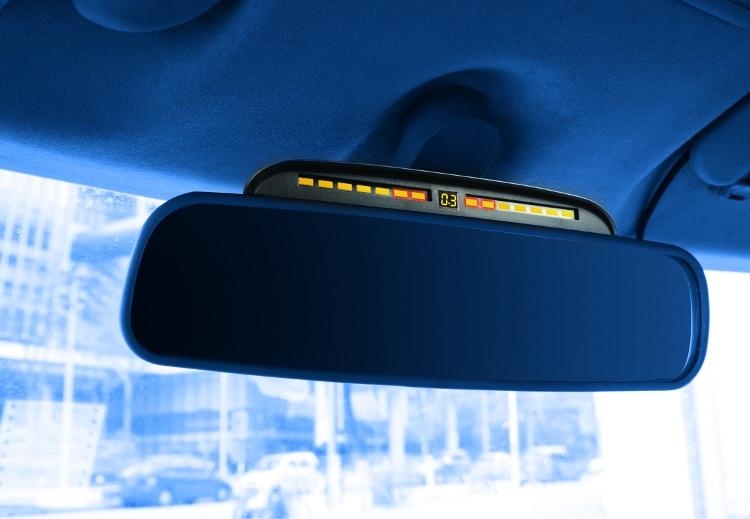
As the car approaches this obstacle, light and sound signals are published.
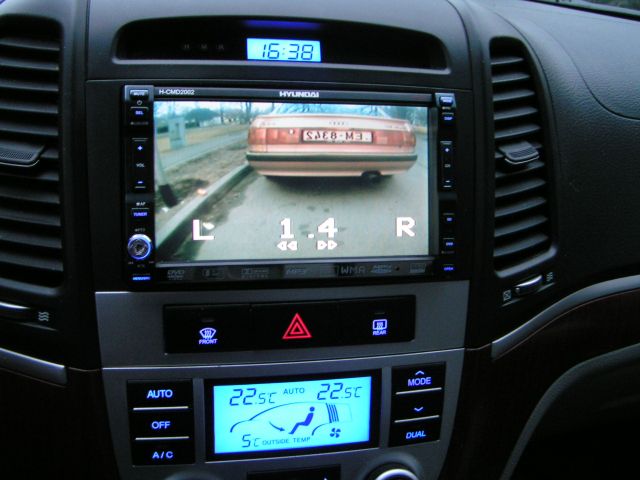
In addition, the parking sensors can be connected to the camcorders, so that the image is displayed on the screen.
packronics equipment
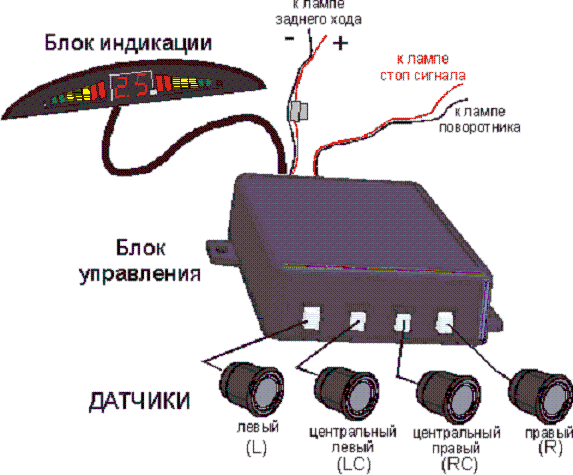
The standard packing radar package has such elements: a control unit that generates information processing, display and different kinds of sensors.
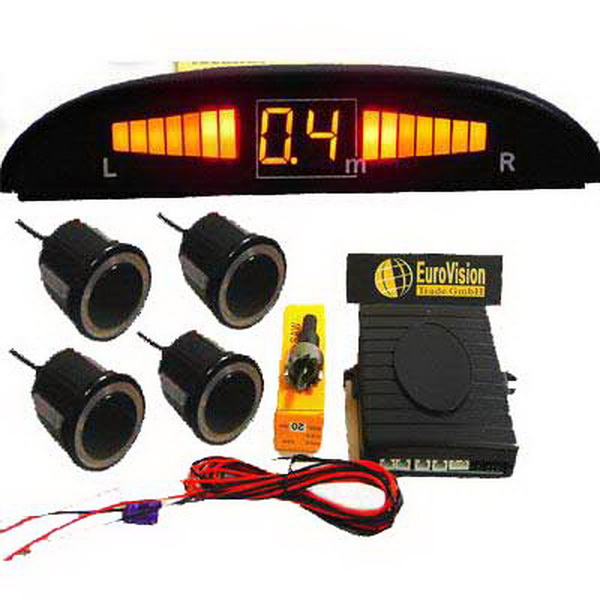
In the cheapest devices there are only two sensors, and the most expensive gadgets include about 8 components.
It has already been mentioned that the most upgraded systems have camcorders and separate screens.

There are also such versions of devices that work through technologies with a wireless connection.
Anyway, the process of mounting different parking sensors is identical.
Independent installation Parktronic
First of all, it is necessary to dismantle the bumper and wash it well.
After complete drying, you can proceed to the markup of the location of the sensors.
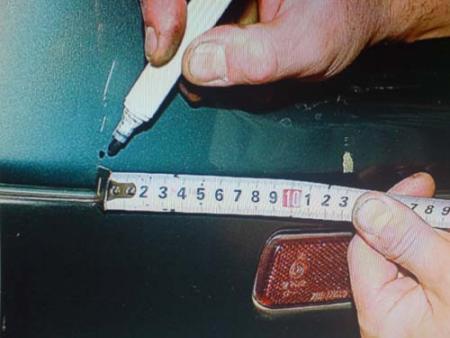
Here you need to use a easily washing marker.
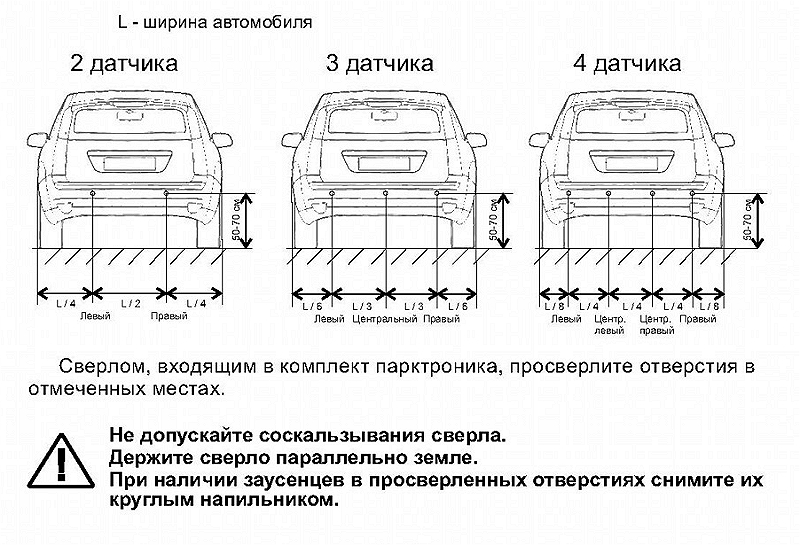
The installation of sensors must be performed by following the available requirements that are consistent with the distance between them and to the height of their location.
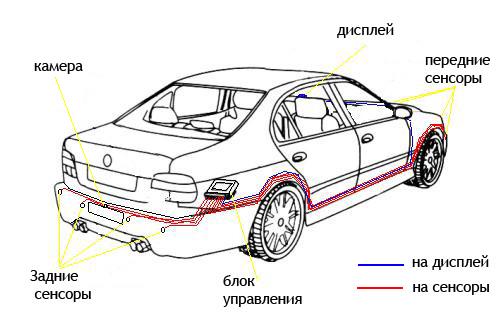
The device should attach instructions and there are all the necessary installation information.
According to the rules, the distance from the Earth should be 0.5 m.
In addition, the sensors must be placed horizontally.
After all the zones are placed on which the radar sensors are assumed, the drill should be used to drill holes.
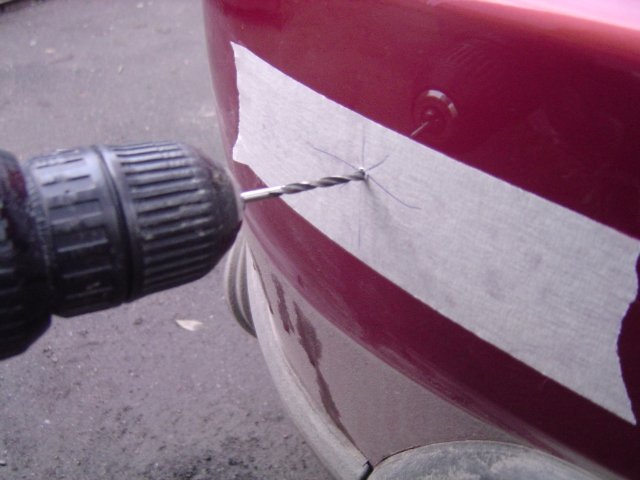
Next, the installation itself is the installation of the sensors.
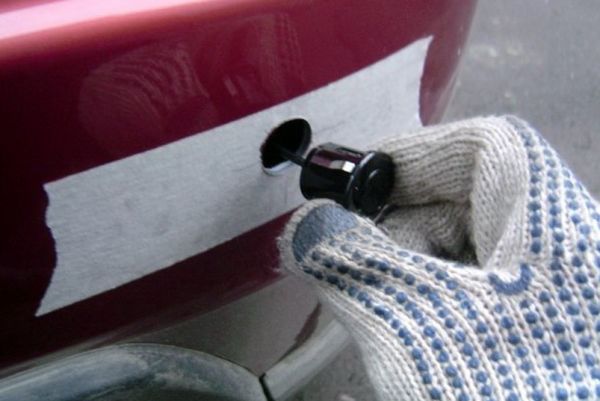
It is necessary to have them according to the designated marking.
In the future, to rationally place the sensors of the parking device, you must arrange the following: on the left edge of the bumper there should be a marking sensor.
On the right edge, the sensor marked D.
The final stage consists in fixing the locking rings and establish a bumper to the initial position.
Luggage compartment can be used to place the control unit.
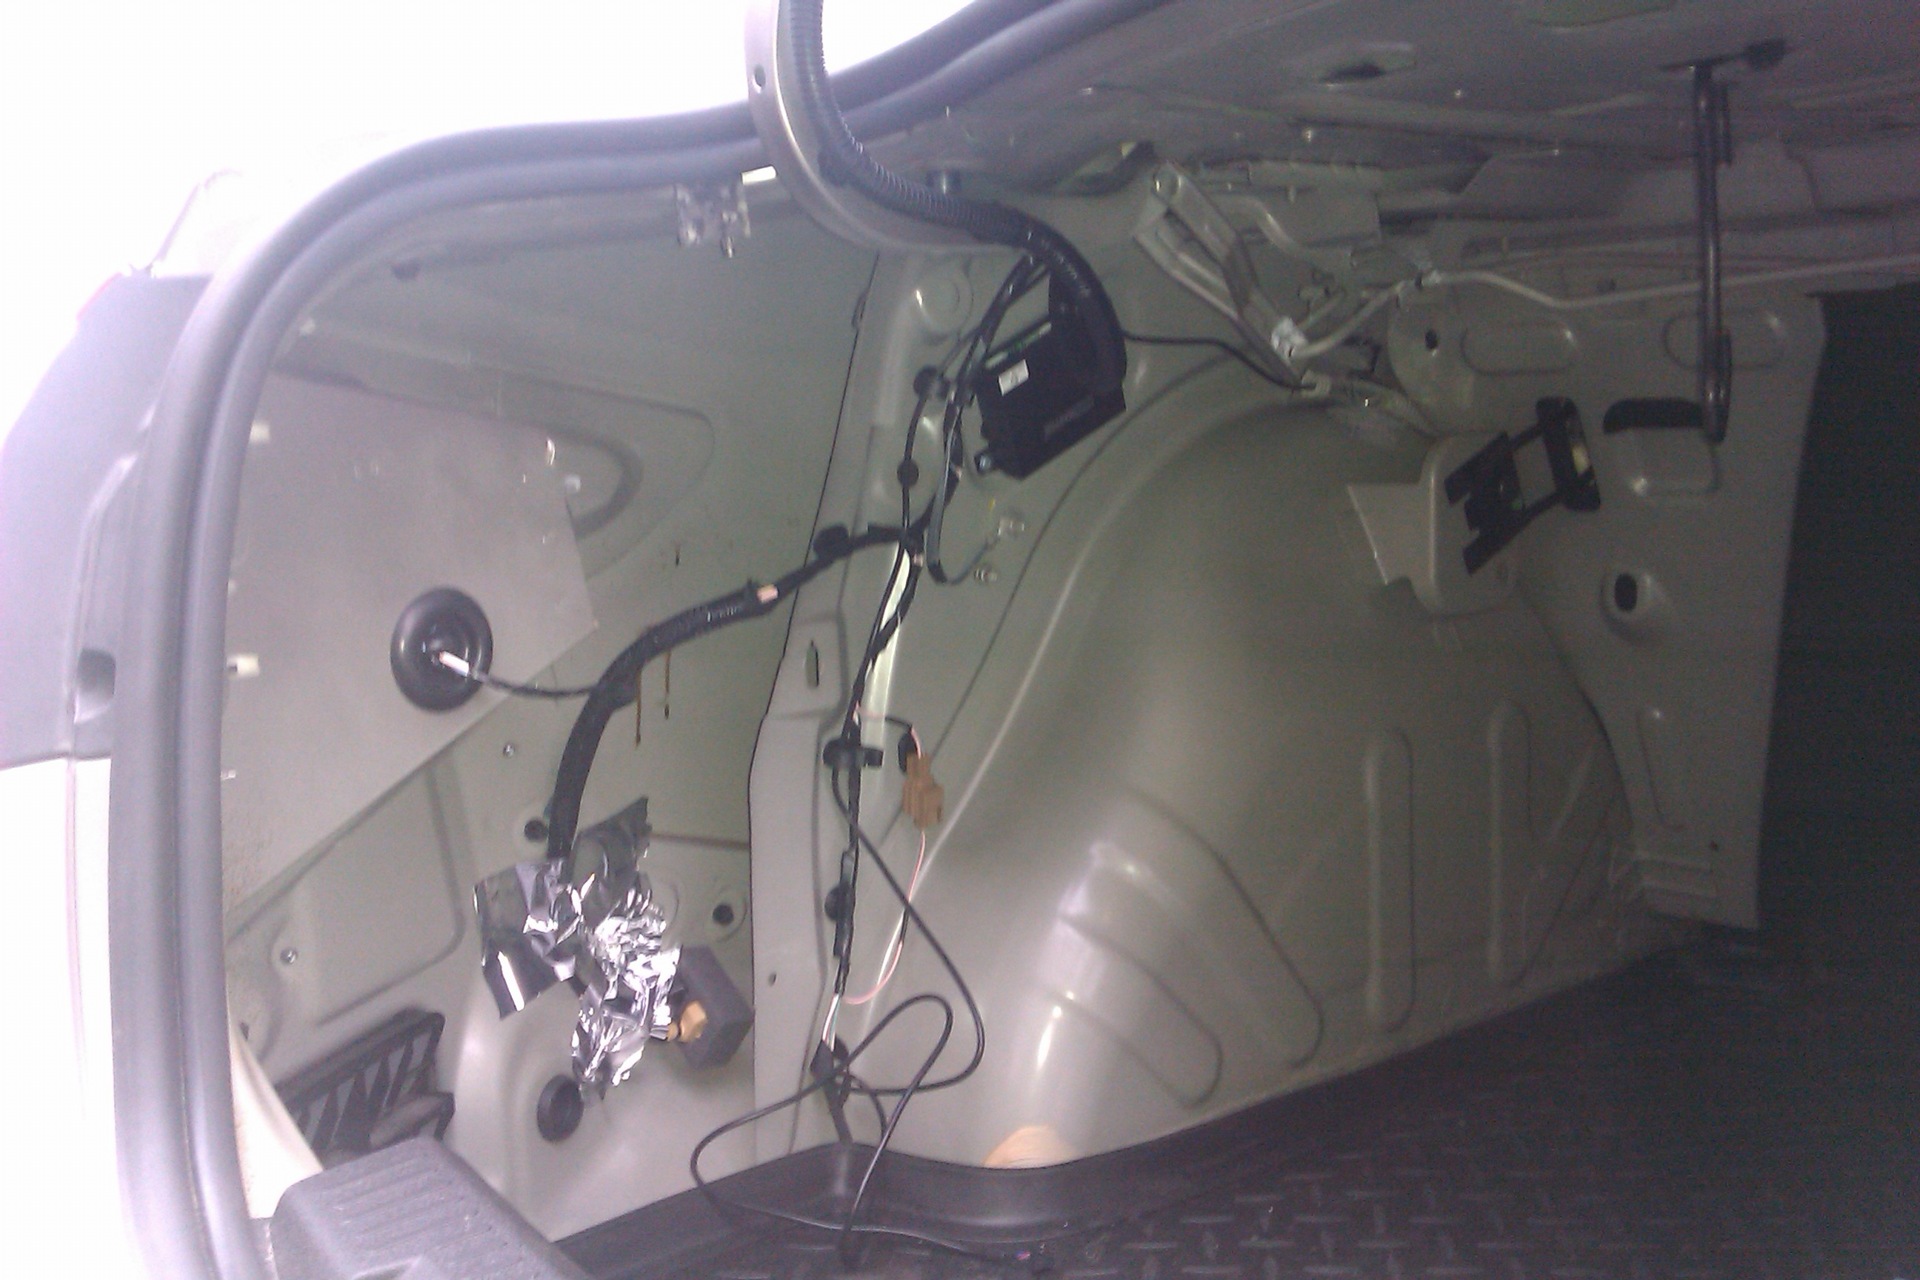
This block is very steadily fixed using a special adhesive with two adhesive parties.
It is very important to observe the polarity.
For example, plus is connected to the lamp warning the reverse of the machine. A larger number of parking sensors are connected according to standard schemes, although there are exceptions consisting in the occurrence of the need to use diodes or an electrical circuit.
However, every time you need to carefully examine the scheme of your own model of the parking machine.
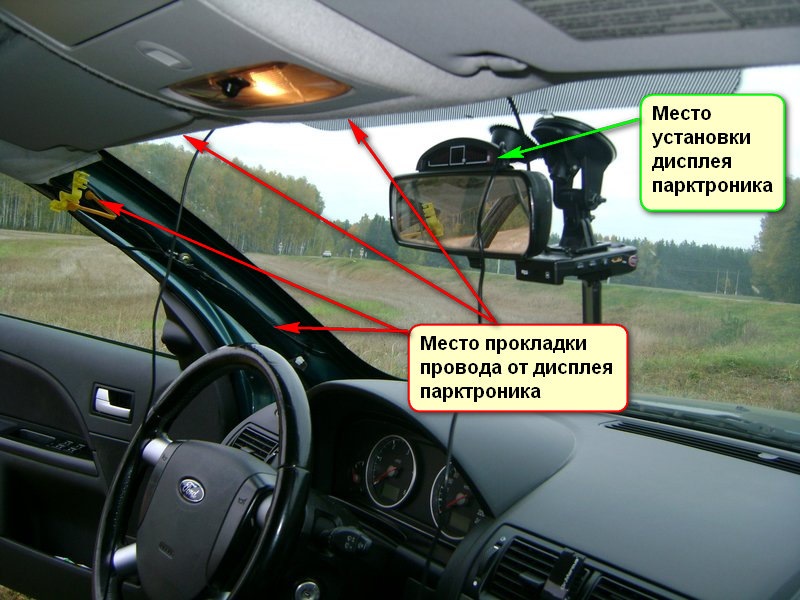
At the last stage of installation inside the car interior, the screen is located (on the left side of the control panel) and the installed device is checked. The check should be carried out in different conditions and with a different kind of obstacles.
Related Materials
- Stove 2110, bad warm stove 2110, VAZ 2110 heating system, repairing the heating system VAZ 2110 with their own hands
- VAZ 2114 stove blows with cold air, stove 2114, bad warm stove VAZ 2114, device and repair of heating VAZ 2114 do-it-yourself, removing the stove VAZ 2114
- How to subdominize the car. How to put a jack. Types of jacks for cars.
- VAZ 2109 Fuse Block, VAZ 2109 Fuse Block Carburetor, VAZ 2109 Fuse Block Injector, Old VAZ 2109 Fuse Block, VAZ 2109 Fuse Block, VAZ Fuse Block 2109
- Car exhaust gas catalyst, faulty catalyst, pluses and cons of the catalyst, how to change the catalyst on the planeencitel
- Stove blowing cold air VAZ 2114, badly blowing the stove VAZ 2114, why badly blowing the stove VAZ 2114
- How to find out the owner of the car by the number of his car, check the car by the number of the traffic police machine, check the car by the state number of the car for free
- How to choose Used tires, Useful Tips
- Winter car road, pressure in passenger car tires in winter, good battery for the car in winter, whether to warm the car in winter
- In winter, the car is poorly started. How to make a car in winter, do you need to warm up the car in winter, useful tips
- Economy fuel consumption machines, the most economical car consumption
- Tires brands for passenger cars, labeling of car tire labeling, residual passenger car tire protector, how to pick a tire on a car brand, car tire tread pattern
- Working transmission operation, mechanical gearbox clutch work, driving with manual gearbox, useful tips
- Rear beam Peugeot 206 sedan, rear beam device Peugeot 206. Rear beam Peugeot 206 Malfunction, repair of the rear beam Peugeot 206
- Diesel fuel in winter, additive for diesel fuel in winter, how to choose the best diesel fuel
- Diesel winter does not start. How to start diesel in winter, heating diesel in winter.
- Tire marking decoding for passenger cars, labeling wheels, how to choose the right tires on the disks
- Diesel engine in winter, launch of the diesel engine in winter, what oil to fill in a diesel engine in winter, useful tips
- LED backlight of the car, the backlight of the bottom of the car, the backlight of the legs in the car, the backlight in the door of the car, the backlight of the car is fine
- Recovered tires, bus tire, restored tire protector, can I use them
- Choose winter tires, which is a winter tires, which pressure in winter tires should be marked with winter tires, how to choose the right winter tires, the best winter tires 2019
- Cameless car tires, a set for repair of tubeless tires, repair of the cannon-free tire do it yourself
- Russian tires, Russian tires Winter, Russian All-season tires, Voronezh AMTEL tires, Tires "Matador Omsk Tire", Kama-tires are world-class bus
- How to open a car without a key. Lost the key from the car what to do, the key from the car inside the car
- Silent tires, quiet winter tires, quiet studded bus, which tires to choose, overview tires
- Tires and safety, safety of the bus, why it is necessary to constantly monitor car tires
- Rust converter which is better for cars, rust converters to choose how to use rust transducer, professionals
- Polishing the body of the car do it yourself, how to choose a polishing paste, useful tips
- Engine durability, engine life, how to extend engine life
- Knock in the car. Knock when moving the car. What can knock in the car. How to determine the cause of the knock.
- ABS car, what is ABS car, ABS system malfunction, ABS diagnostics
- Overtaking a car when you can start overtaking a car, rules of traffic rules
- Fuel pump VAZ 2110, VAZ 2110 gas station scheme, VAZ 2110 fuel pump device, VAZ 2110 gas station repair,
- Automotive antennas for radio, automotive antenna device, car antenna do it yourself
- Front suspension Kalina, device front suspension Kalina, knock in front suspension Kalina, repair of front suspension Kalina
- Shock absorber Oil, best oil shock absorbers, pumping oil shock absorbers, how to properly pump oil shock absorber
- Clutch malfunctions, touches clutch, causes a clutch malfunction, how to eliminate
- Viscounts of the fan, work uniforms of the fan, malfunction of the ventilator fan, repair of the ventilator fan
- Corrosion of car thresholds, film on car thresholds, how to stick a film on the thresholds of the car
- Gas or oil shock absorbers, which shock absorbers to choose, the top 10 of the best manufacturers of shock absorbers

Comments